How Can You Build a Silent Server Cabinet for Your HomeLab?
Reduce server noise in your homelab with a custom soundproof cabinet. Learn how Technodabbler built a quiet, efficient setup using enterprise hardware at home.

When building a homelab, noise is a common concern. Enterprise-level servers were never designed to be quiet and most people will object to the jet engine sound of the server booting up. In a family setting, if you do not have a dedicated and isolated space for your lab, noise will quickly limit what equipment you can have.
For those with a large amount of disposal income or luck, you can buy a soundproof server rack that will absorb most of the noise generated by the homelab. Unfortunately, these soundproof server rack cost several thousands of dollars, one the most popular being the APC Netshelter CX 24U costing a mere 3'775 USD.
For those resourceful enough, you can also try to build it. I was lucky to work with my father on this project. His years of wood working experience were invaluable to the creation of this project.
The Science
The first step in building a soundproof rack is understanding the science behind sound. Looking around the Internet, I found I wasn't the first to attempt such a a project.
 Sharad Dominic
 Written by


Here is what I learned from them :
The rack needs to be box that contains sound. Noise generated by computer equipment radiates outwards and hits the wall of the box. Half of those sound waves will try to go through the wall, generating noise outside. The other half of the sound waves will bounce off the wall until it hits another obstacle. The cycle then repeats itself with half of the sound waves crossing through the obstacle and the other half bouncing off. To successfully block sound, both the bouncing and traversing sound must be dealt with.
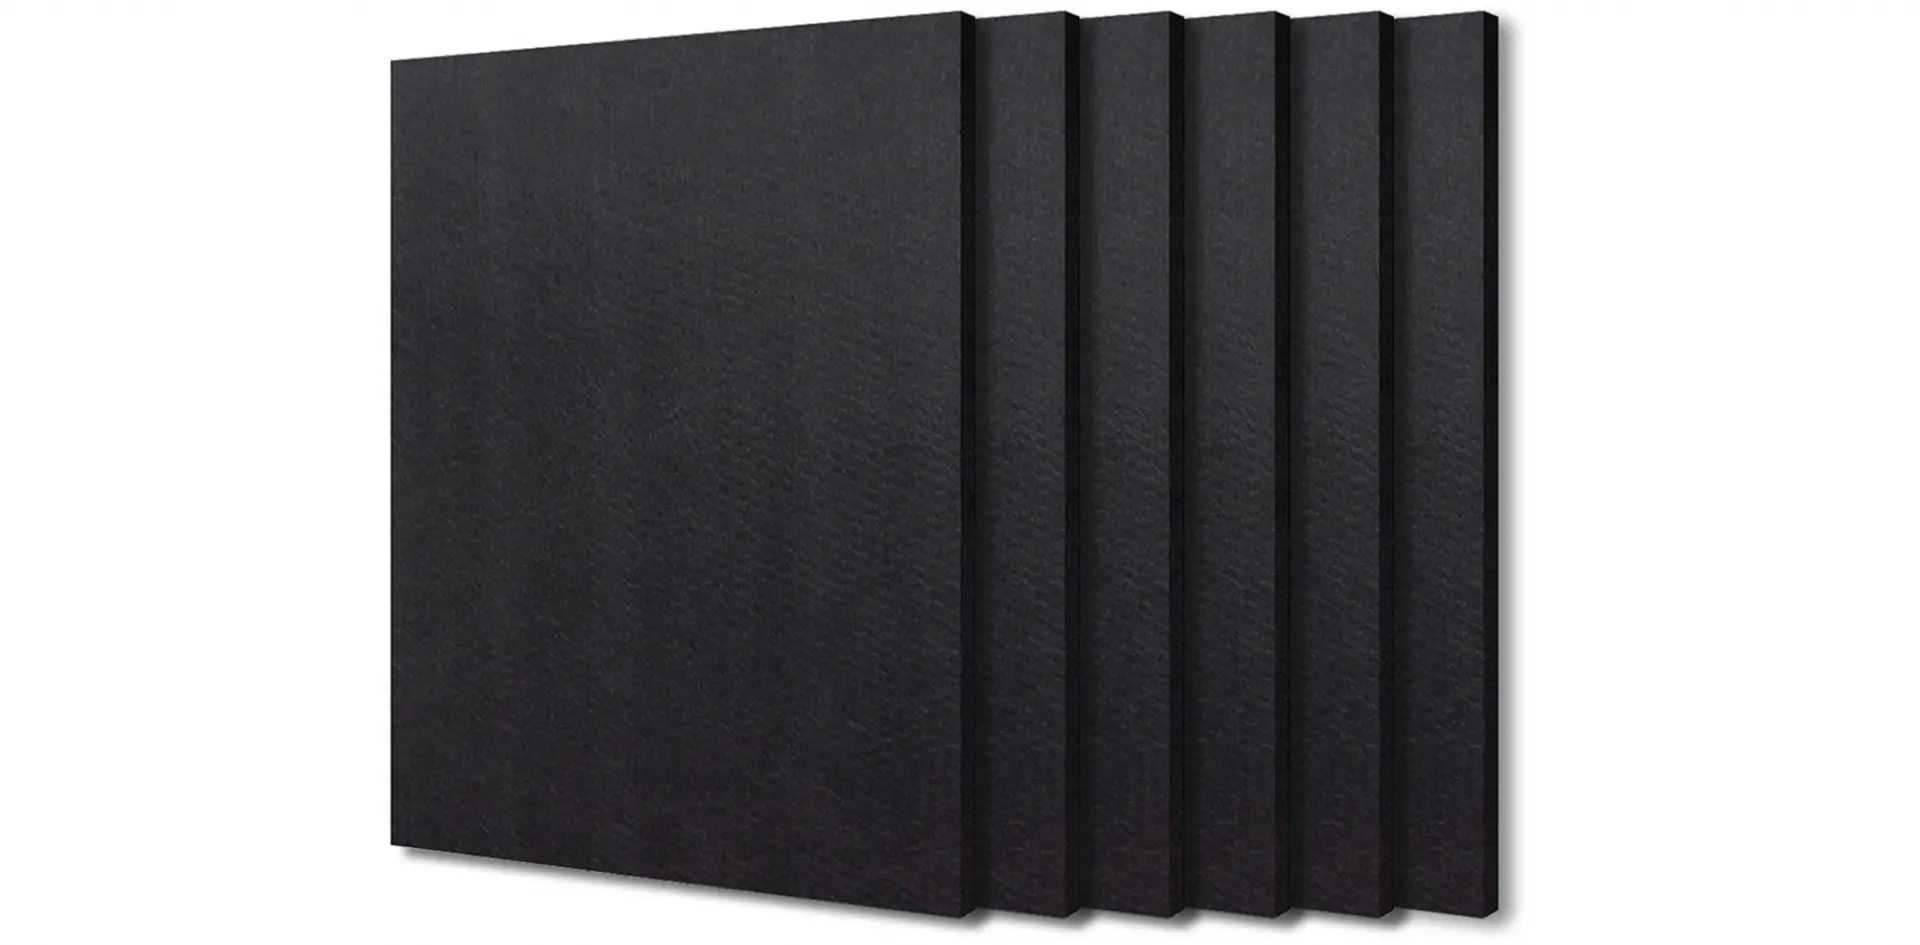
Sound reflection is the most easy to deal with: you simply need to reduce the amount of flat surface you have in the box. This is typically achieved using foam in some kind of egg or pyramid shape. Exceptionally, some flat materials, depending on their composition will also prevent reflection. In our case, we used a Polyester Panel from BXI.
Sound absorption, or deadening, requires the use of an incredibly dense material to block the sound wave. It is very common to use loose panels of mass loaded vinyl (mlv) to soundproof recording studios. Unfortunately, because of its weight, this kind of material is very difficult to obtain in Canada at a reasonable price. Instead, we used a relatively new absorbing material known as green glue. When tightly squeeze between two wooden or gypse panel, green glue will convert sound wave into micro amounts of heat, which is then dissipated into the panels. This is a very common soundproofing solution in homes.

Special thanks go out to BXI for helping me figure out a lot of the science behind sound proofing.
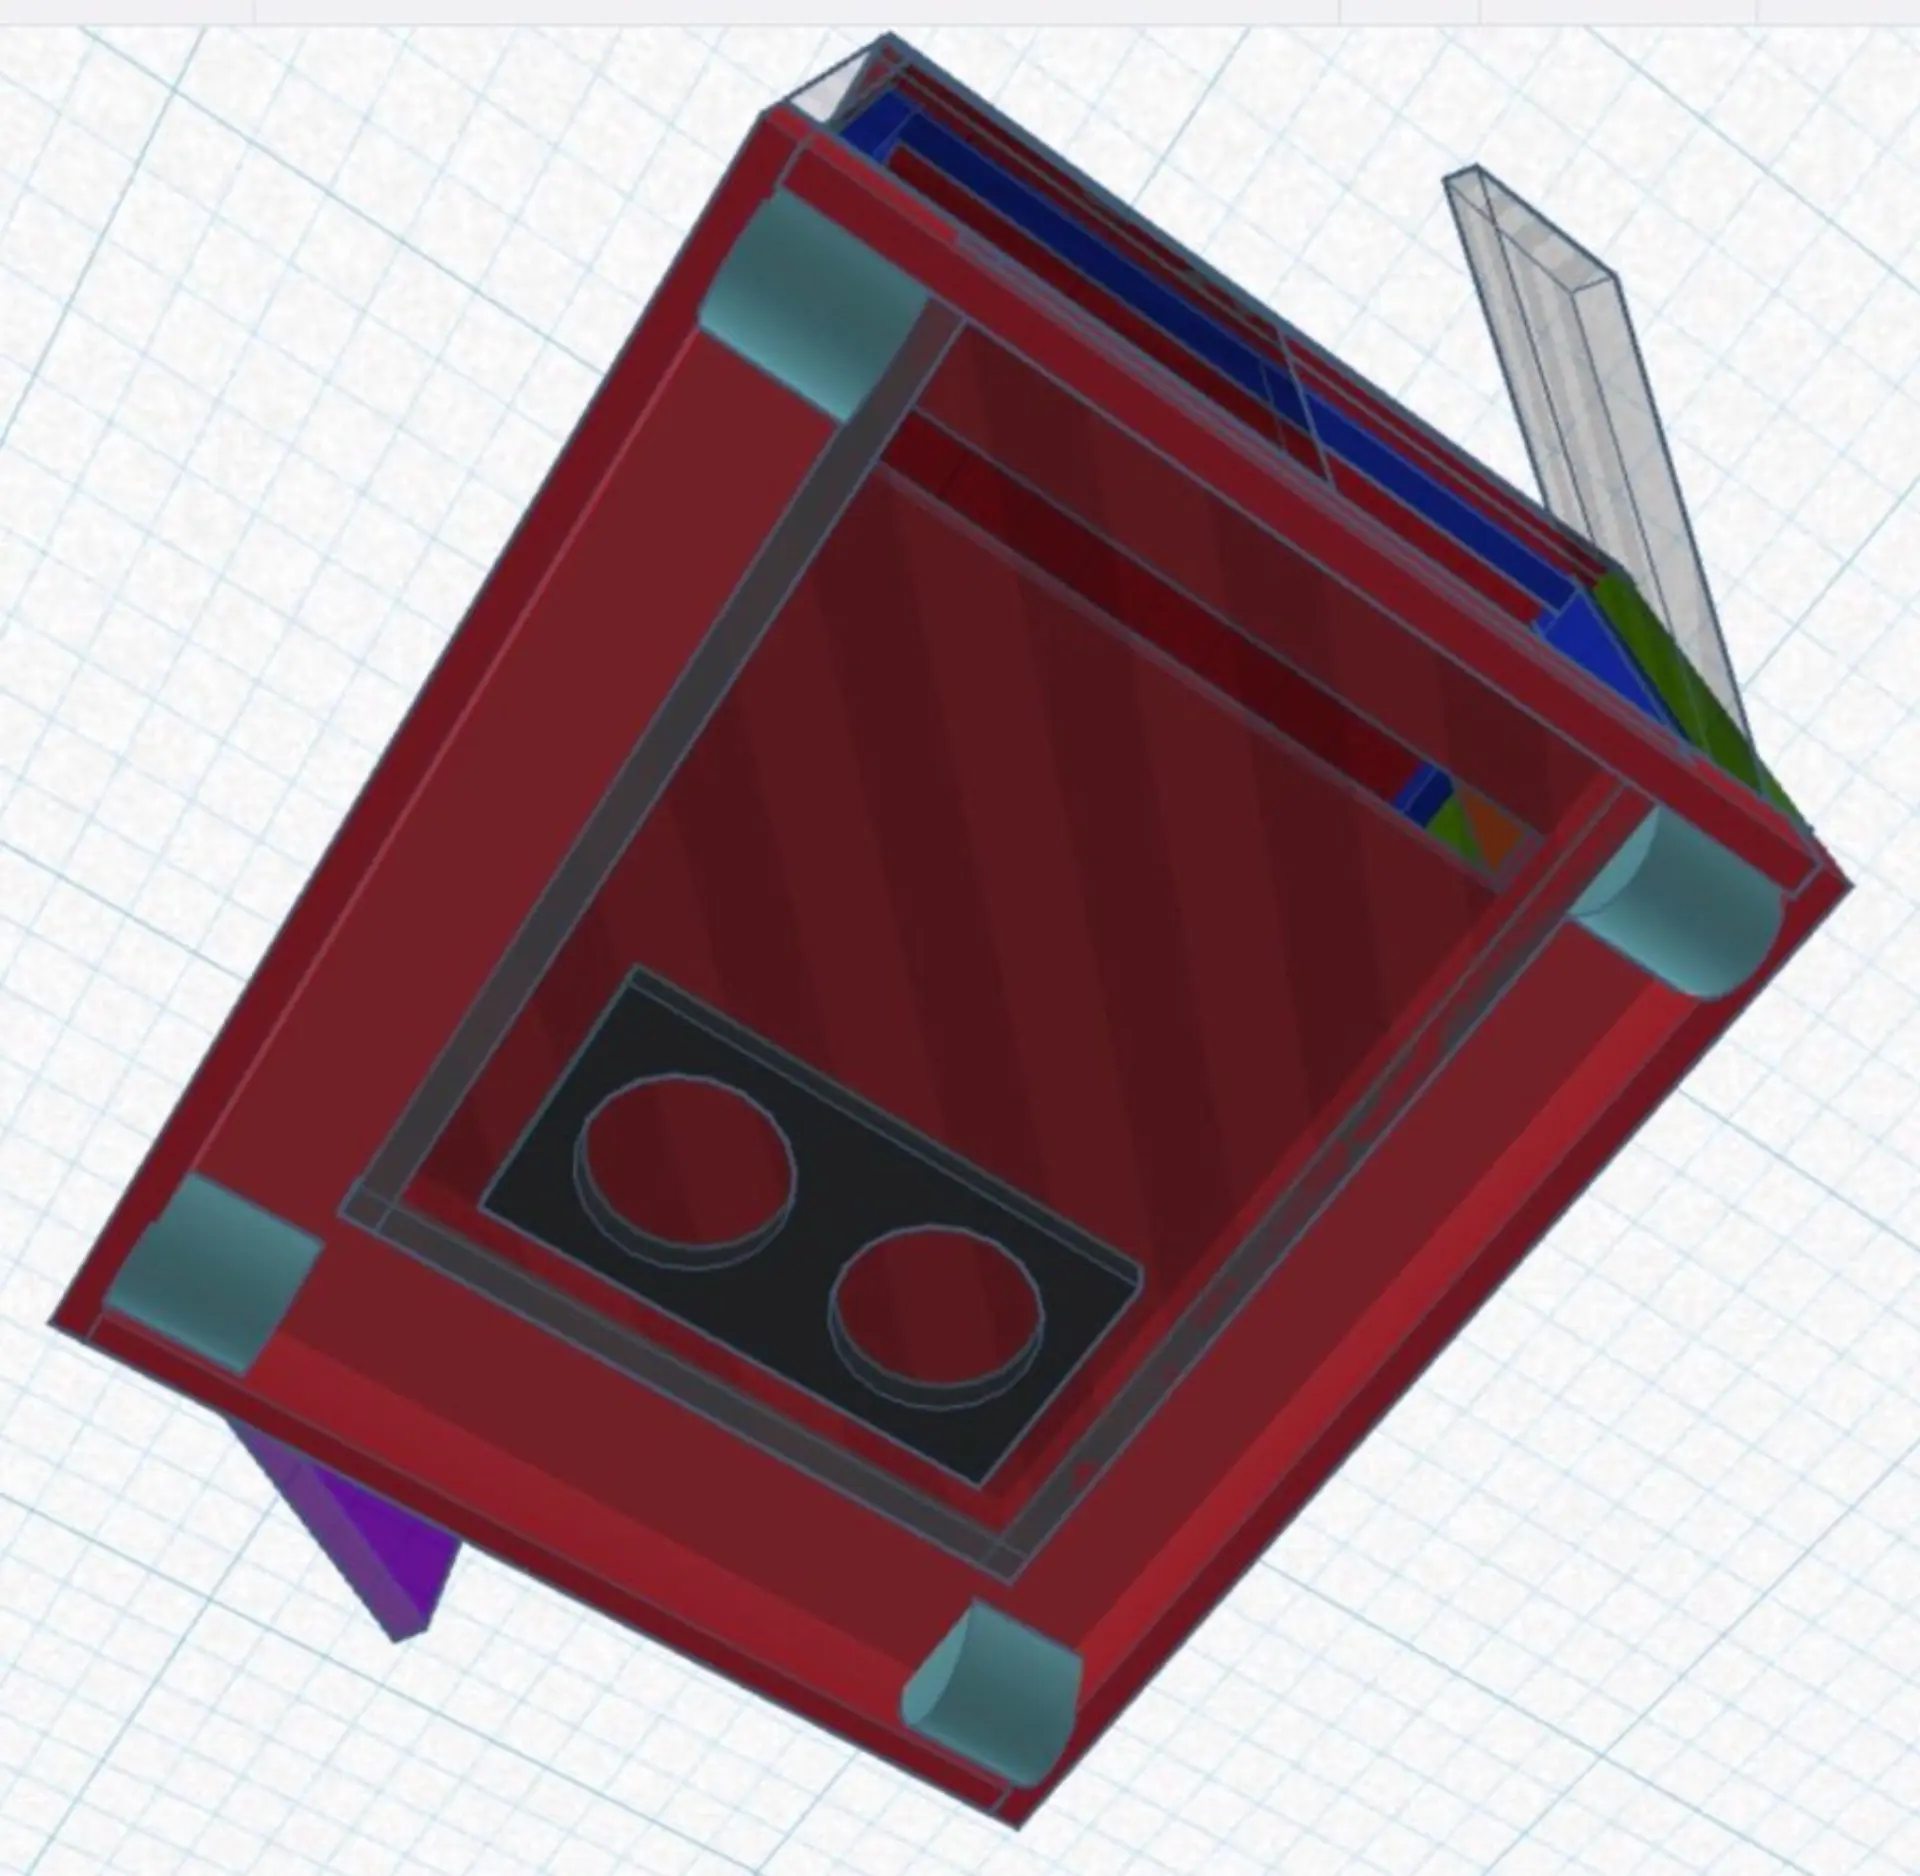
The Plans
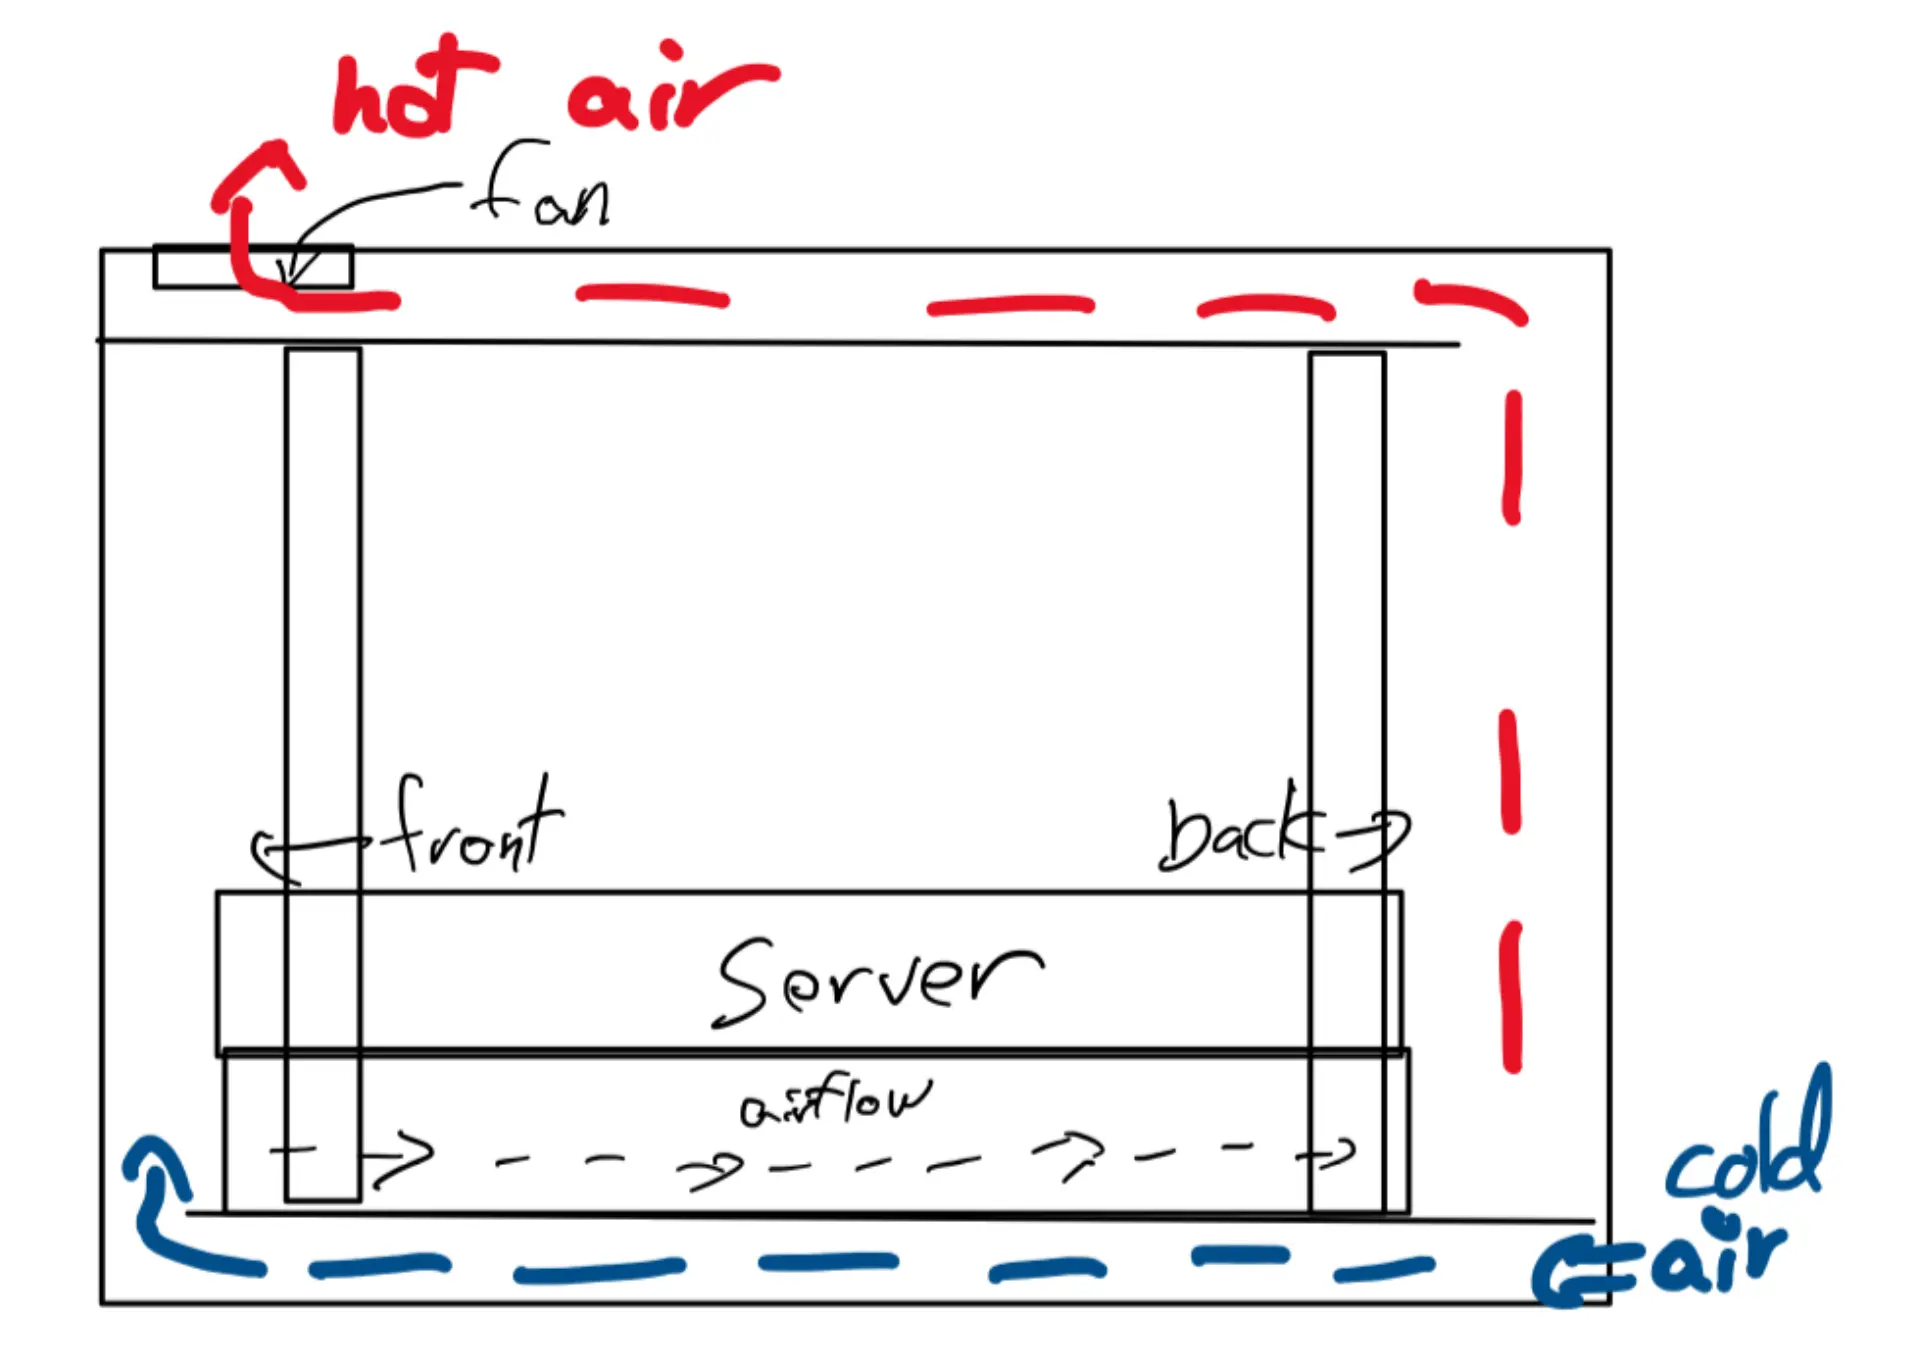
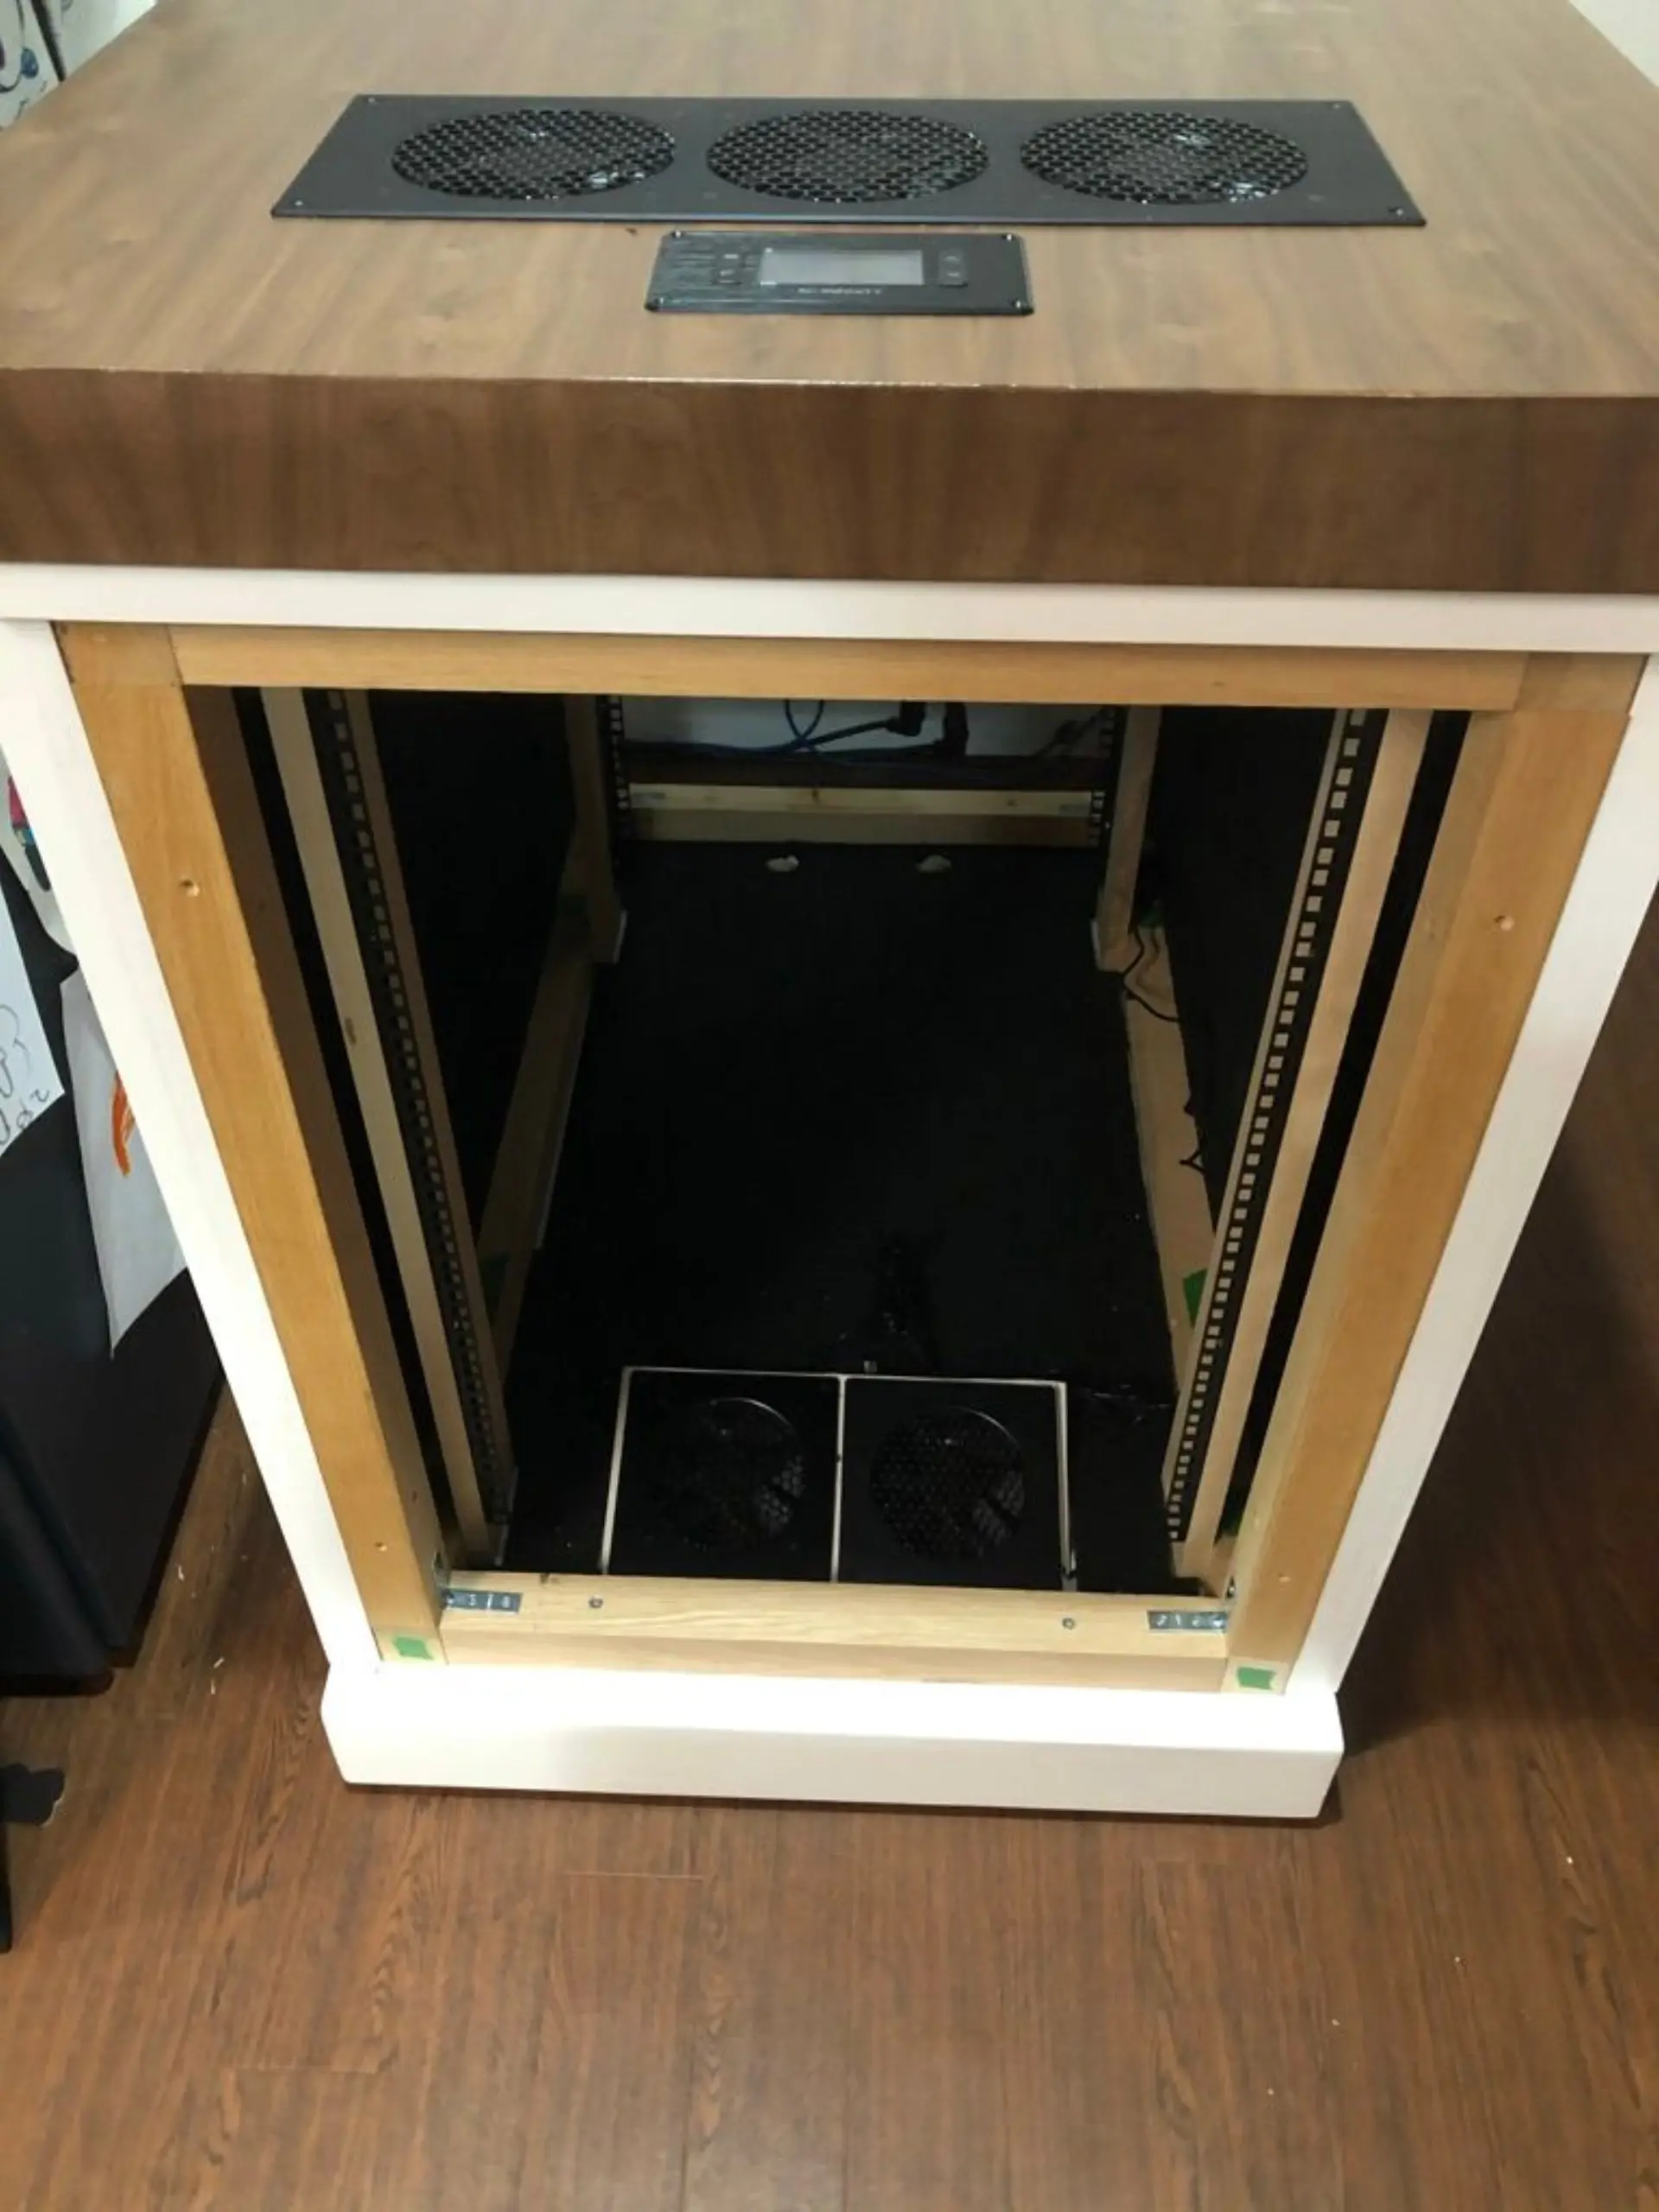
With the science worked out, the next step of the project is to draw some plans to determine what needs to be built. One important concern ignored until now is the dissipation of heat. Given that we will be building an almost sealed box, we need a way to ingest cold air and output hot air. Cold air is gathered from the base of the rack and pushed through the server. The air then heats up and then rises. We catch this hot air and after bouncing it a bit to reduce noise, output it from the top of the case.
Next, we need a structure to house the servers. We choose 19U as a compromise to host a decent amount of hardware without making cabinet too tall. The depth of the cabinet will greatly depend on the longest equipment stored inside, a Dell R720 and MSL-2024 tape library in our case. The width of a server case is standard, as most homelab equipment is 19" wide. Three-dimensions mockups were drawn using Tinker3D.
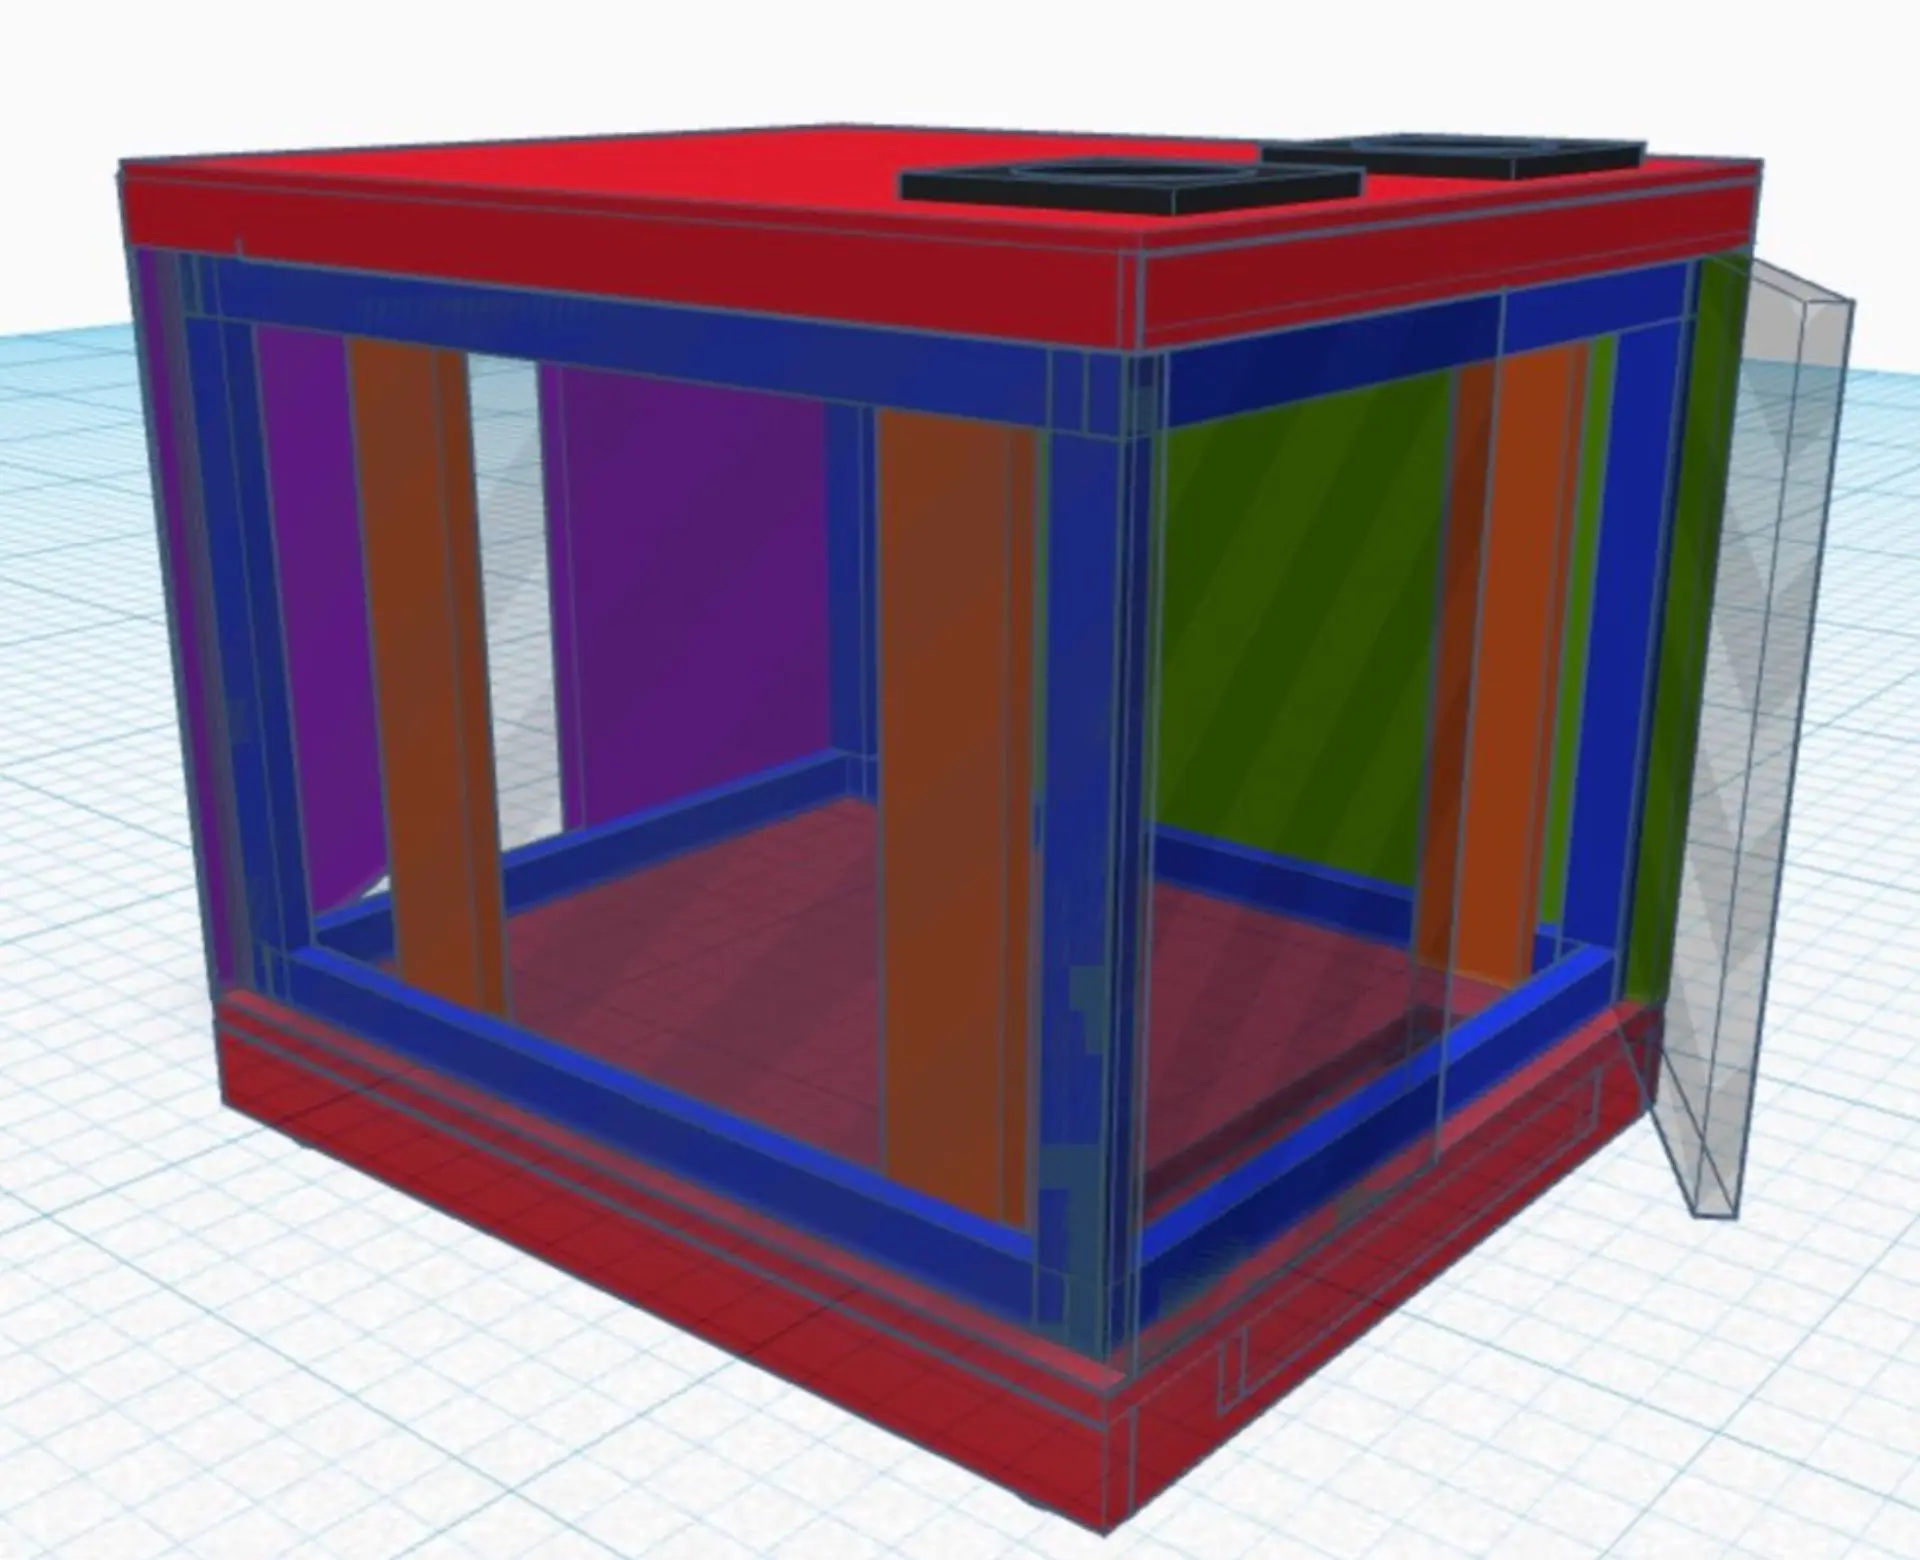
Large caster wheels were chosen so the cabinet would be somewhat mobile. An opening was also added at the back of the lab for power and network cabling.
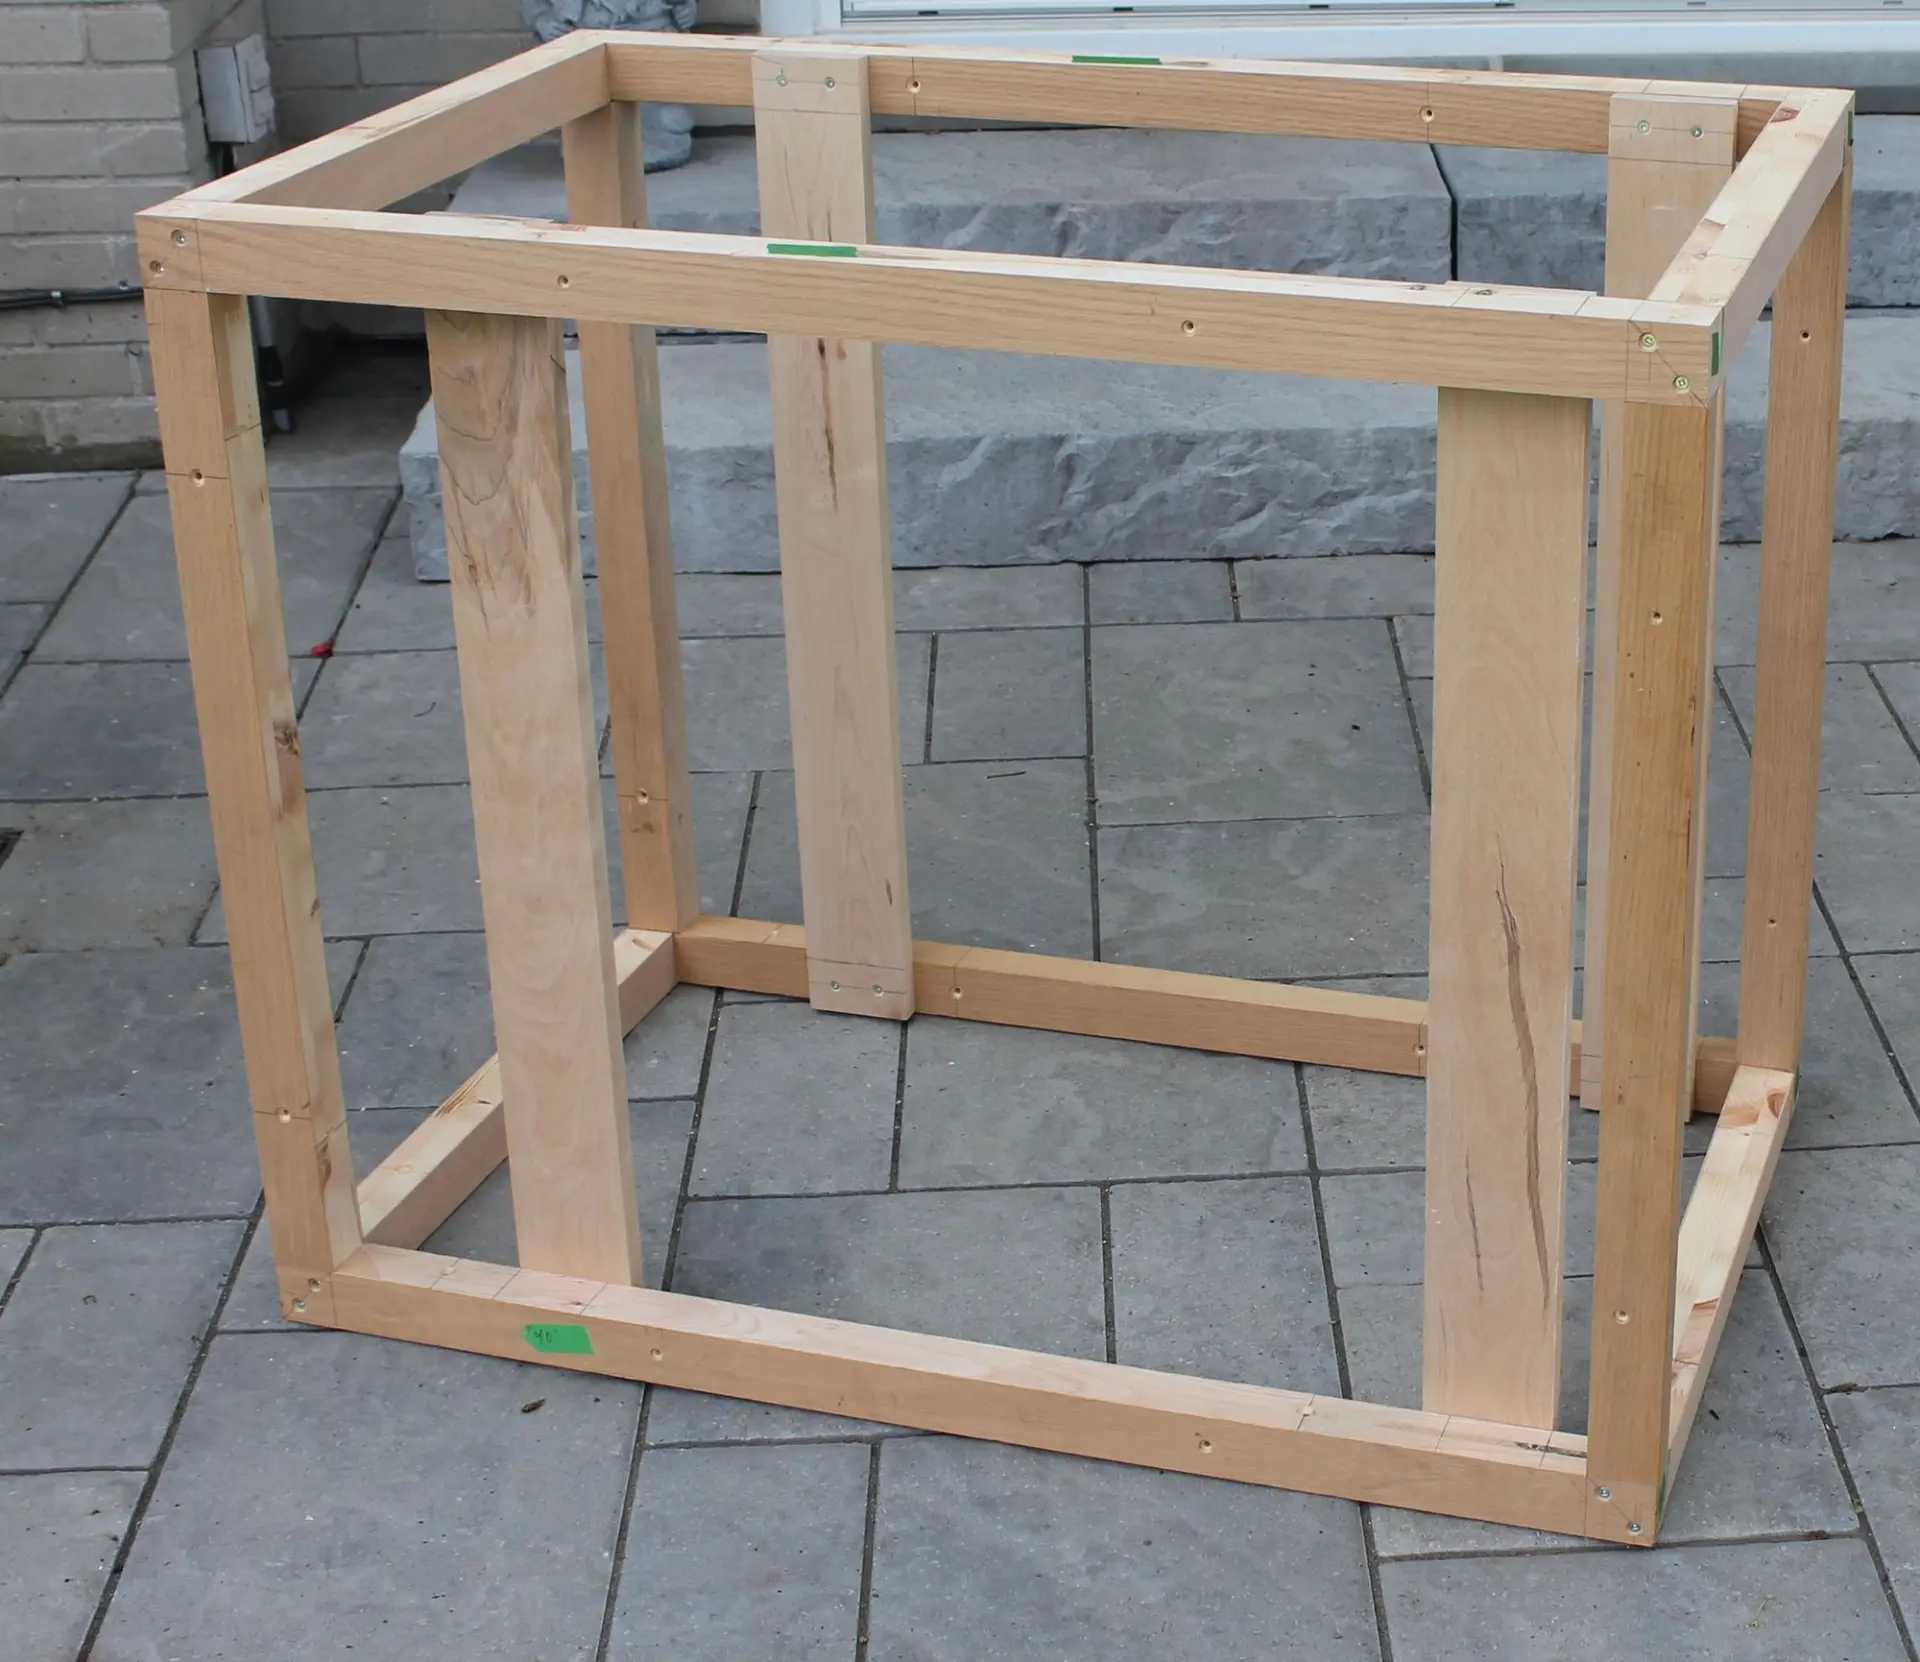
Construction
Constructions started with the structure of the box, using solid wood 2"x2". Given that the pandemic prevented me from working directly with my Dad, work on the material was done by my Dad in his workshop. I was responsible for the on-site assembly.
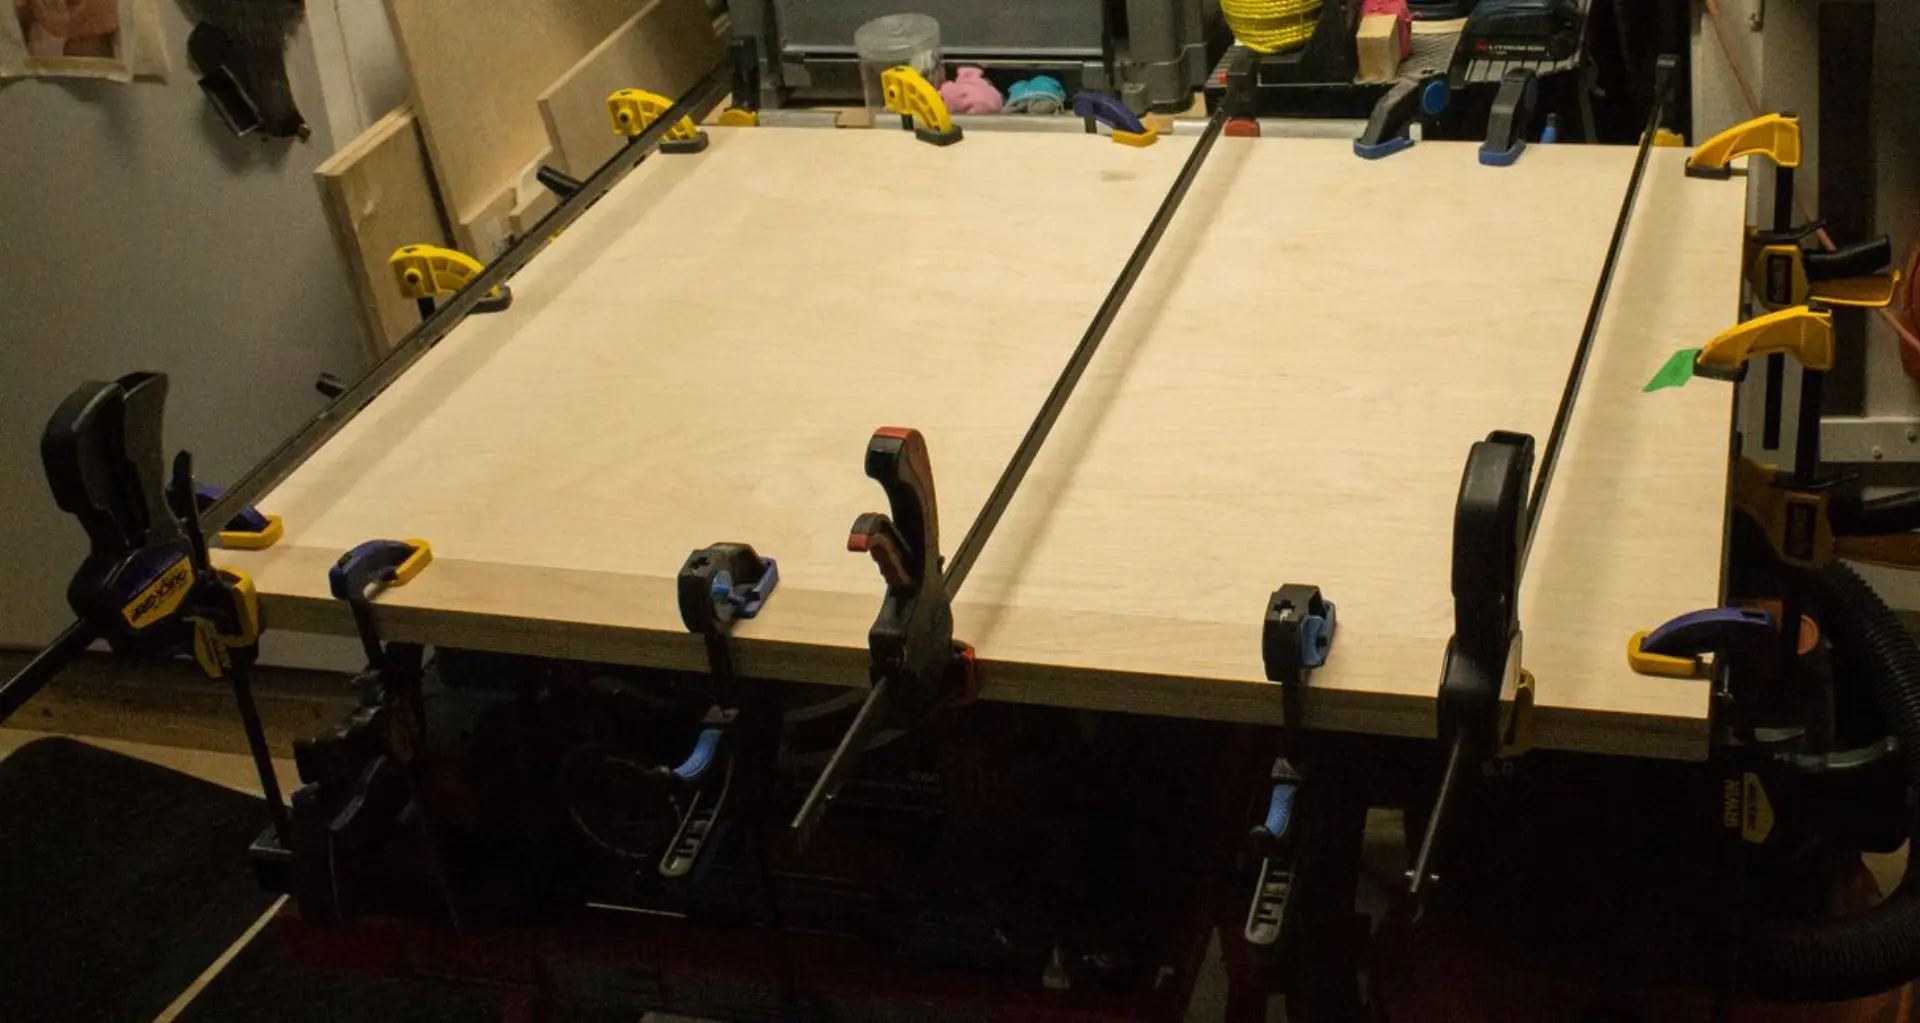
All the exterior walls were built using two boards of Russian Plywood, with sound absorbing green glue in between. Green glue cures well under pressure, so clamps were used to hold the boards thigh. The end result absorbed sound incredibly well, but was very heavy.
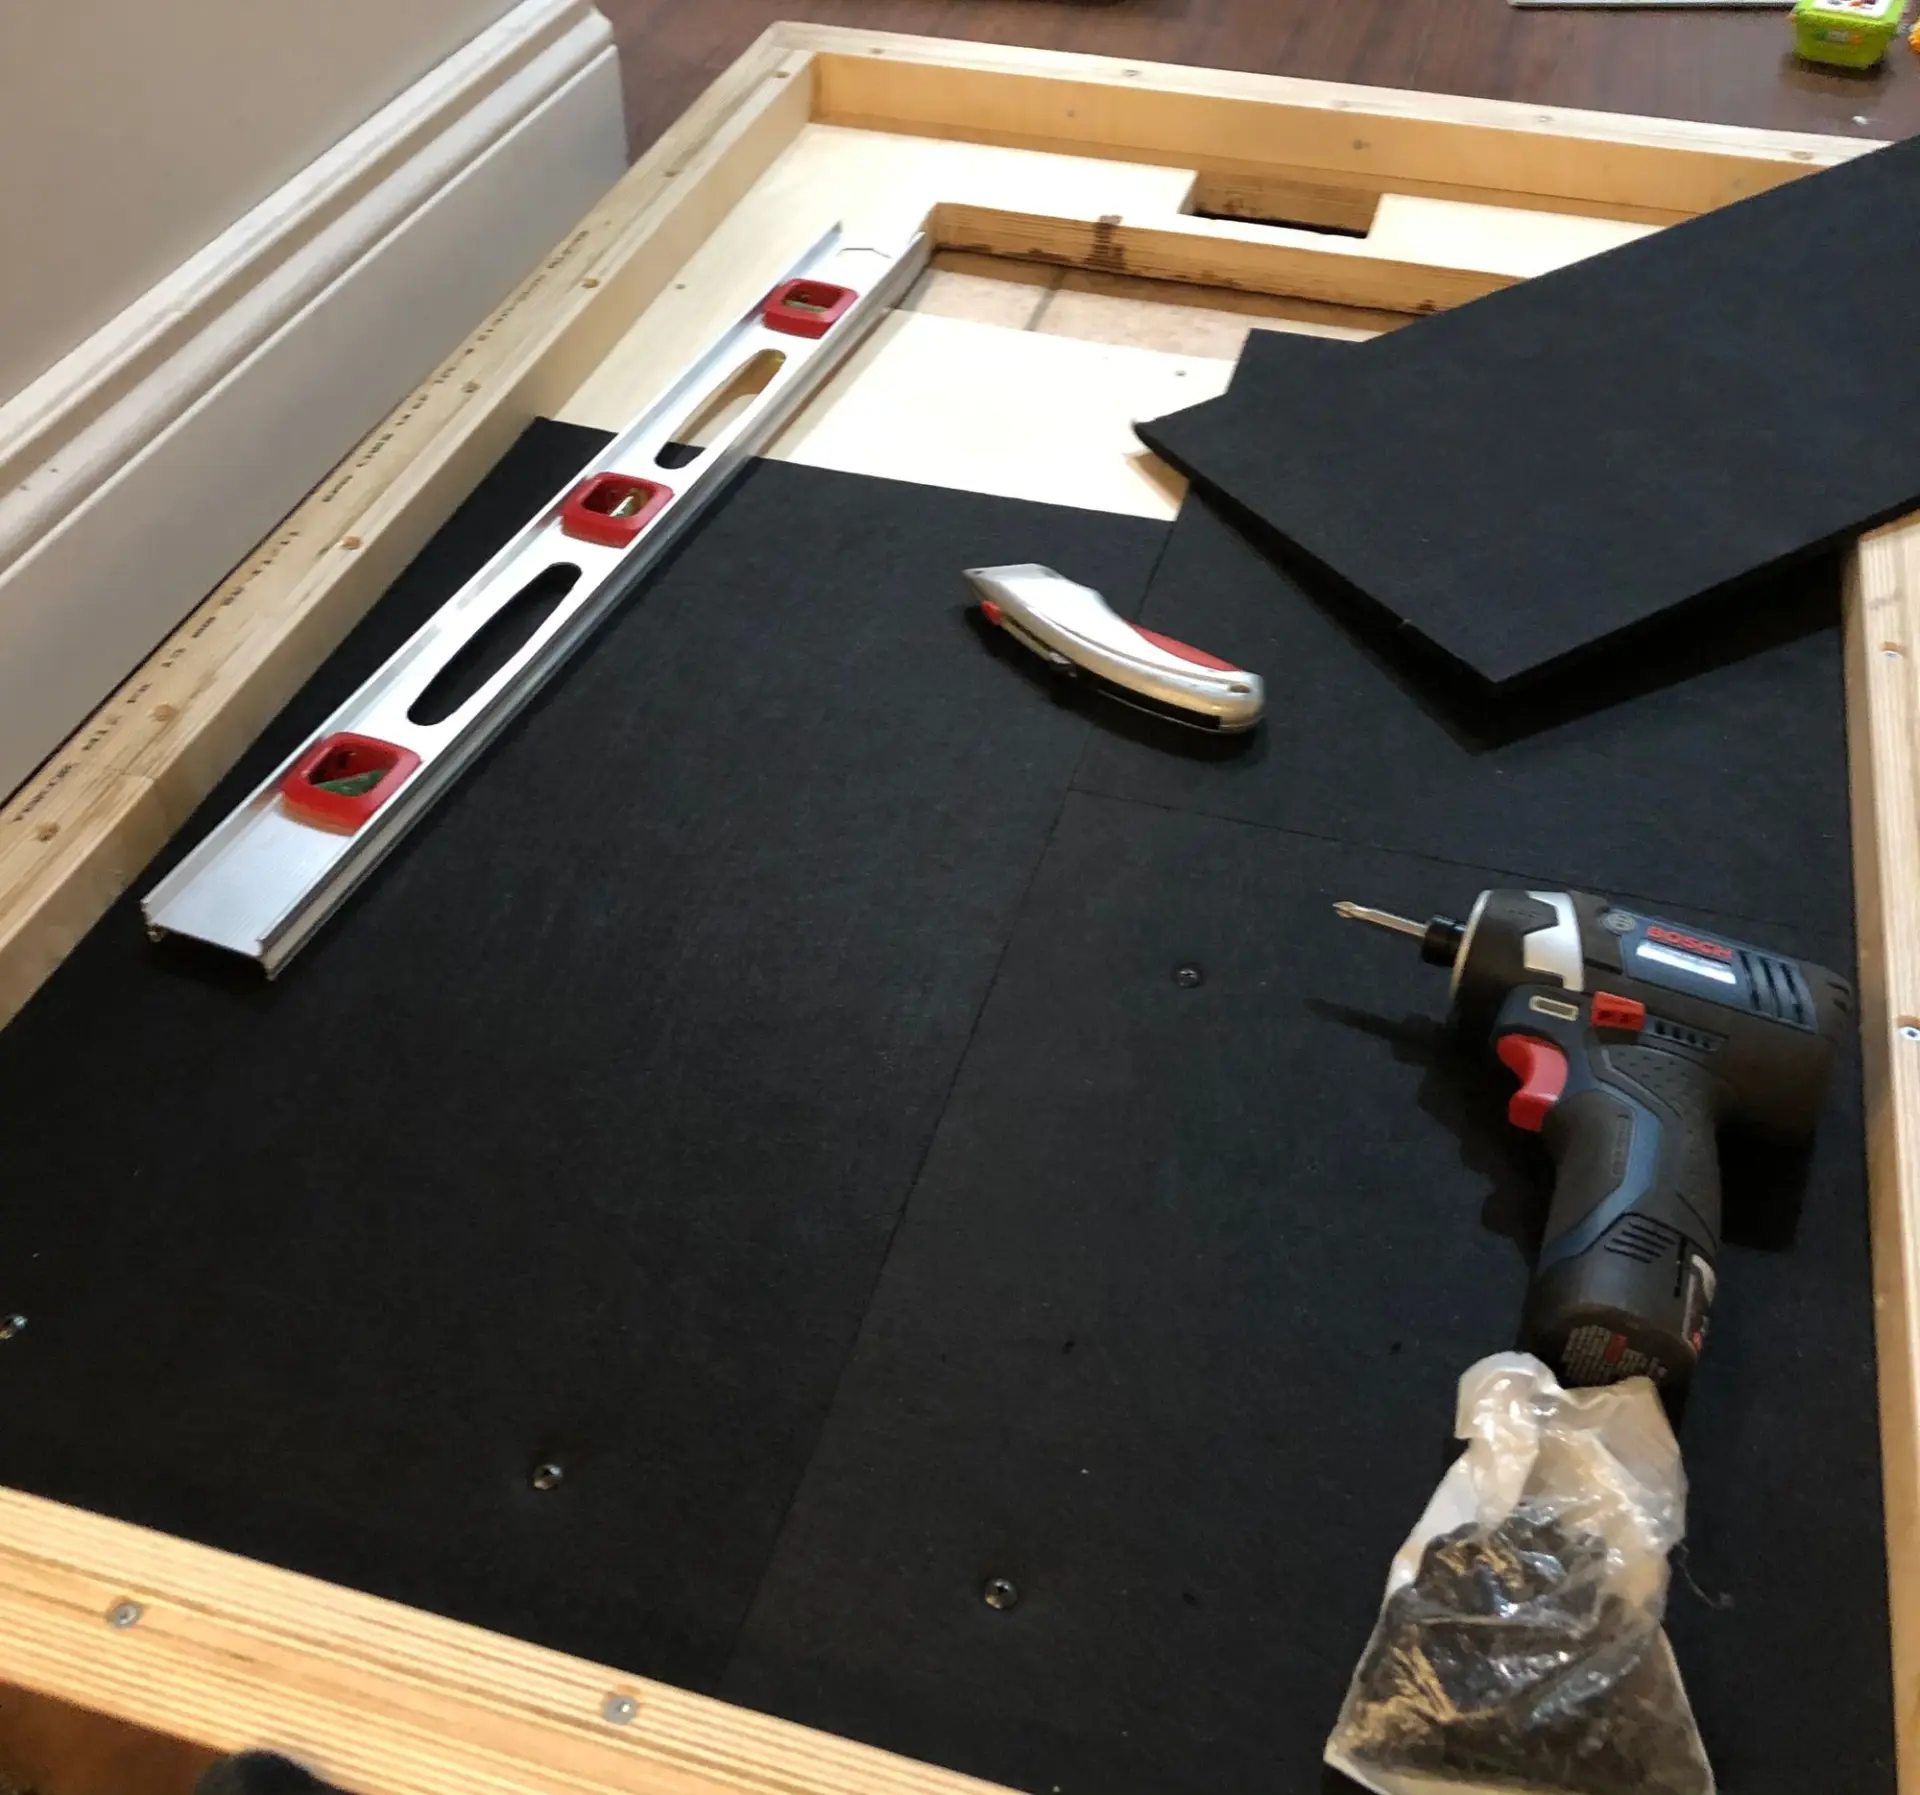
To prevent sound reflexion, all interior walls were covered using BXI panels. These panels can be easily cut using a box cutter and installed using long staples or screws. Although cheaper pyramid foam panels could have been used, the BXI panels have some sound absorption properties, further enhancing the noise blocking capacity of the cabinet.
For the top of the rack, we wanted a butcher block finish. The minimum thickness of the top piece was determined by the airflow needed for the outflow. Unfortunately, using a real butcher block of that thickness would have been prohibitively expensive. You can achieve a similar finish using walnut wood paneling, which is glued to the surface you want to finish, kind of like melamine. This kind of walnut panelling can also be varnished, providing a rich finished look and increased resistance to nicks and chips.
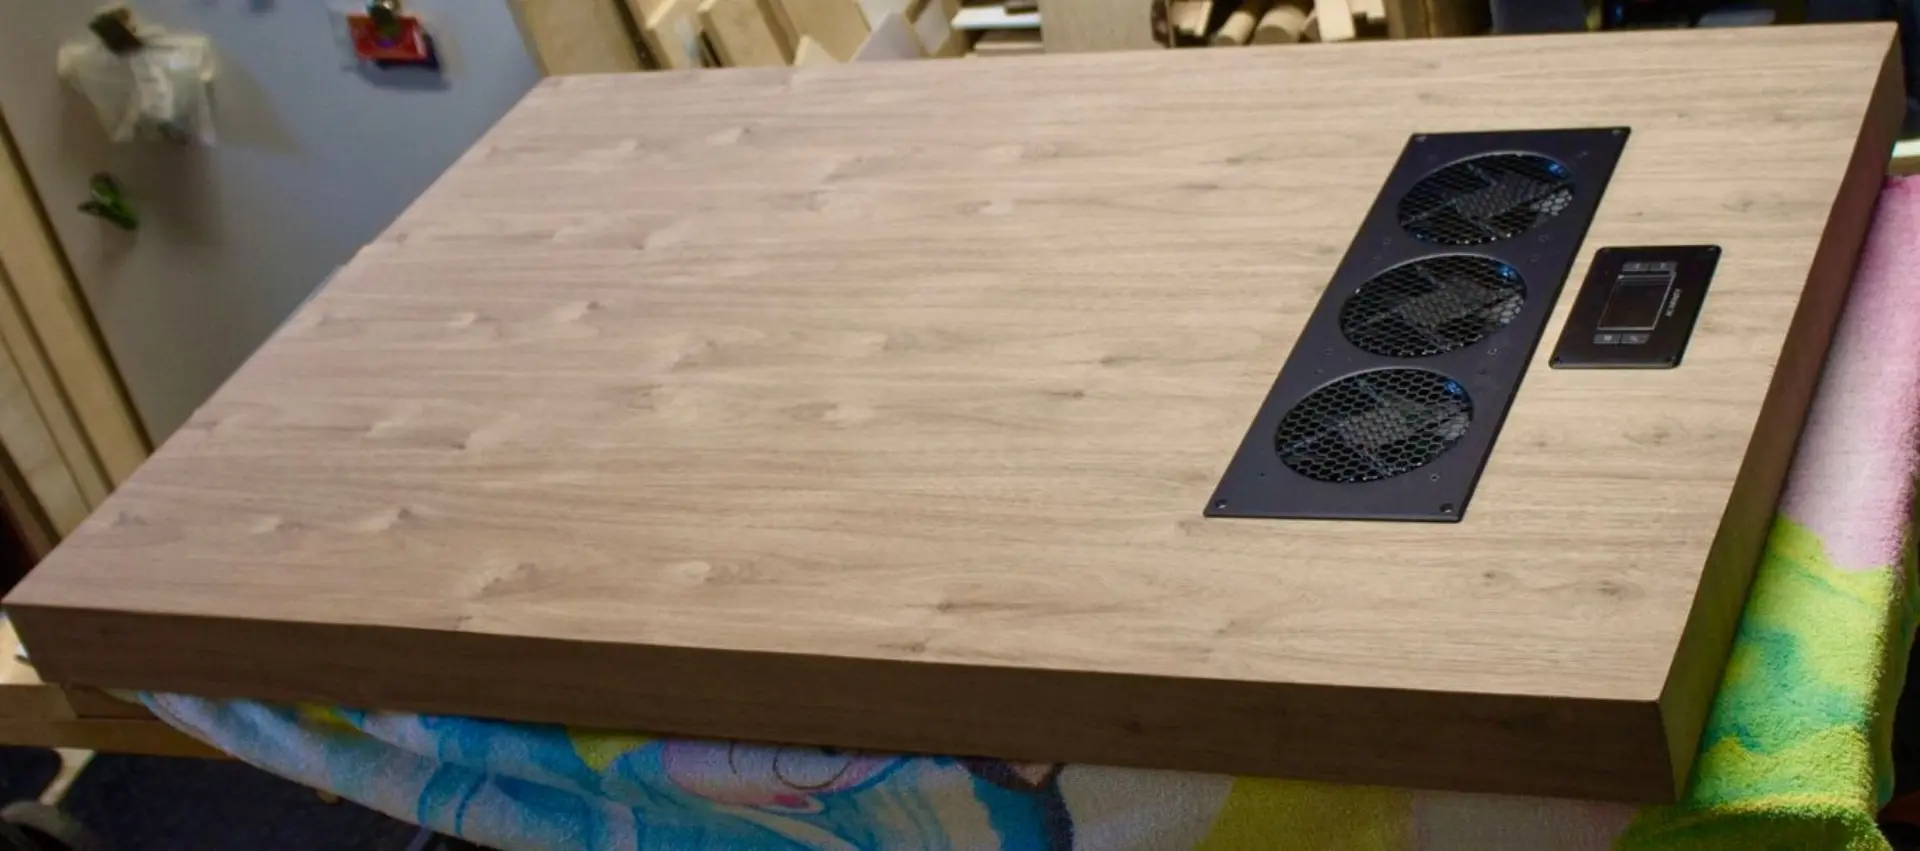
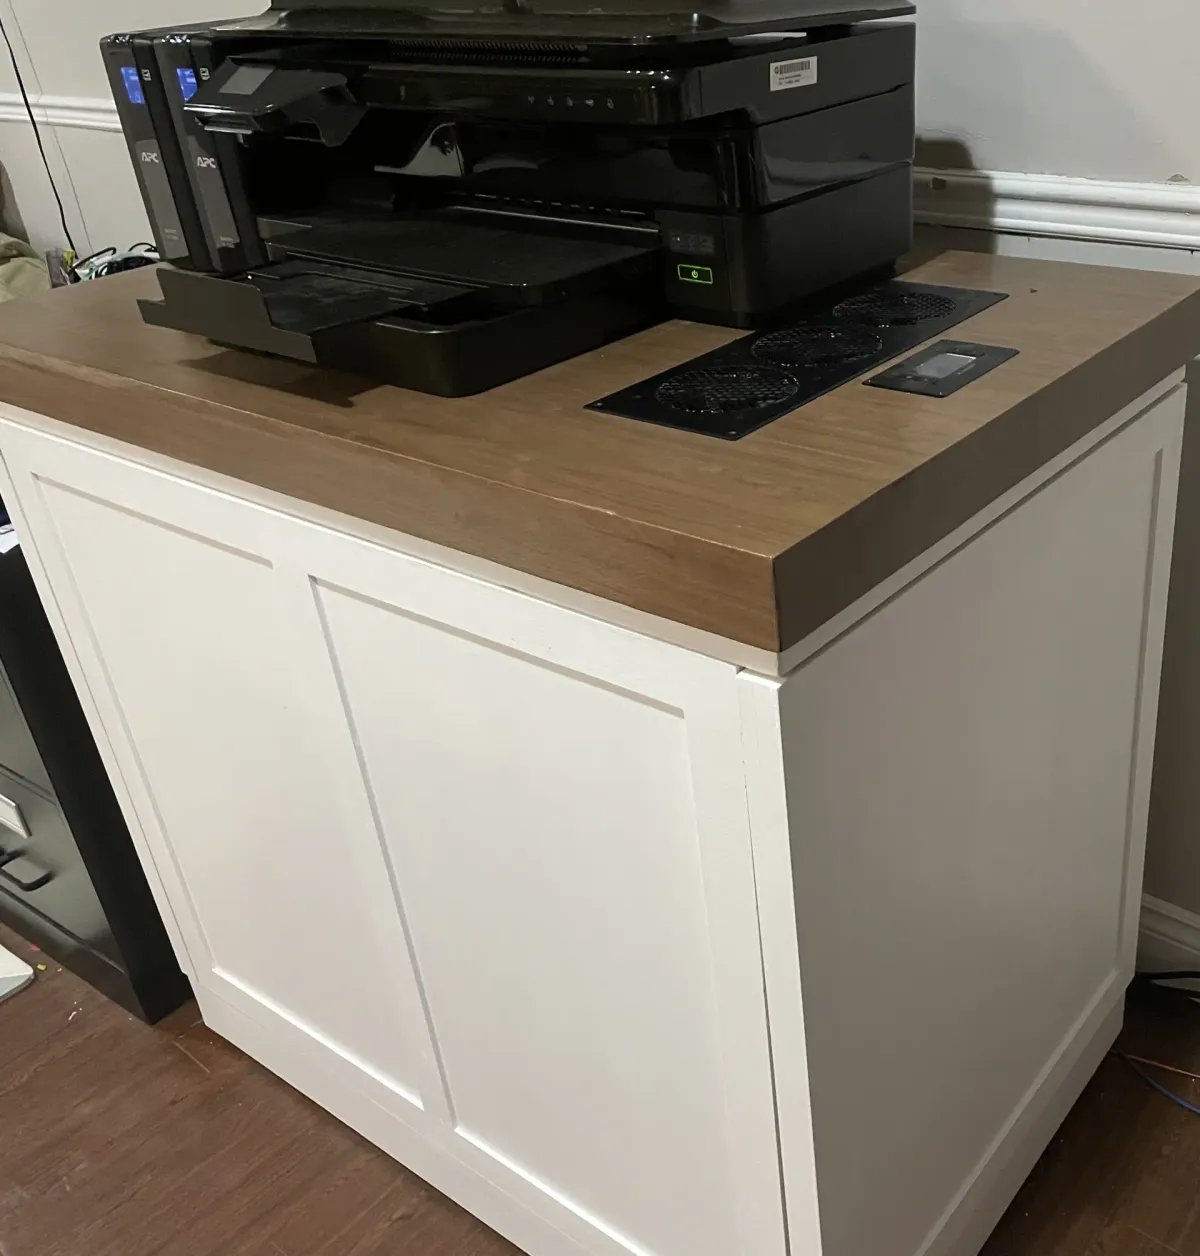
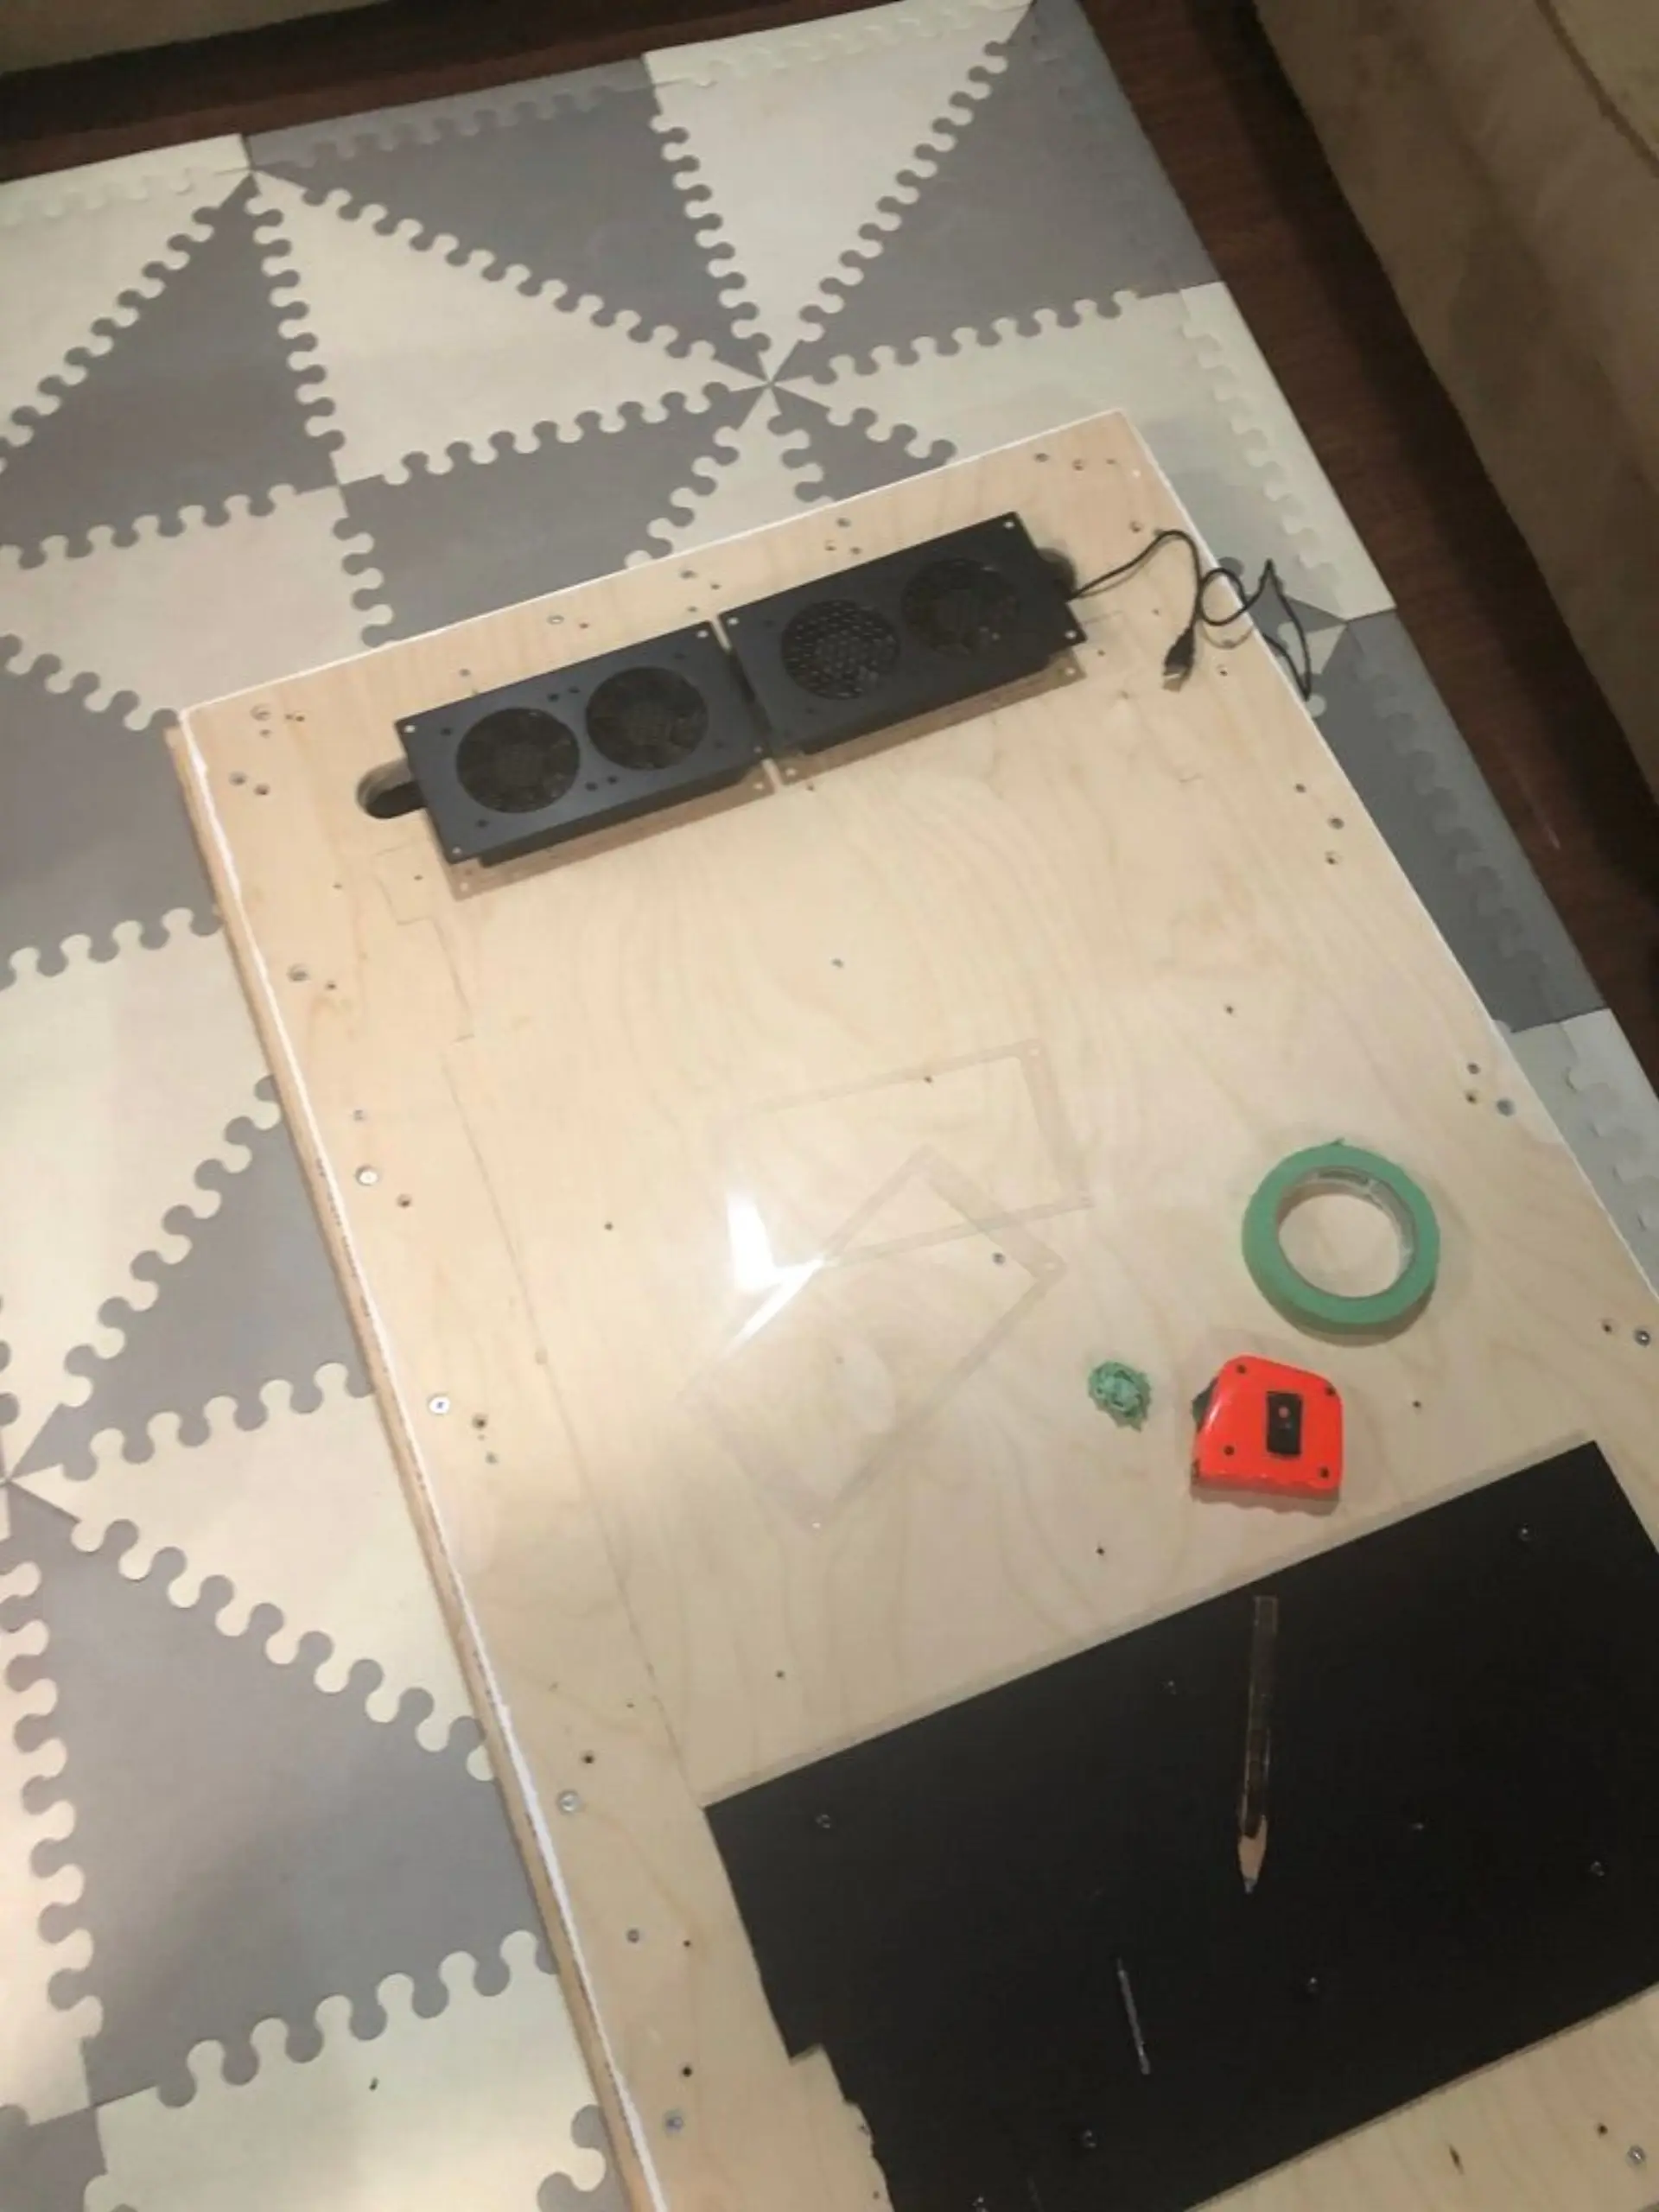
Both the top and bottom of the furniture were fitted with fans from AC Infinity. The bottom fans draws cold air from the floor to the front of the server while the top fans draw out the rising hot air. Air chambers are used in both cases to dampen vibration originating from the equipment inside the case. These particular fans were chosen because of AC Infinity reputation for near silent cooling and the sleek black look.
The final design elements were the doors, at the front and at the back of the cabinets. Although it would have been simple to add hinges, most solutions would have been too visible. Instead, velcro was added to the frame and the door, providing much needed stability to the doors.
The Patch Panel
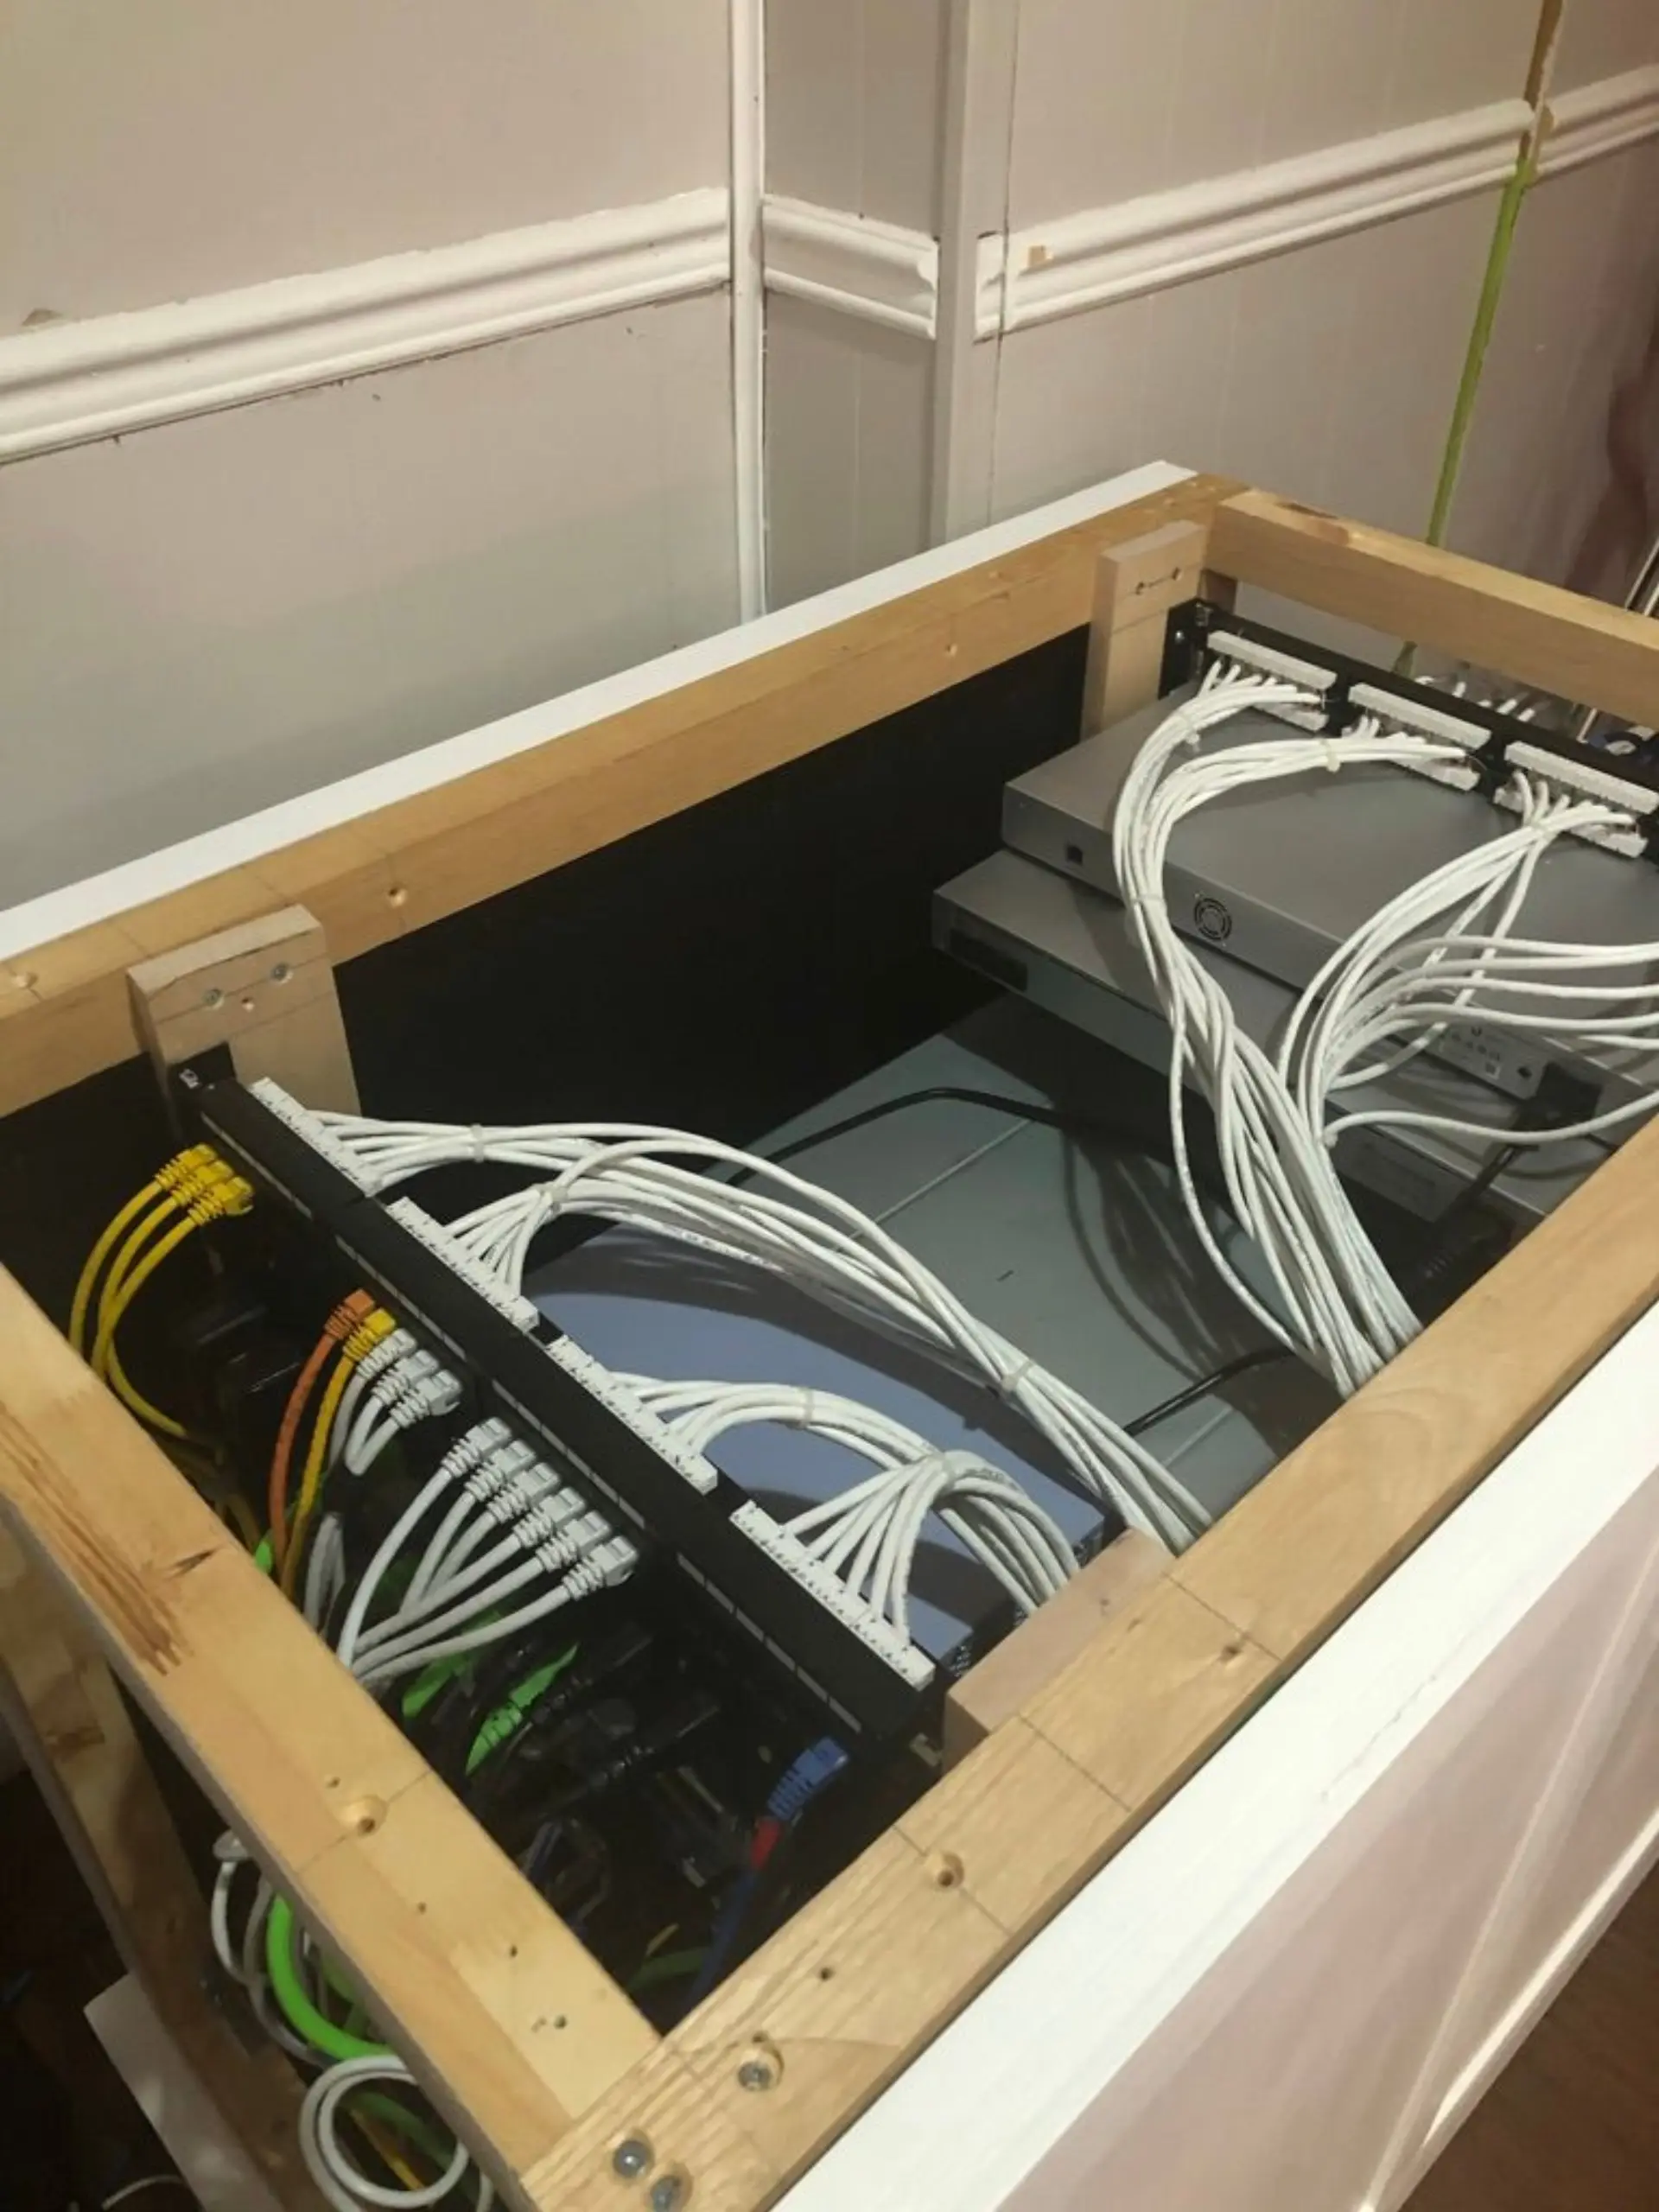
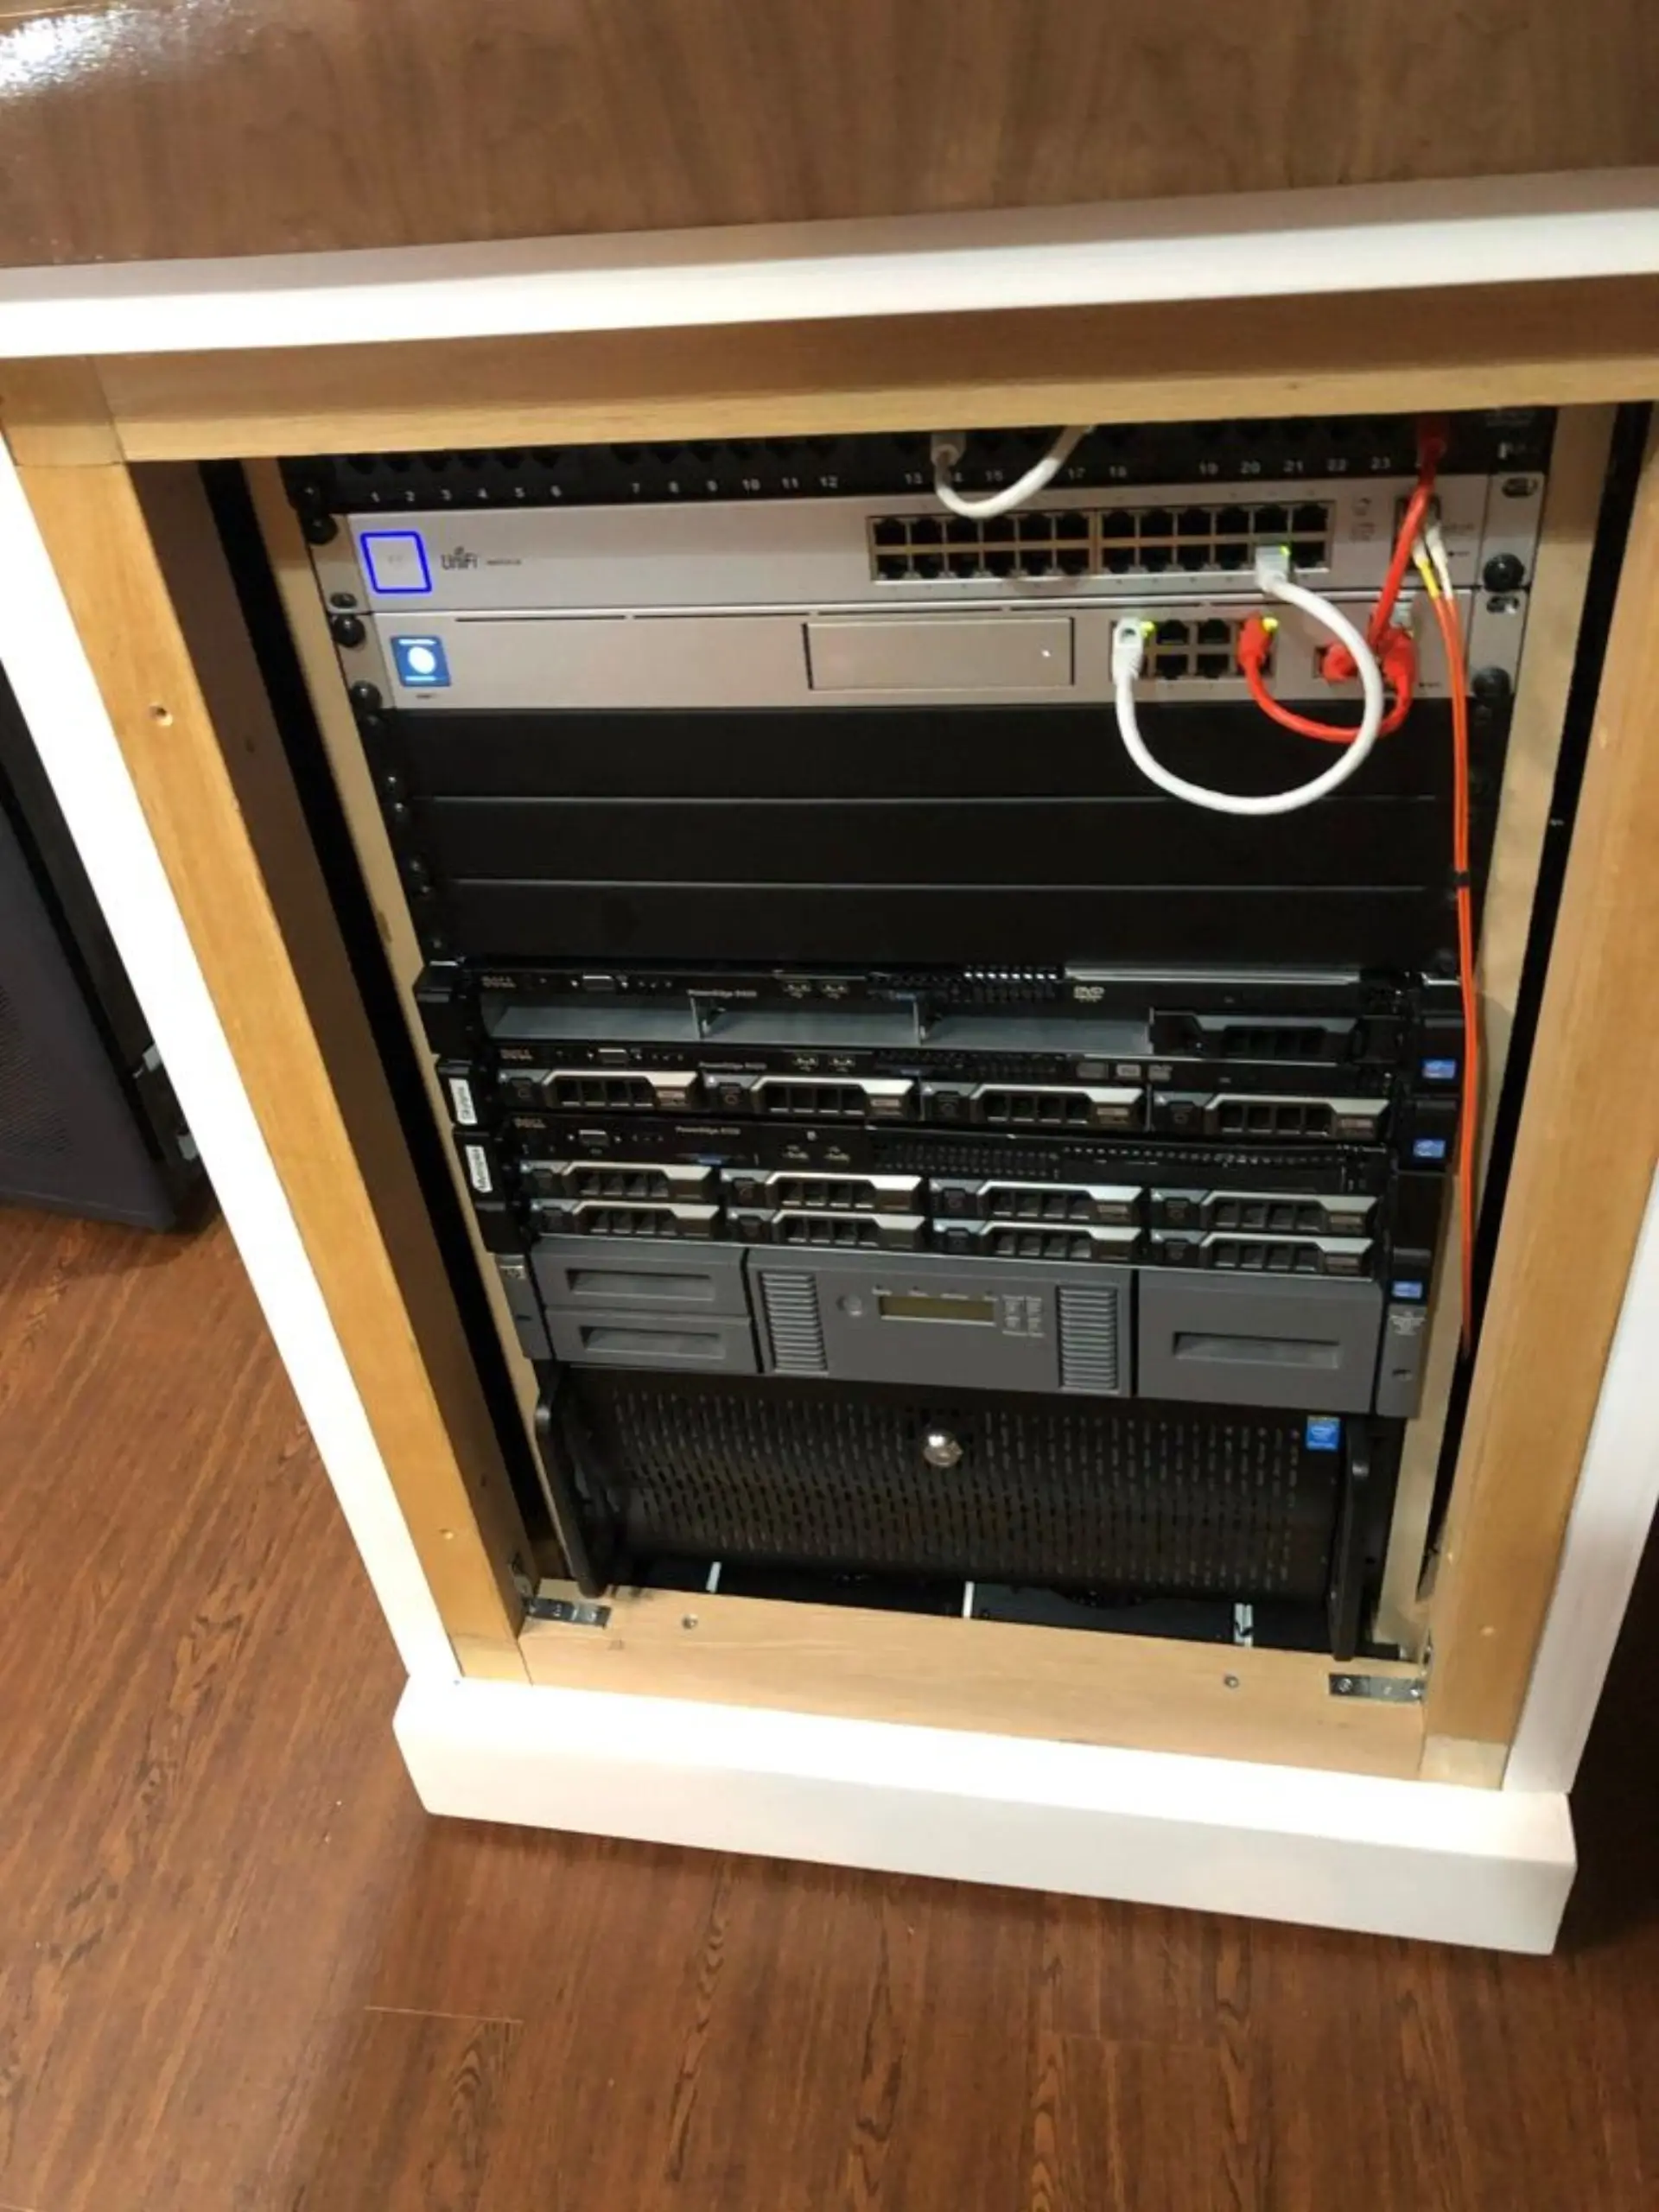
Some network equipment, because of its airflow, needed to be installed in front of the rack. This was problematic, as most of the network connectivity was in the back.
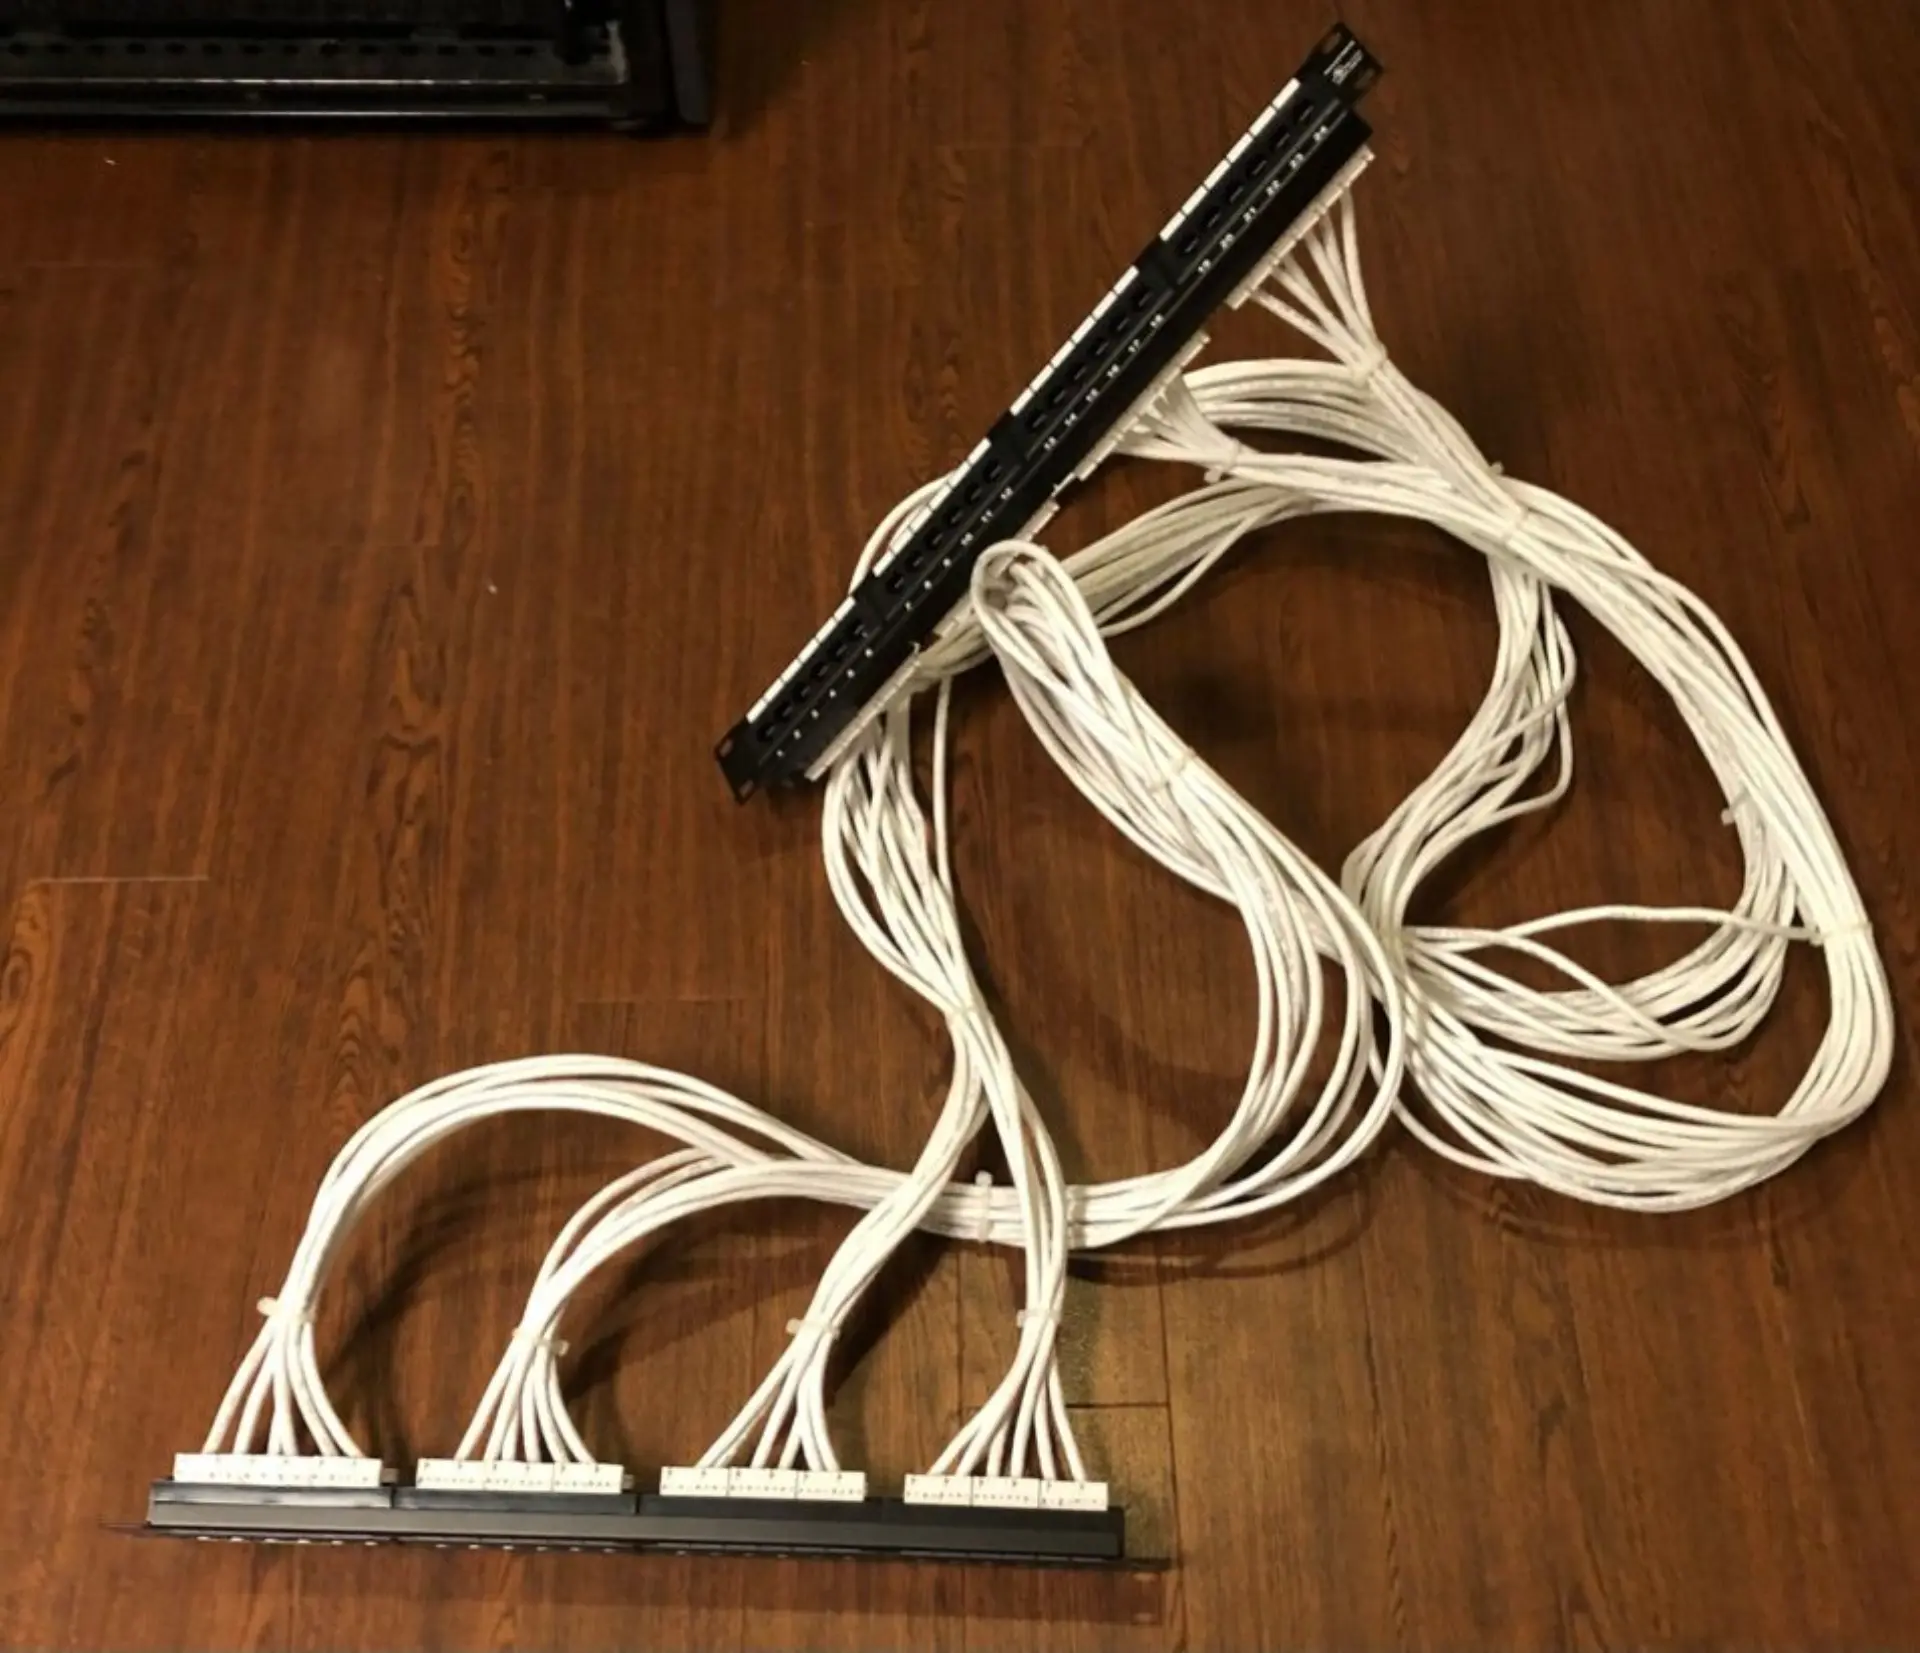
This was easily solved using a pair of 24 ports patch panel previously wired up for another server case. Although the cables were a bit long, the patch panels were easily installed in the upper levels of the rack.
The Heat Test
One of the biggest challenge in the construction of a sound proof box is making sure that it is properly ventilated. Once closed, the box is almost airtight, as to minimise escaping sound waves. Unfortunately, this lack of circulating air will overheat computer equipment, which will shut down in turn to prevent damage. In this particular case, the cooling features our silent cabinet needs to dissipate about 350w of heat.
Airflow in the first iteration of this server rack was provided by an AirPlate T9 (three 6 inch fans, 151 CFM) and an AirPlate S7 (two 6 inch fans 106 CFM). Their combined power moved about 251 cubic feet of air per minute (CFM), which was unfortunately not enough. Temperature inside the box would increase to unreasonable levels for the computer.
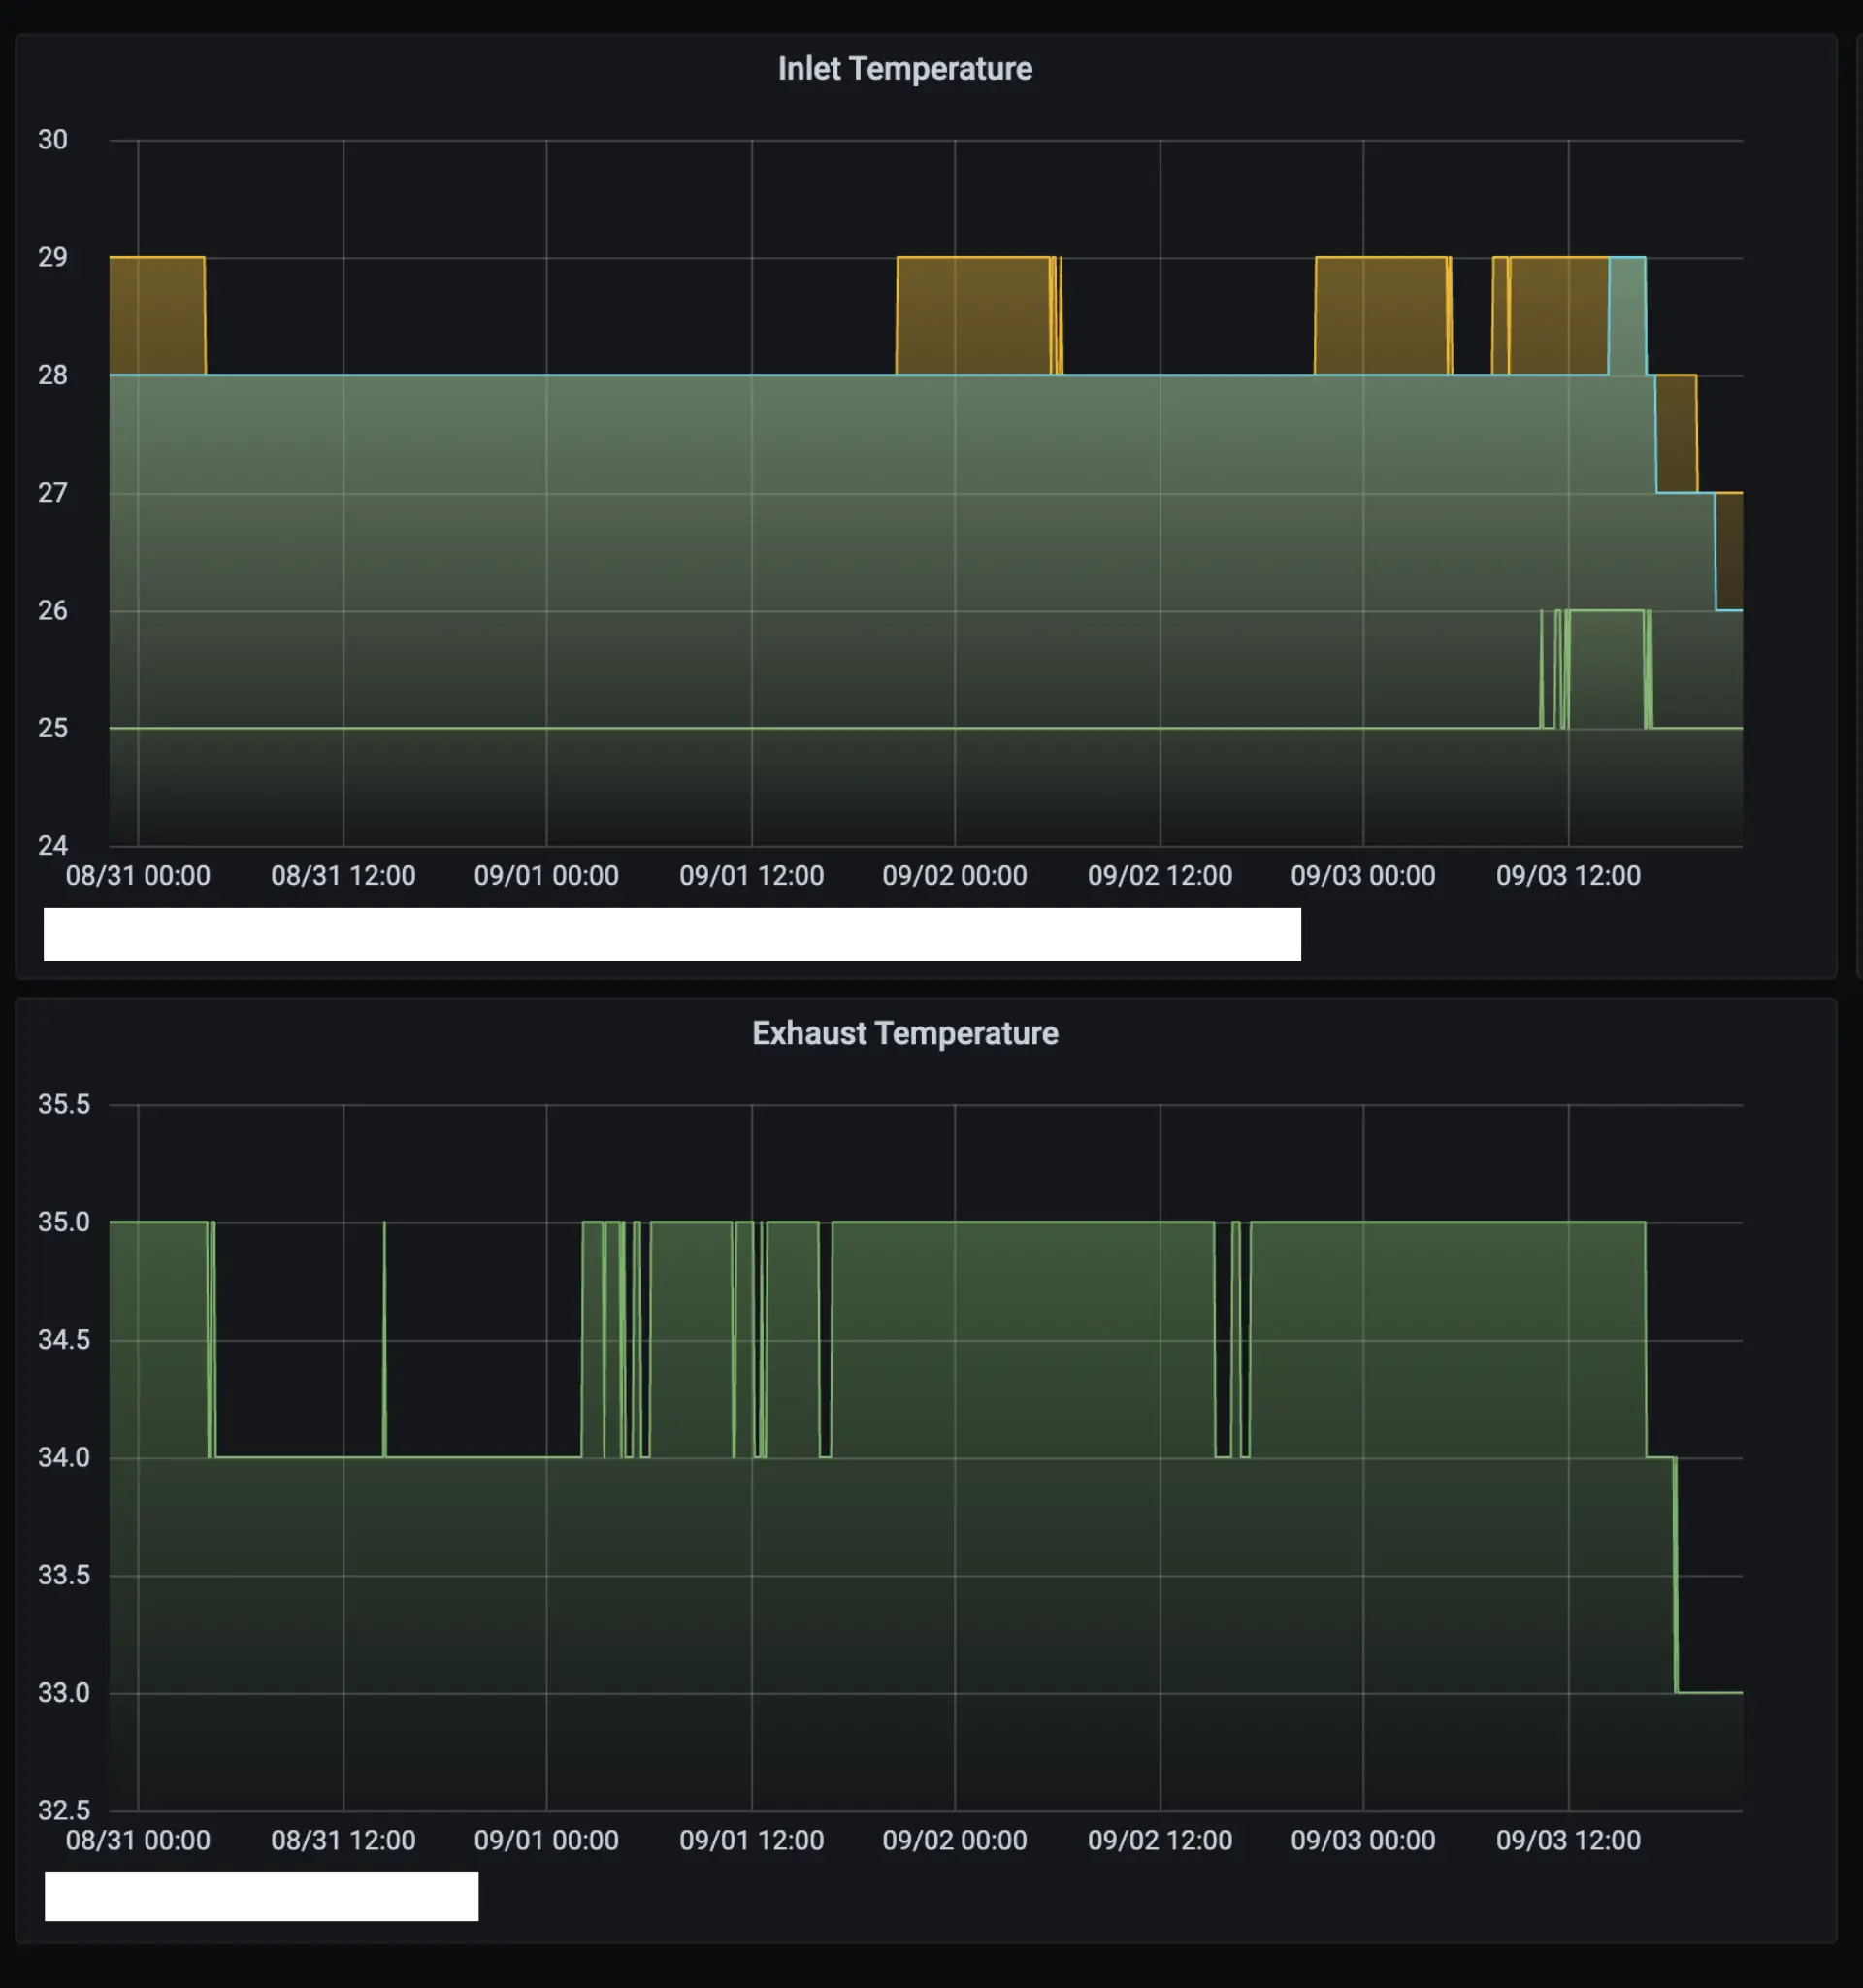
The rack was disassembled and two S7 Airplate were added to the underside of the stop of the rack, improving dissipation of hot air. With a total power of 469 CFM, air intake of the rack was room temperature of 25 degree celsius and exhaust was warm at 36 degree celsius.
Sound Test
One of the most important characteristic of a silent server cabinet is its ability to absorb noise. Sound levels are measured with decibels (dB) on a logarithmic scale. This means that with an increase of 10db, the sound is twice as loud. Common example of decibels mesures are 20 dB for a quiet room, 30 dB for a whisper, 40 dB for a normal home and 50 dB for a casual conversation. All measures taken in this section were in a room with an ambient noise level of 36 dB.
Ideally, our silent server case should keep sound levels under 40 dB, allowing it to blend into a normal household. When idle, the equipment stored in the cabinet have a noise level of about 55 dB. Once the silent cabinet panels are closed, the noise level falls to about 39 dB, an improvement of about 5 times more quiet. The noisiest component in cabinet operates at around 70 dB. Once inside the silent cabinet, noise levels were about 42 dB, an improvement of of about 25 times. This means that the cabinet is incredibly efficient a blocking out noise to about 40 dB.
Unfortunately, when active, the AC Infinity cooling fans cause a slight increase in the overall noise profile of the cabinet. In the winter, when ambient temperature is quite cool, the fans run at moderate speed for a total cabinet noise level of 43 dB. Hot summers are more problematic, as fans must run at their highest setting, raising the total noise level to 50 dB. That said, the cabinet remains much more quiet than most of the cooling solutions (air conditioner, etc.) used in the summer.
The Budget
Quite a variety of materials are used to build a silent server cabinet. With the exception of the rack strip, all materials were acquired on Amazon.ca or at the local Homedepot store.
- 2 sets of BXI Sound Absorber - Acoustic Absorption Panel - Polyester Fiber - Black - 16'' X 12'' X 3/8'' - 6 PACK : 66 CAD
- 1 set of BXI Sound Absorber - Acoustic Absorption Panel - Polyester Fiber - Black - 23.6'' X 23.6'' X 3/8'' - 8 PACK : 115 CAD
- AC Infinity AIRPLATE T9 : 150 CAD
- 3 sets of AC Infinity AIRPLATE S7 : 180 CAD
- 1 set of GBL - 2'' Caster Wheels with Screws 440Lbs | Heavy Duty Dolly Wheels for Furniture (2'' Standard) : 35 CAD
- 2 tubes of Green Glue : 40 CAD
- Russian Plywood, Wood Glue, Screws and other hardware : 200 CAD
- Wood Paneling for Top : 100 CAD
- 4 sets of Penn Elcom 16U Full Hole Rack Strip with Square Holes 2mm/0.08" R0863/2MM-16 : 40 CAD
The total costs of the materials for this project sum up to 926 CAD, which is considerably less than the price of a new cabinet. However, if you factor in the cost of labor invested in this project, I'm pretty sure that buying a silent cabinet would be optimal.
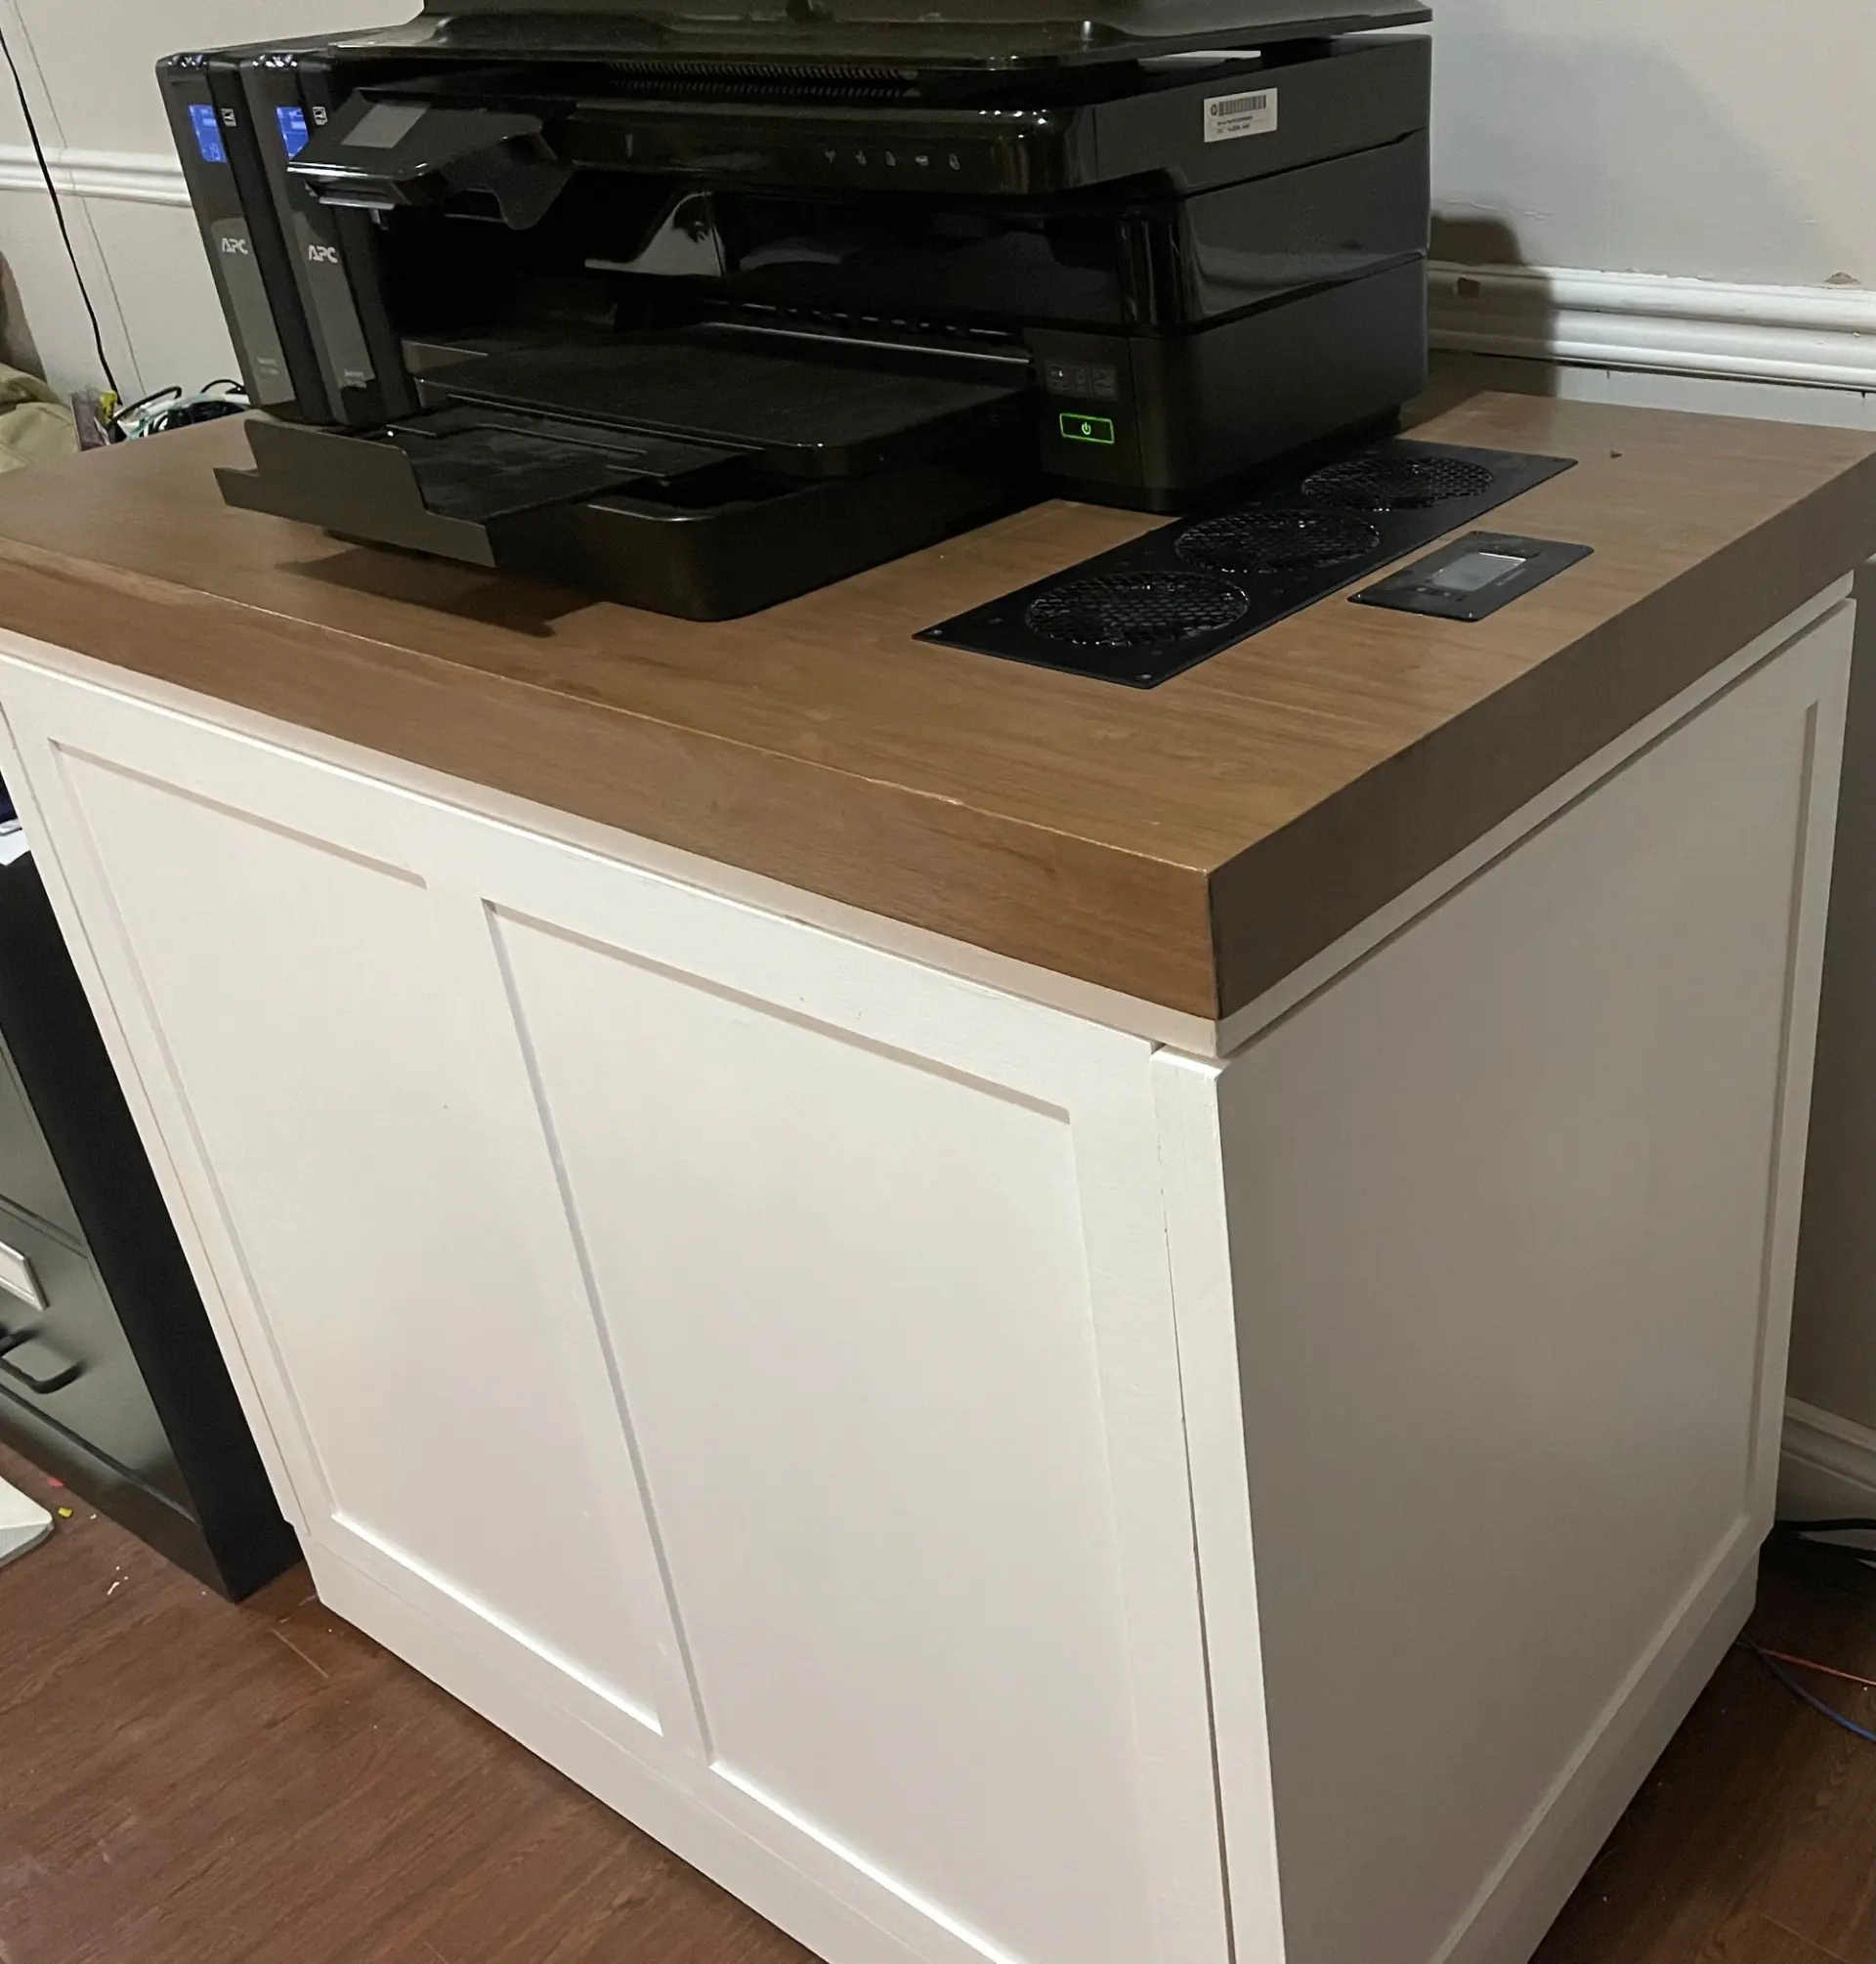
The Final Product
The goal of this project was to create a silent server cabinet with proper thermal control. With a noise reducing capacity of 20 to 30 dB, the cabinet fulfills its goal of silence. Thermals are adequate, but it would be difficult to add more equipment without overwhelming the current cooling solution.
Although expensive, the silent server cabinet does its job exceptionally well. Tuck away in the side of the basement, the cabinet hosts a number of servers without being notice. However, the biggest gain was the lessons learned about sound transmission and soundproofing. That said, we are extremely happy with the result and look forward to improving it over time.