What’s the Best Way to Build a DIY Disk Shelf?
Need more storage in your homelab? Learn how the Titanus Disk Shelf project turned a noisy challenge into a quiet, DIY solution - and how anyone can build one too.

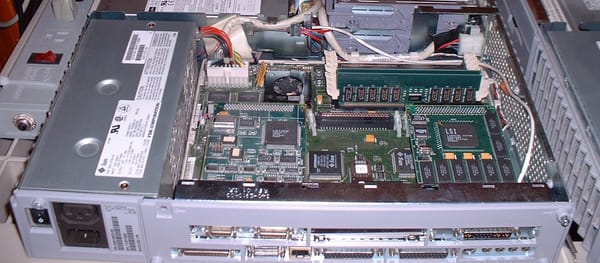
Expanding storage in a homelab setup often means looking beyond the internal bays of a server. One common solution is a disk shelf, an external enclosure that connects over SAS and adds new capacity without replacing existing hardware. Commercial options like the NetApp DS4243 or Dell MD1200 are widely available on the second-hand market, but their constant fan noise makes them difficult to live with outside a datacenter. For homelab enthusiasts who want quiet operation in a home environment, building a disk shelf yourself is often the best answer.
This article explores the concept of a disk shelf in the context of home servers and NAS setups, highlights the design choices that matter, and walks through the Titanus Disk Shelf project as a practical example of a quiet, DIY solution.
How does one build a disk Shelf
A disk shelf is an external enclosure that houses additional hard drives and connects them to a server over the SAS (Serial Attached SCSI) protocol. In a homelab setup, it allows storage to grow beyond the limits of a server’s internal bays while keeping the system modular and easier to maintain. Instead of replacing a perfectly good chassis, a disk shelf makes it possible to expand capacity as needed.
Designing a disk shelf requires balancing several factors. Cost is always a concern, and while second-hand enterprise shelves can be affordable, they bring trade-offs in noise and power usage. A DIY build offers more control over component quality and acoustics, but also demands careful planning. Space is another limitation, since the shelf will take up room in a rack or on the floor, and the size of the enclosure directly determines how many drives it can support.
Noise is often the deciding factor for building your own. Enterprise shelves rely on high-speed fans to keep drives cool in datacenter environments, and the constant drone makes them impractical at home. Selecting quieter fans and tuning airflow can reduce noise while still keeping drives at safe operating temperatures. Power consumption must also be considered, since a disk shelf adds a dedicated power supply to run drives and cooling. Choosing the right unit means supplying enough current for spin-up without wasting energy on unused overhead.
Finally, expandability defines how useful the shelf will be over time. SAS breakout cables support four drives each, so connecting eight drives requires two cables. This makes an eight-drive design the sweet spot for most DIY shelves, striking a balance between simplicity and storage growth. Going beyond eight drives usually means incorporating a SAS expander, which adds both cost and complexity.
In this guide, we’ll walk through the design and construction of the Titanus Disk Shelf, a quiet and efficient solution built for the Technodabbler homelab.
Step 1: Planning Your Disk Shelf
Once the decision is made to build a disk shelf, the next step is selecting the components that will bring it to life. The choices made here will define not only how reliable the system is, but also how quiet, efficient, and expandable it becomes.

The case is the most visible decision. Some builders prefer rackmount enclosures that slide neatly into a homelab rack, while others repurpose a desktop tower that can be tucked under a desk. A few even design their own enclosures and 3D-print them from PETG, proving how flexible a DIY approach can be. Whatever the choice, the case must provide enough drive bays for the intended capacity and enough airflow to keep everything cool.

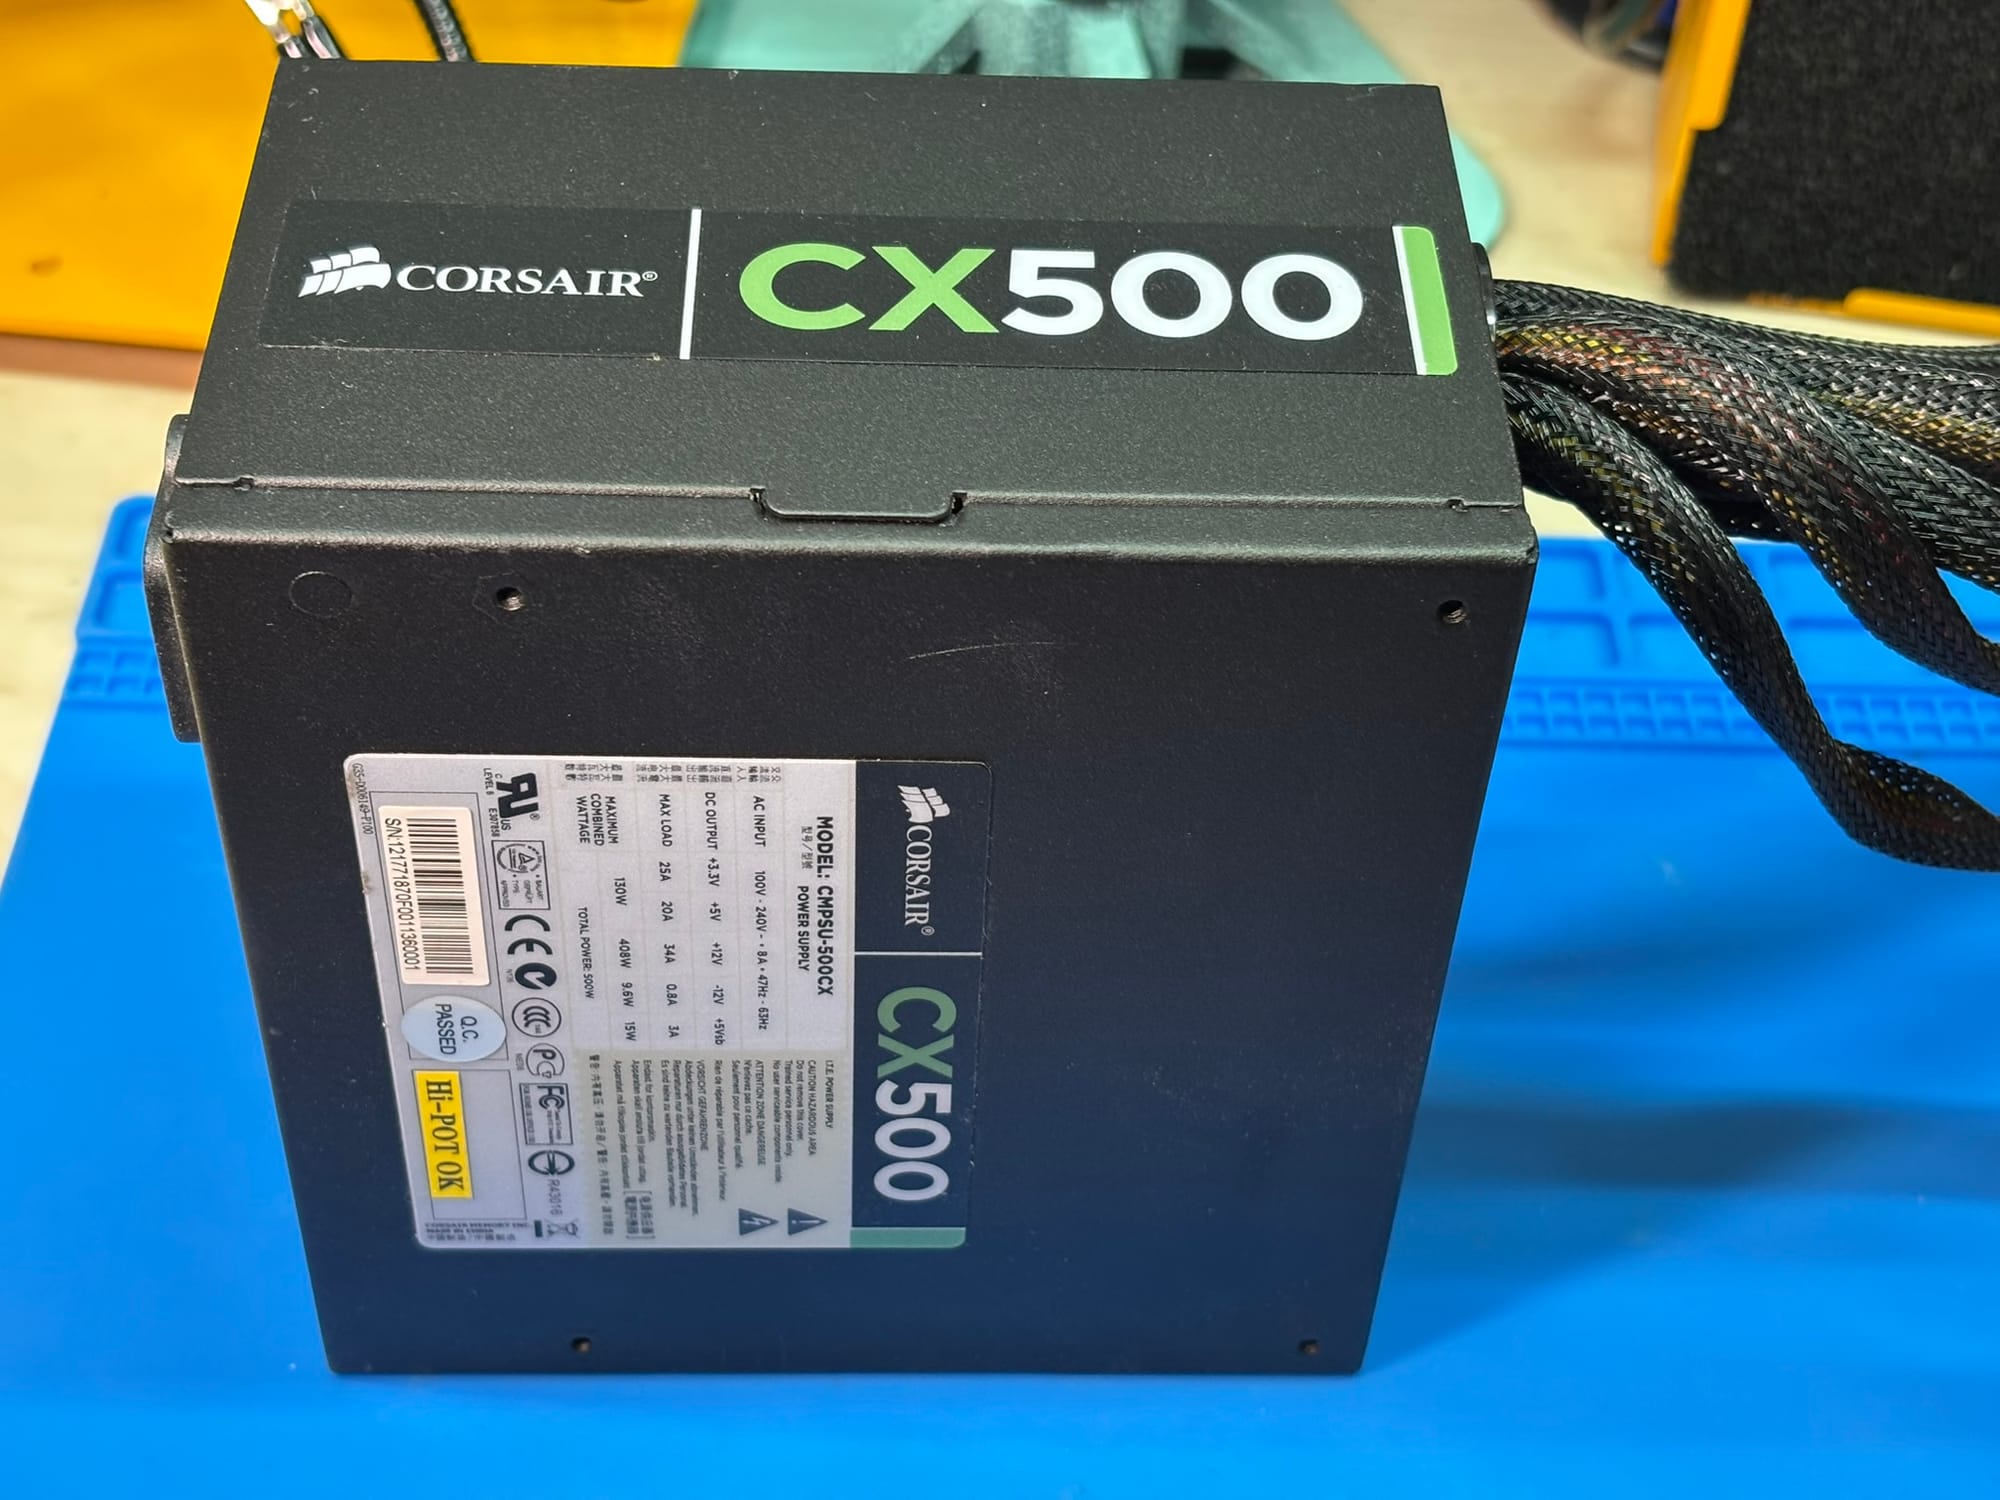
The power supply is another critical piece. Disk shelves rarely demand high wattage, since the workload is limited to spinning drives and powering fans. What matters more is reliability and the number of SATA power connectors available. A well-known brand is worth the extra expense, since a cheap supply risks more than just uptime—it risks the integrity of the data stored on the drives.
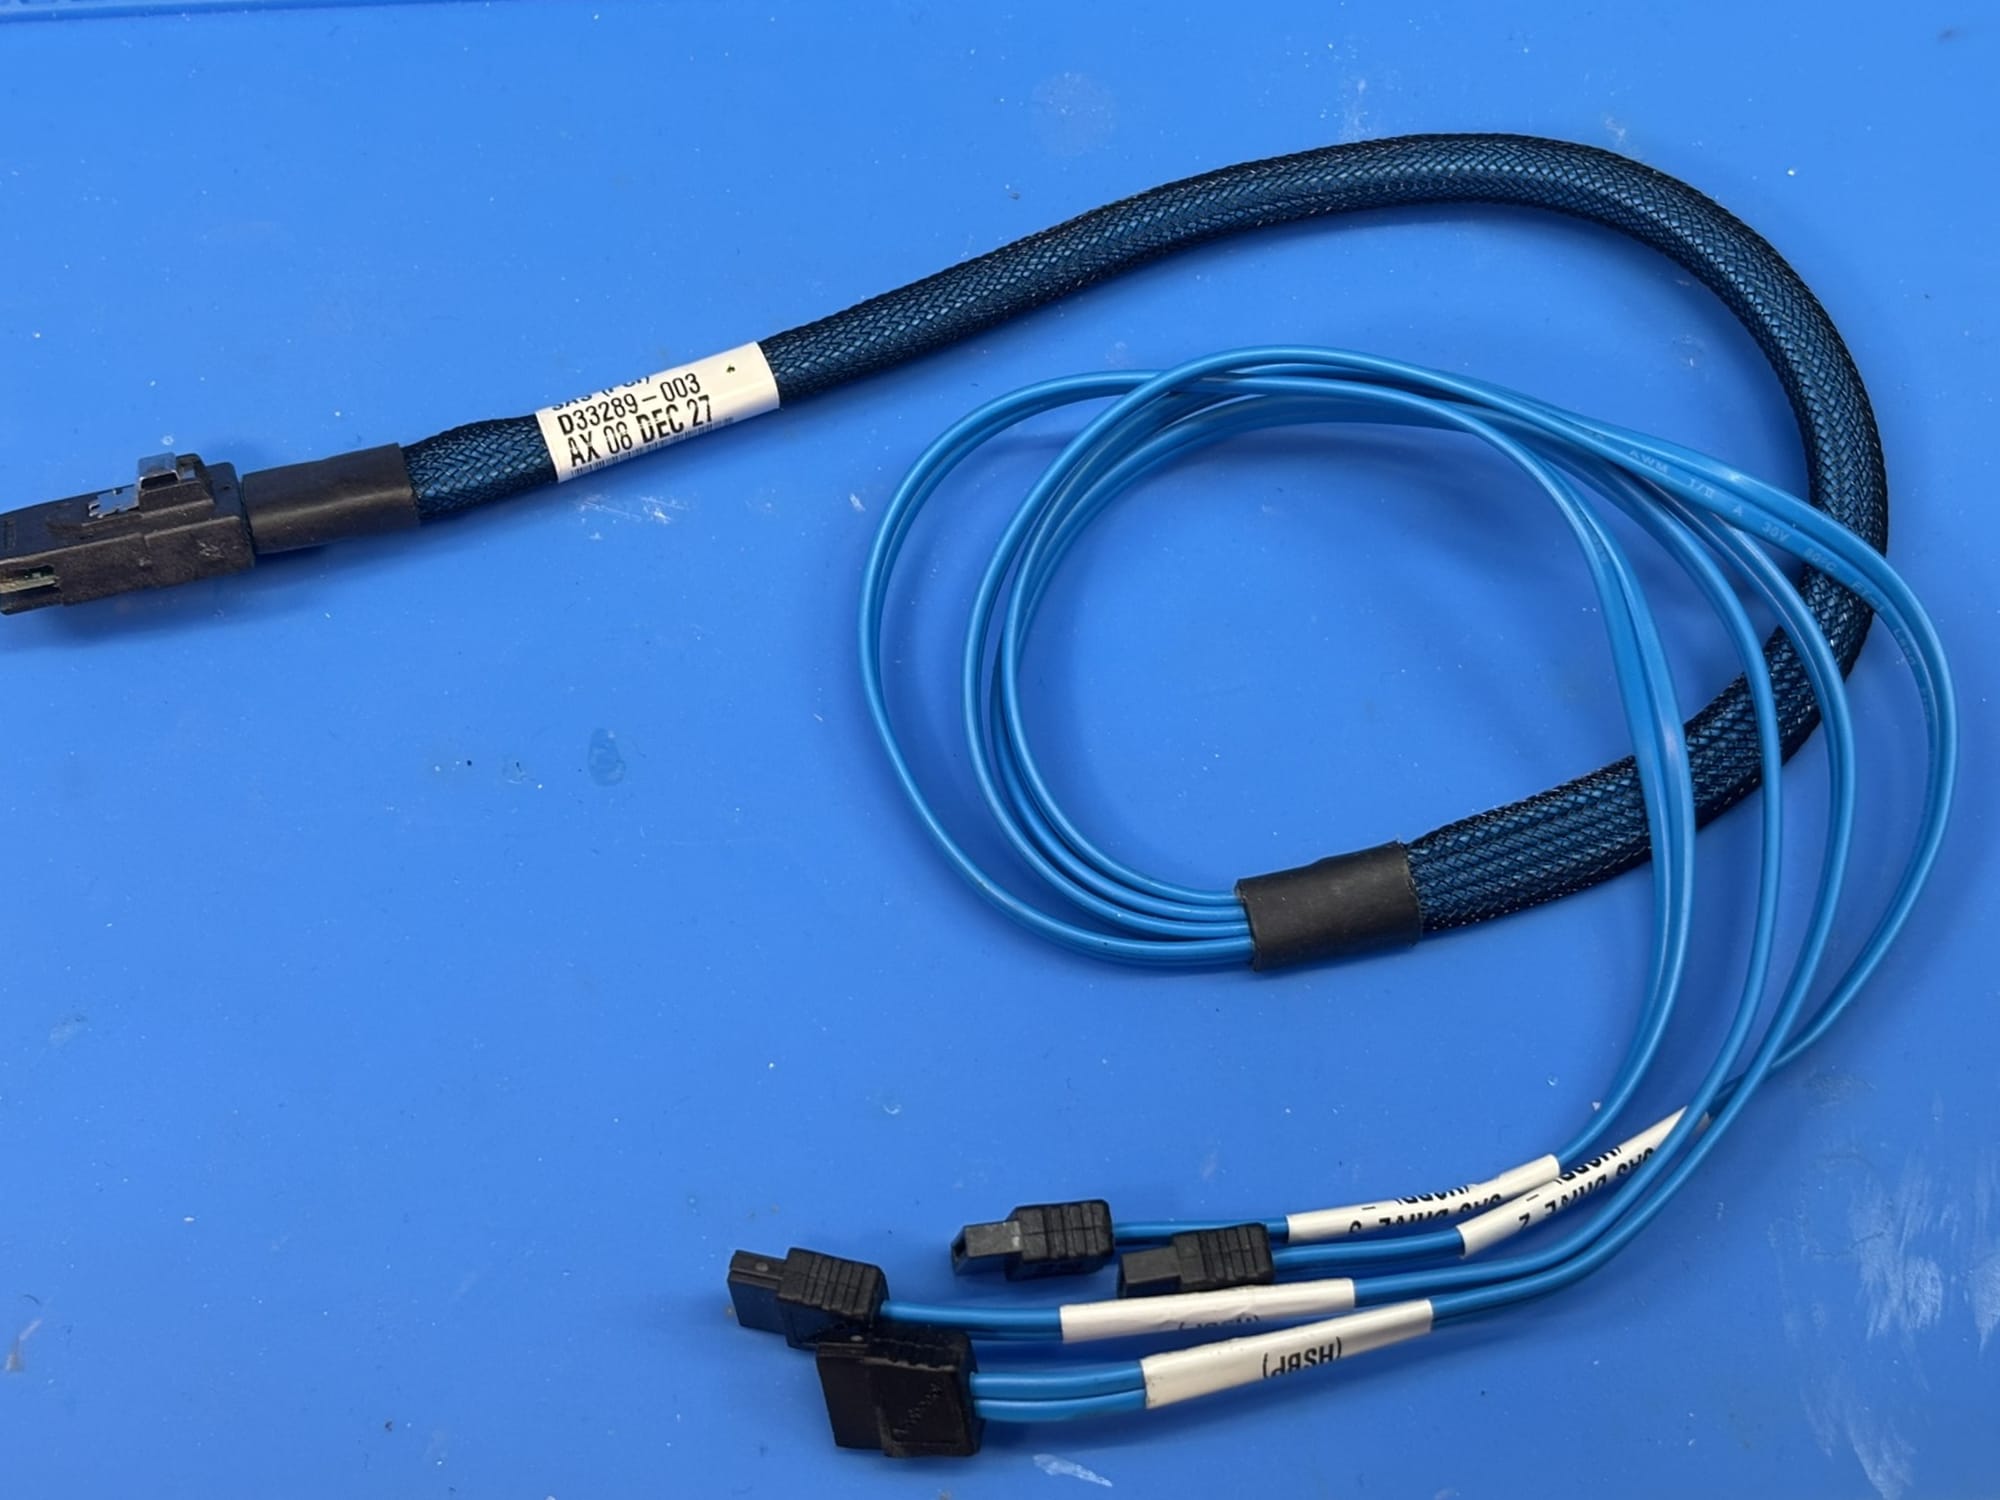
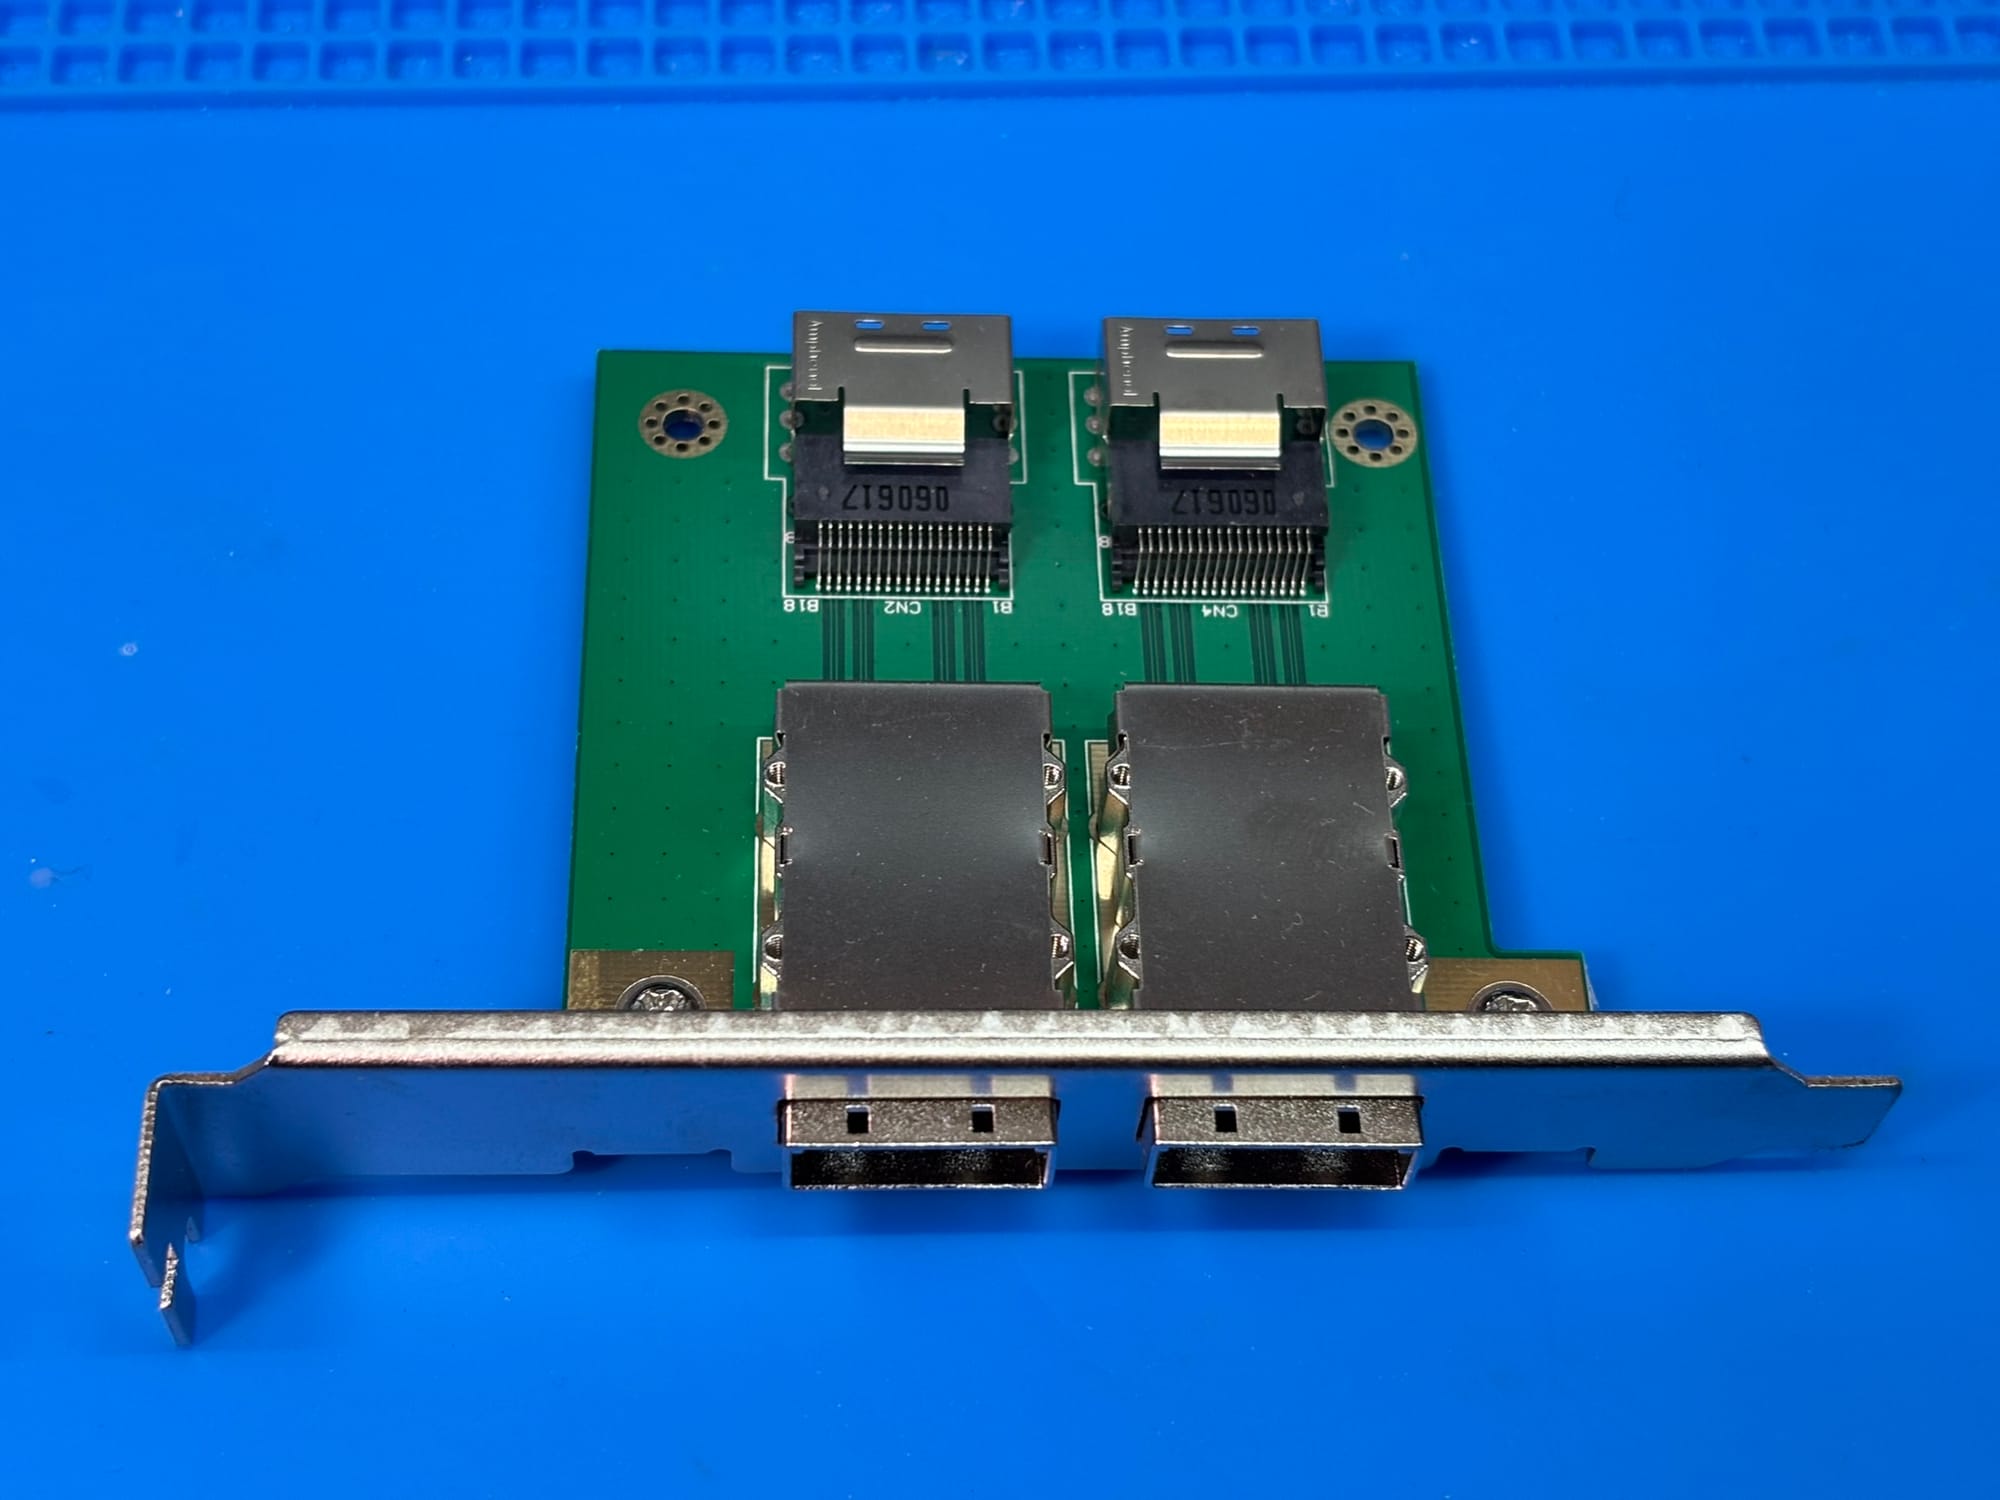
Connecting the drives themselves requires bridging SAS to SATA. At the simplest level, this can be handled with breakout cables that split each SAS connection into four SATA ports. For a cleaner and more maintainable setup, an internal-to-external SAS connector can be added, letting cables pass neatly between the server and the shelf. The more professional the wiring, the easier future maintenance will be.
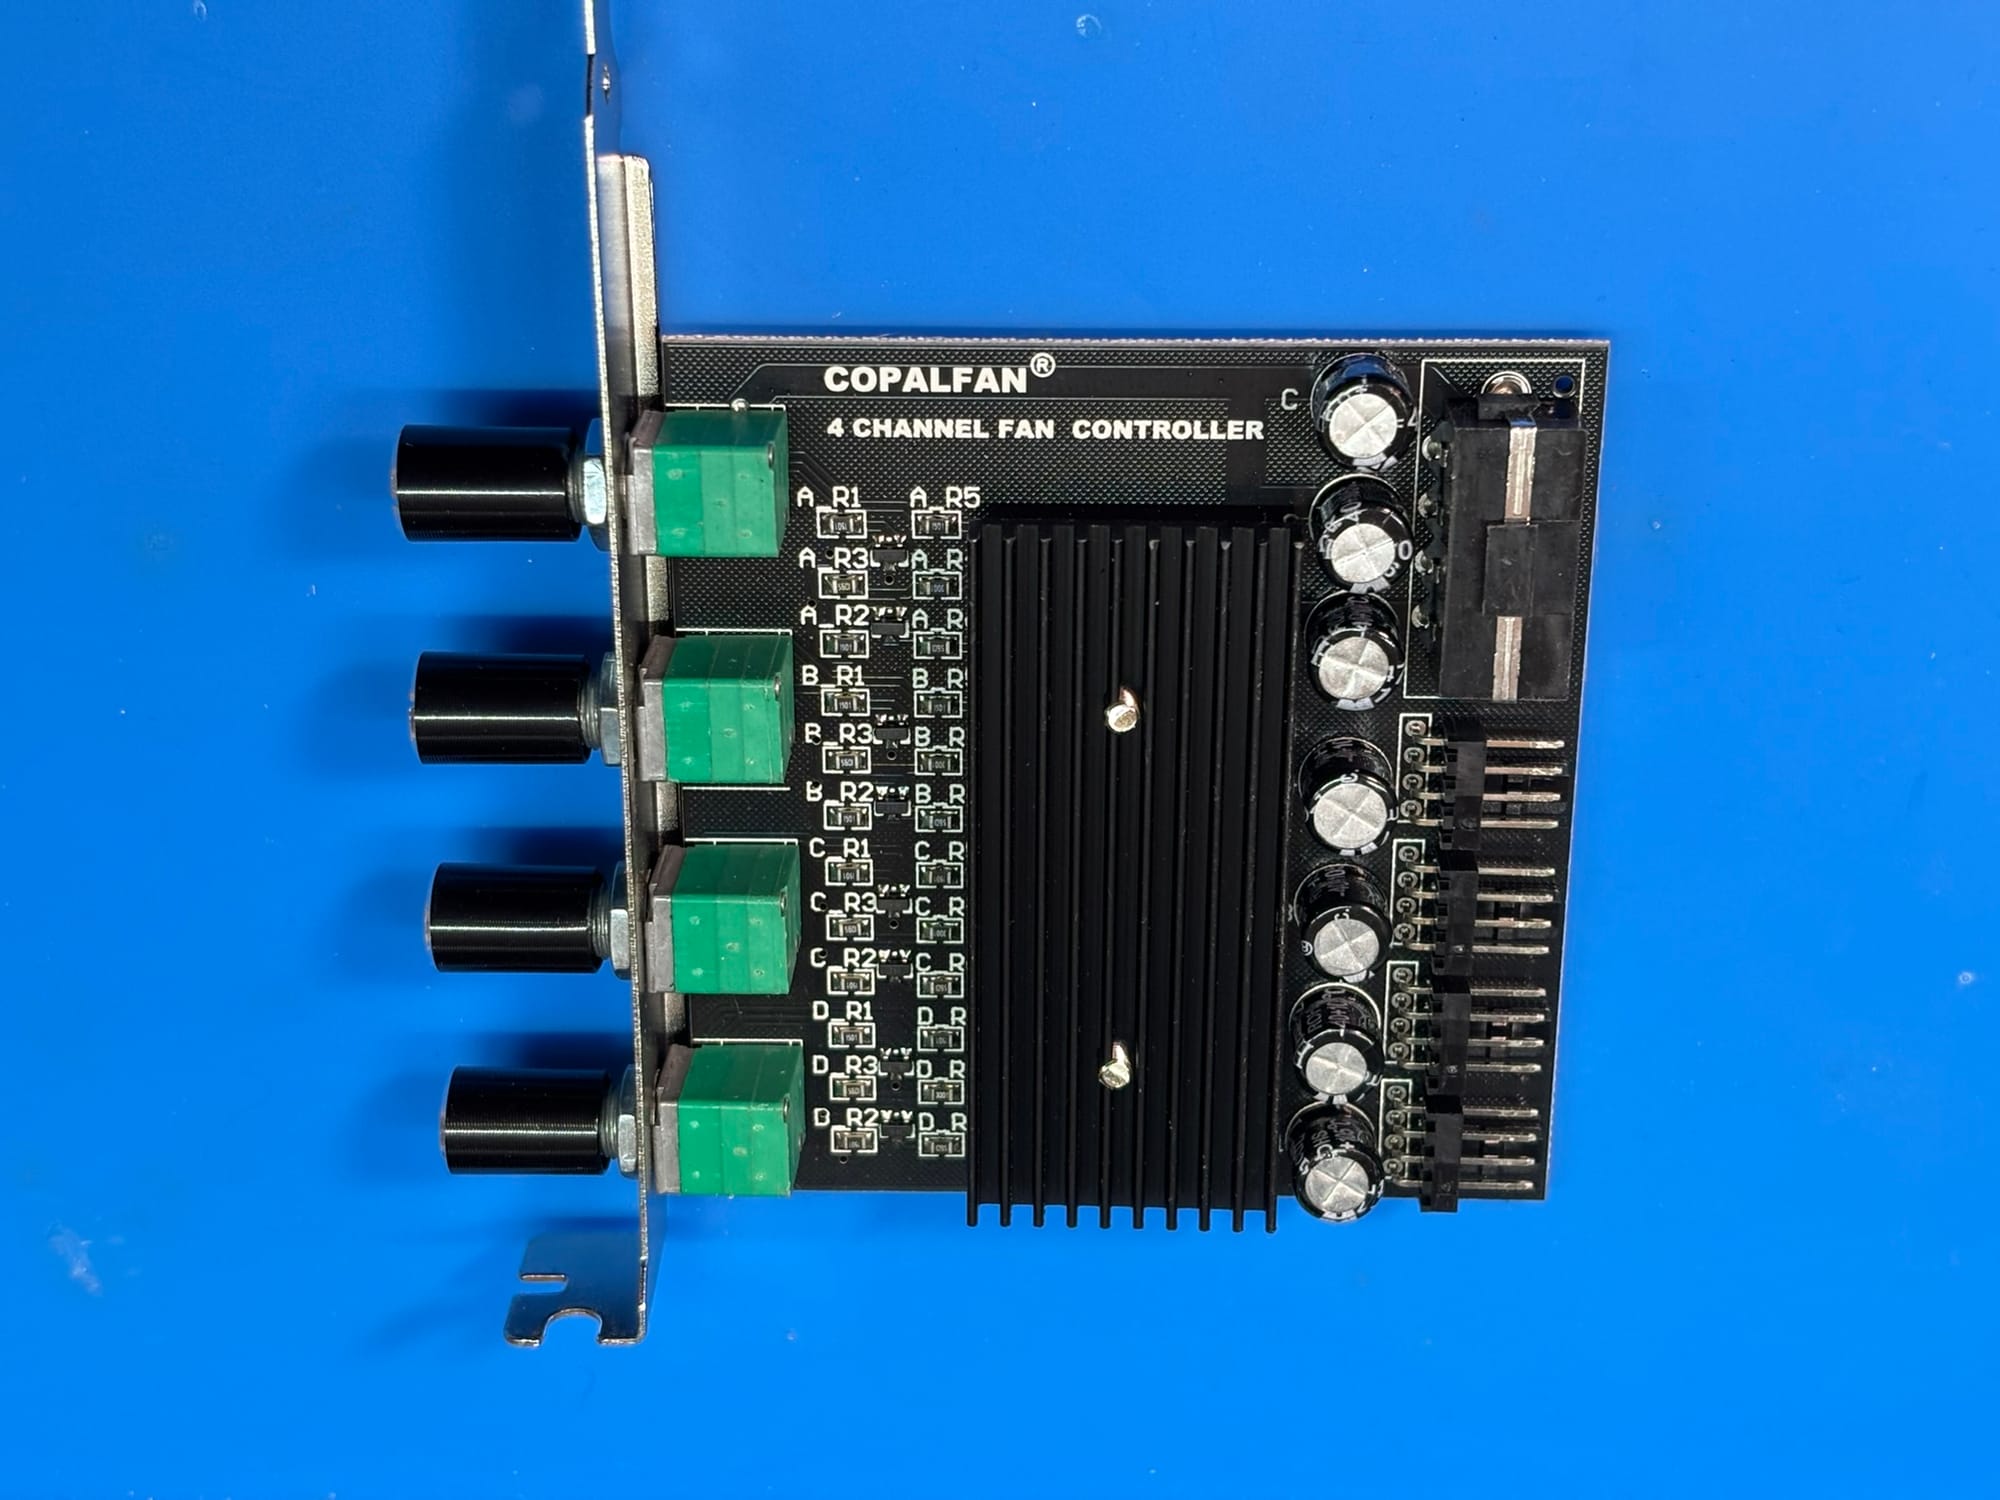
Cooling is essential, as drives generate significant heat under load. Fans are a given, but choosing PWM fans adds flexibility, allowing speed to be tuned for the right balance of temperature and noise. This does require a controller to supply power and manage fan speed, but the investment is worthwhile in any home environment where quiet operation is a priority.
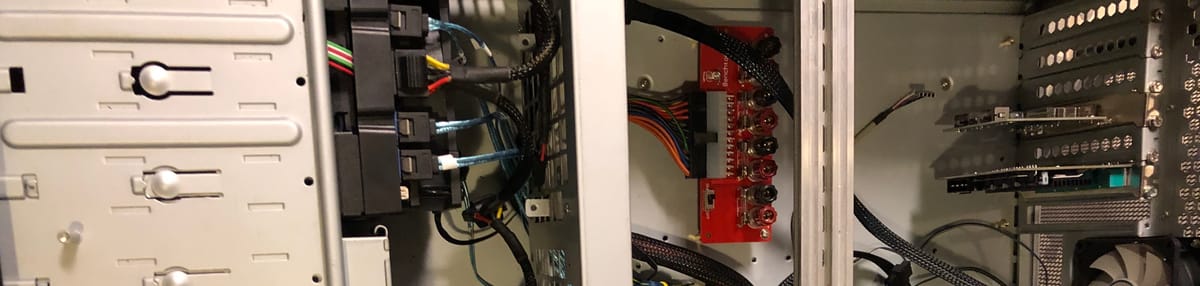
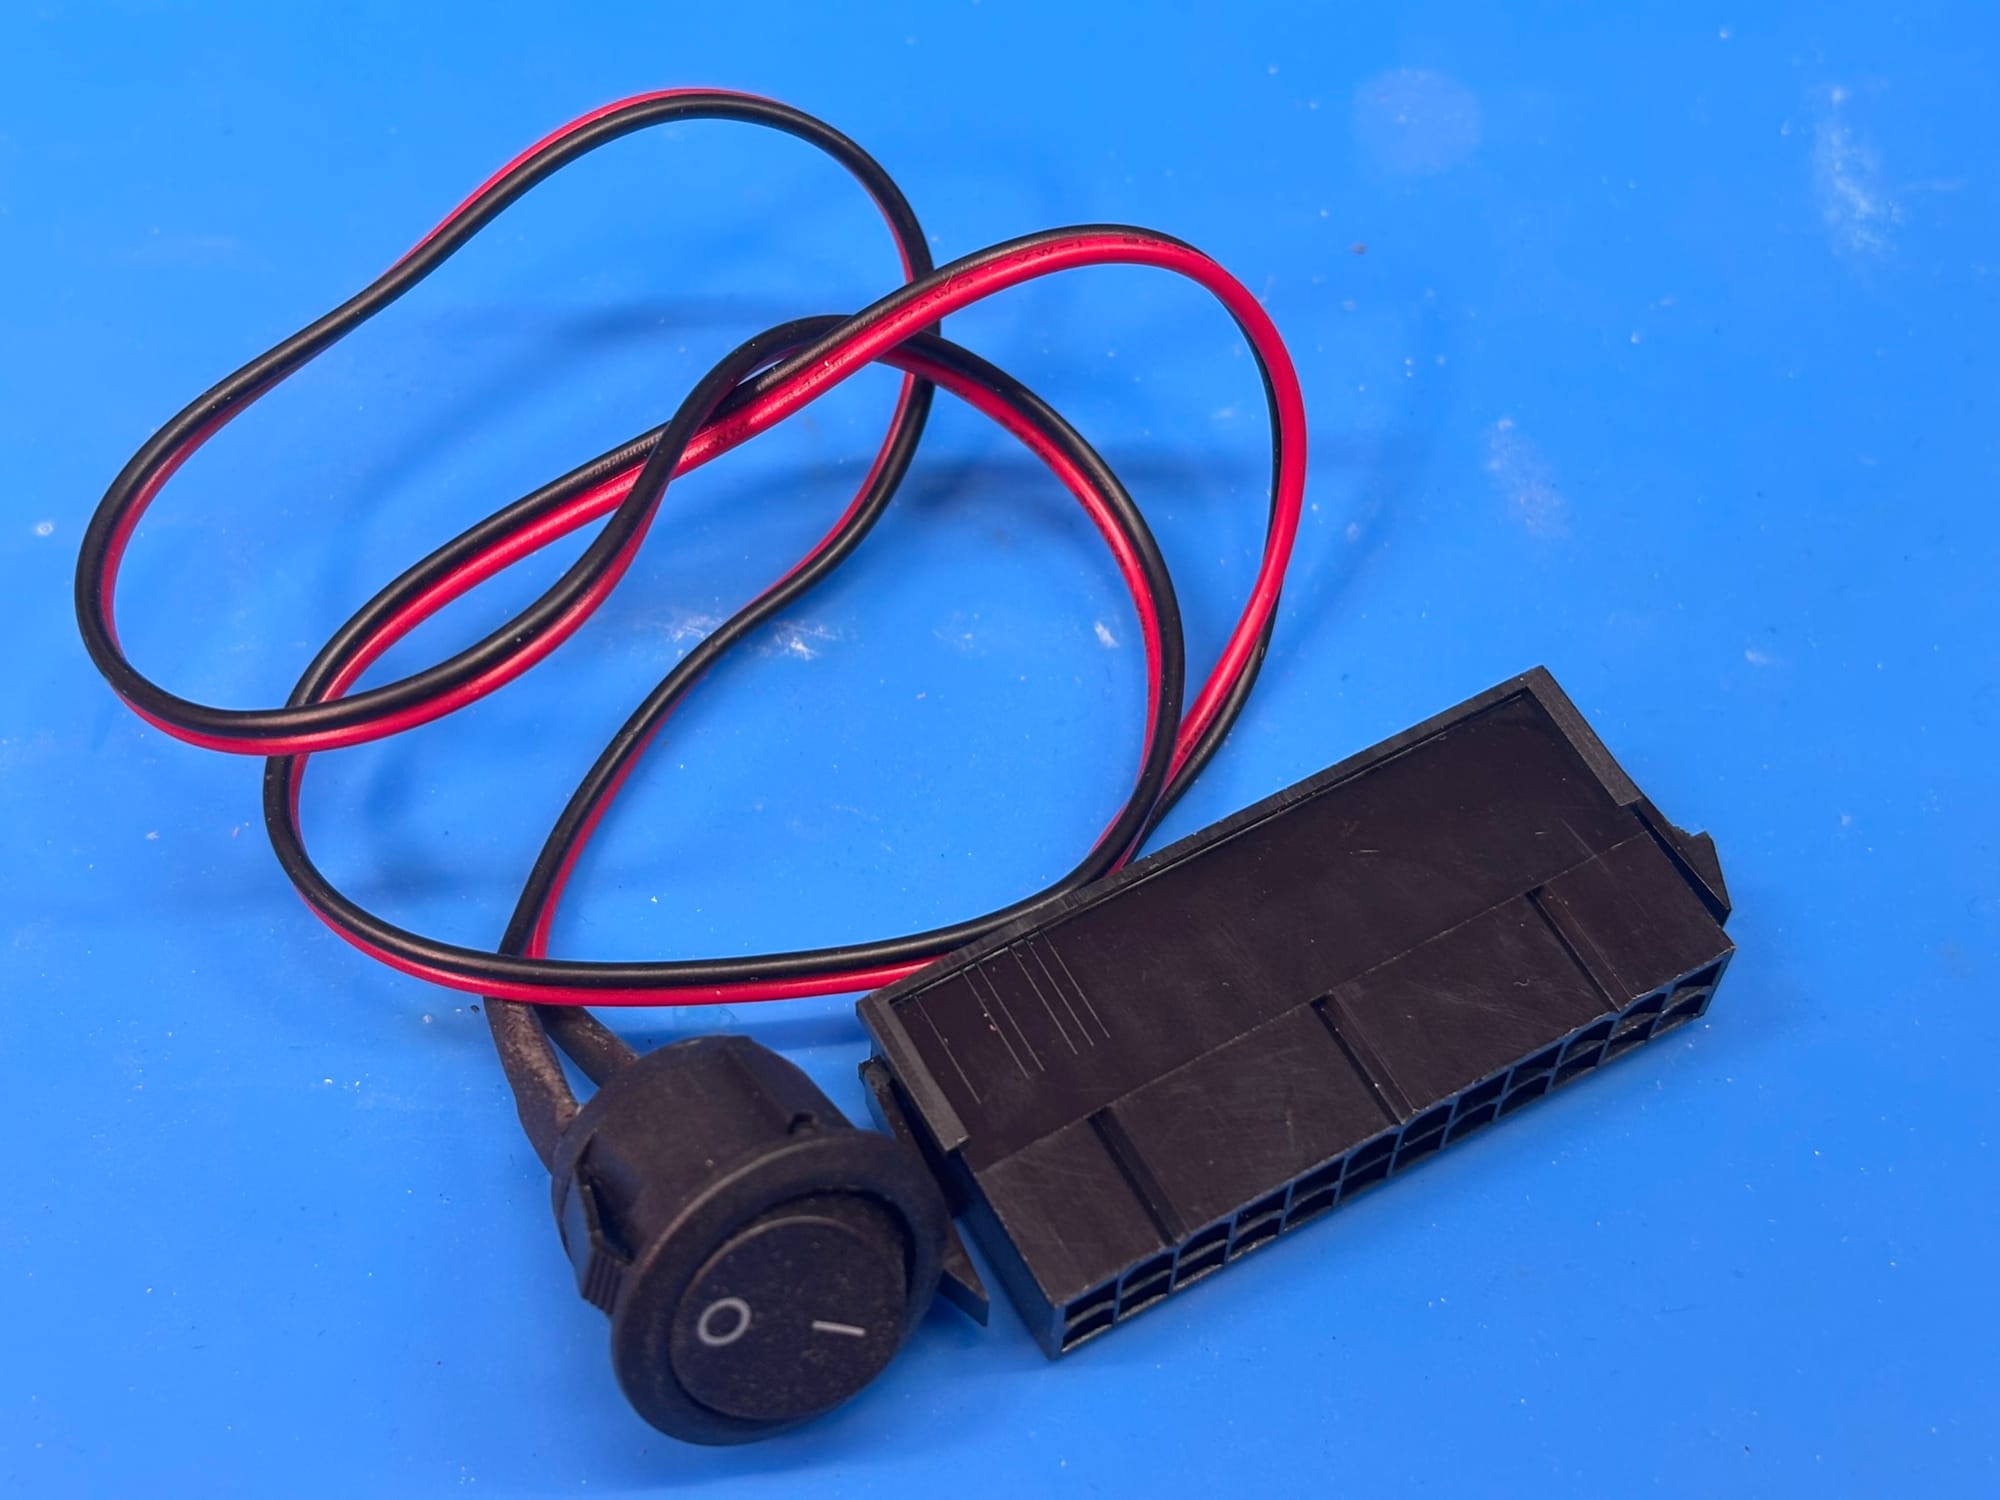
Finally, there is the question of how to control power. At a minimum, the power supply must be shorted across two pins to start, which can be done with a simple jumper or toggle switch. For convenience, builders often use a remote switch that allows the shelf to be powered on and off without opening the case. Those seeking a more advanced setup can even integrate a dedicated power control board, adding sophistication to what is otherwise a very straightforward requirement.
When choosing components, aim for a balance of cost, performance, and compatibility.
Step 2: The Titanus Project Components
With the planning complete, the Titanus project became an exercise in turning theory into a working, quiet disk shelf. At its core was a Rosewill RSV-L4500 ATX chassis, a roomy enclosure that could be repurposed to hold up to twelve drives. To make the most of that space, Rosewill’s RSV-SATA-Cage-34 hot-swap modules were installed, giving each set of drives a clean, accessible mounting system. The case offered both flexibility and airflow, making it a practical choice for a homelab shelf.
For connectivity, the shelf relied on a straightforward but effective SAS-to-SATA setup. A dual Mini SAS adapter bridged the server’s external SAS port (SFF-8088) to internal connectors (SFF-8087), with breakout cables providing SATA connections to the drives. This arrangement supported up to eight drives without the complexity of an expander, a design choice that struck a balance between simplicity and scalability.
Power was supplied by a Corsair CX500, chosen not for raw wattage but for its reputation and reliability. The unit had more than enough capacity to handle the startup surge of multiple drives and the steady draw of the cooling system, while avoiding the risks of a lower-quality supply.
Cooling was managed with a mix of 120mm fans mounted behind the drive cages and 80mm fans at the rear of the case. To keep noise in check, a PWM controller allowed fan speeds to be tuned for the right compromise between quiet operation and safe drive temperatures. In practice, this meant the shelf could run silently at idle while ramping up airflow only when needed.
Power control was handled a little differently in the Titanus build. While most DIY shelves only require a basic ATX breakout adapter with a toggle switch to short the power-on pins, Titanus used a benchtop power board. This gave the enclosure a clean on–off switch for daily use, but also exposed additional rails at 3.3V and 5V. Those extra outputs were not strictly necessary for the disk shelf itself, but they proved useful for side projects and small electronics that shared the homelab space. For most builders, a simple power switch is the practical choice, but the benchtop board demonstrated how a shelf can be tailored to individual needs.

The result was a build that captured the goals set during planning: quiet, expandable, and reliable, without the compromises that come from reusing enterprise hardware designed for datacenter environments.
Step 3: Assembly
Building the Titanus Disk Shelf came together like any well-planned homelab project: one piece at a time. The case was first stripped of unnecessary parts, leaving only the space needed for drives and airflow. Installing the hot-swap cages early made it easier to keep the build organized and ensured that future drive replacements would be straightforward.
The power supply went in next, secured in its bay and wired through the breakout board for manual control. From there, connectivity took shape. The dual Mini SAS adapter was mounted and linked to the server, while breakout cables were carefully routed to each drive bay inside the enclosure.

Cooling was added with a set of fans positioned to push air directly across the drives, all tied back to the PWM controller for speed tuning. This allowed the shelf to run quietly most of the time, with enough headroom to increase airflow when temperatures demanded it. Finally, the tangle of wires was pulled into order. Clean cable management not only improved airflow but also made the shelf far easier to maintain and expand in the future.
The result was a tidy, functional build that could be powered on with the flick of a switch and expanded with little effort.
Connecting the Disk Shelf to the Server
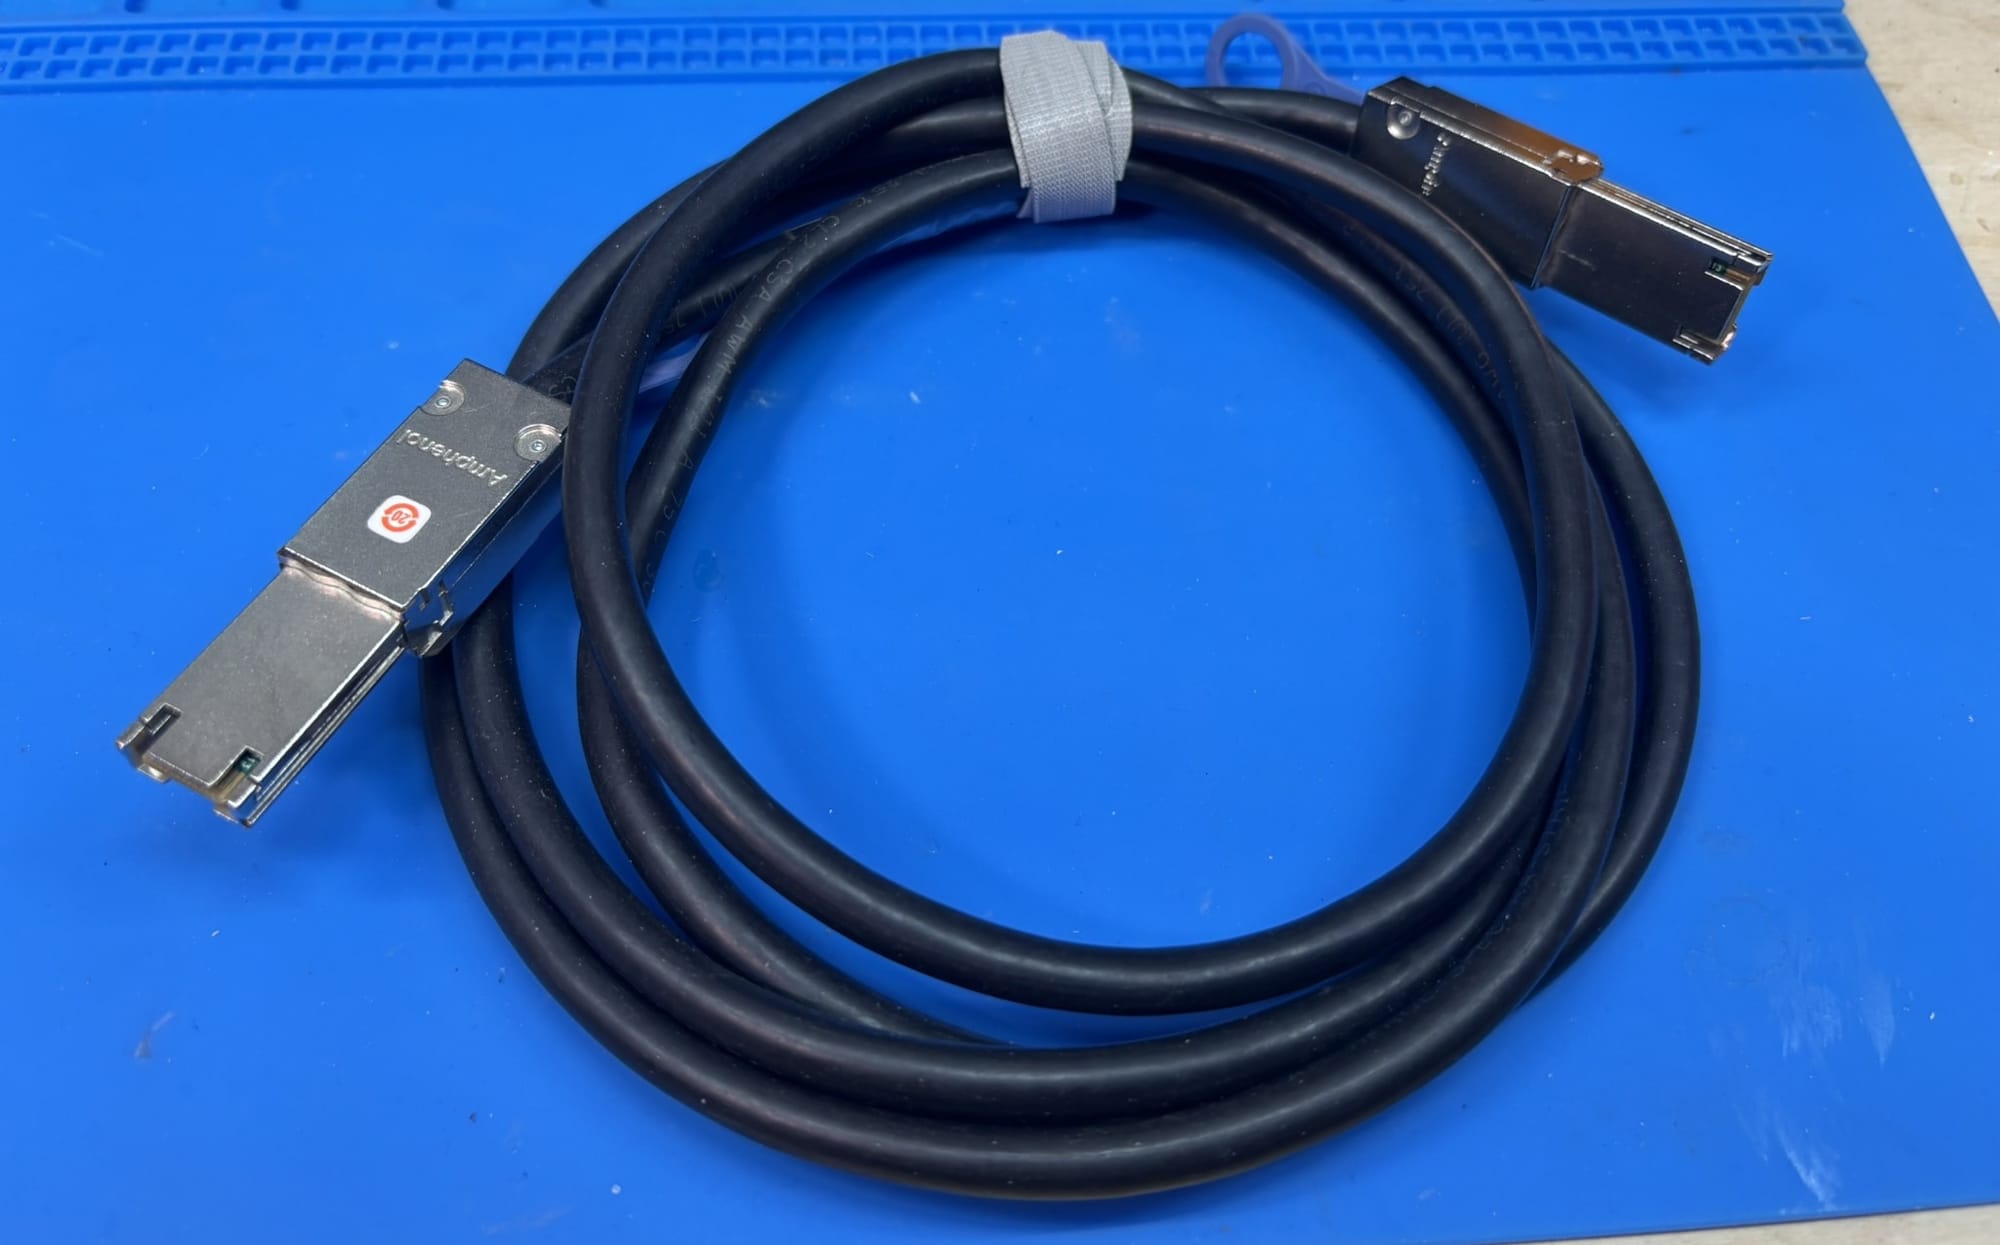
A disk shelf on its own is just an enclosure full of drives. To make it useful, it needs to be connected back to the main server using the SAS (Serial Attached SCSI) protocol. The most straightforward way to do this is with a host bus adapter (HBA) that provides external SAS ports. These cards are widely available on the used market, often pulled from enterprise servers, and give a homelab the ability to link additional storage outside the chassis.
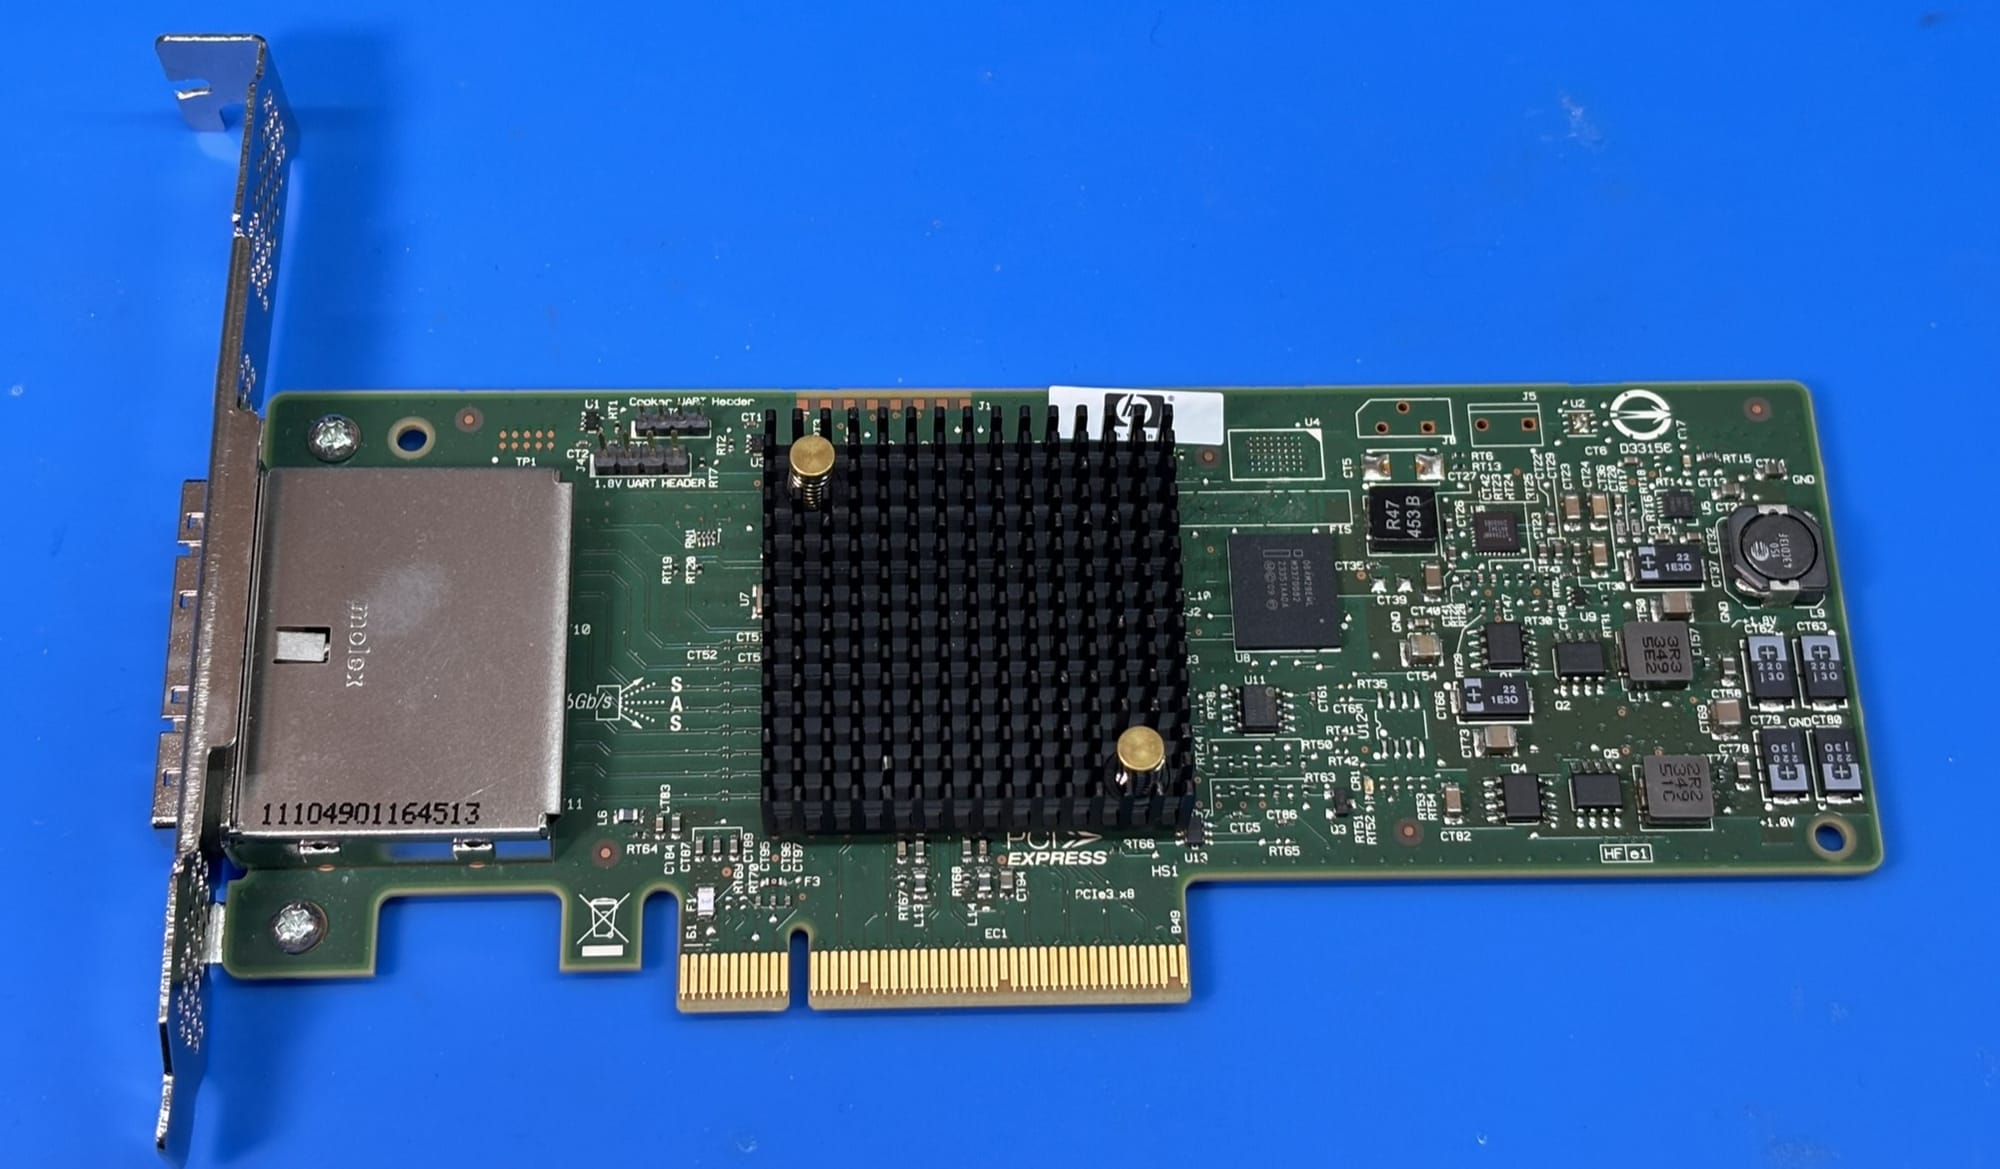
The connection itself is made with SAS cables, which are designed to carry multiple drive signals through a single connector. Each cable supports up to four drives, so a typical eight-drive shelf will require two cables. On the server side, the cables plug into the external SAS card, while on the disk shelf side they connect either to breakout cables or an internal adapter that routes them to the individual drives.
This design keeps the server and the storage shelf separate but tightly integrated. From the operating system’s perspective, the drives in the disk shelf appear just like locally attached disks. The advantage is that the server can continue to handle all management and file system duties, while the shelf simply provides additional bays and power to keep the drives running.
Expanding Beyond Eight Drives
For most DIY shelves, eight drives is the natural stopping point. Each SAS cable supports four drives, and running two cables keeps the design simple and manageable. However, builders who want to go further will eventually need a SAS expander, a device that allows many more drives to connect through the same HBA.
The challenge is that most SAS expanders are designed to be installed in a server chassis, drawing their power directly from a PCIe slot. In a standalone disk shelf without a motherboard, this creates a problem. One solution is to install the expander into an old, unused motherboard and power it as though it were part of a second system. This adds bulk, but it keeps the expander happy and gives the shelf a sort of “offline management platform” to host it.
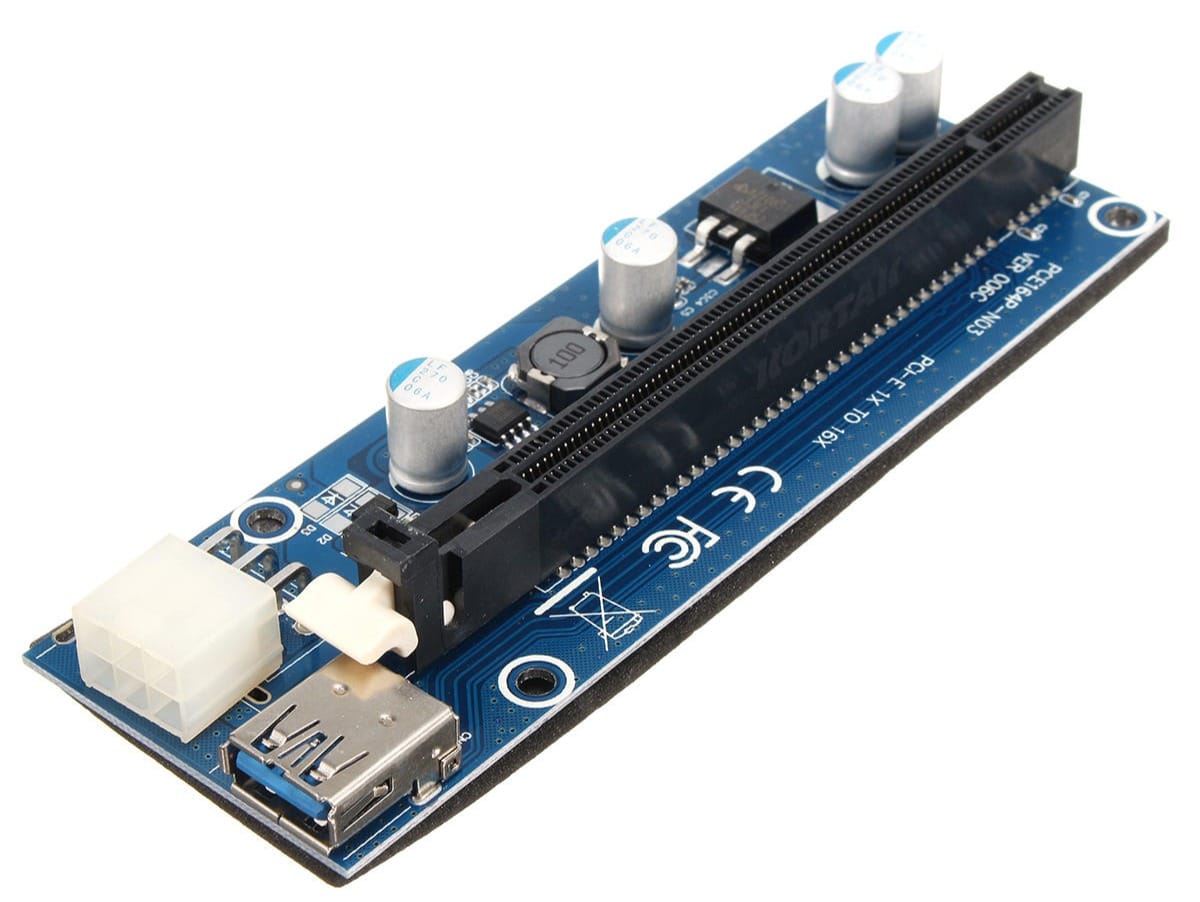
A more compact alternative is to use a PCIe power adapter, often sold to cryptocurrency miners for running multiple GPUs. These adapters provide the 12V and 3.3V rails that a SAS expander needs, without requiring a full system board. It is a cleaner approach, but it adds another layer of wiring, complexity and risk to the build.
In the end, pushing past eight drives is entirely possible, but it comes with trade-offs in power delivery, cabling, and maintenance. For many homelab enthusiasts, the simplicity of a single or dual-cable design makes it the better long-term choice unless massive storage capacity is an absolute requirement.
Reflecting on the Titanus Disk Shelf
The Titanus project showed that the strongest reason to build a disk shelf yourself is noise control. Commercial shelves like the NetApp DS4243 or Dell MD1200 are widely available, but their datacenter fans make them unsuitable for a quiet homelab. A DIY build avoids that compromise, delivering the same storage expansion in a package designed for a home environment.
For most homelab enthusiasts, eight drives is the natural limit. It aligns with SAS cable capacity, keeps power delivery straightforward, and avoids the complexity of adding a SAS expander. Expanding further is possible, but rarely makes sense outside of specialized projects.
Community plays a big role in these efforts. The r/Homelab subreddit and ServeTheHome forums are filled with builders who share their designs, solutions, and lessons learned. For anyone considering their first shelf, these spaces are invaluable resources that can shorten the learning curve and inspire creative approaches.
In the end, the Titanus Disk Shelf proved that quiet, reliable storage expansion can be achieved without datacenter compromises, and that DIY remains one of the most rewarding paths in the homelab space.