CrunchLabs Domino Robot: Build, Line-Follow, and Tumble

Lining up dominoes is one of those timeless childhood activities: equal parts patience, precision, and anticipation. The fun comes when the first piece falls, but anyone who has set up more than a handful knows how tedious and fragile the process can be. Mark Rober, no stranger to large-scale domino stunts on his YouTube channel, decided to take on this problem with a blend of robotics and playful engineering.
Enter the second CrunchLabs robot, part of the Hack Pack series. For more background on the Hack Pack and why these kits exist, see our first article on the IR Turret.
This article explores the journey of building the CrunchLabs Domino Robot. Driven by two DC motors through a dual H-bridge circuit, the robot follows a line of tape using paired infrared sensors mounted underneath. A single servo, connected to a scotch yoke mechanism, controls the gate that dispenses dominoes at steady intervals. Together, these systems introduce important concepts in motor control, pulse-width modulation, and line-following algorithms. Along the way, we will look at the components that make it work, the clever engineering decisions behind its design, and the learning opportunities this playful project provides.
Inside the Kit
At the core of the Domino Robot is a Nano-compatible microcontroller mounted on a custom breadboard. This board provides an accessible platform for wiring sensors, motors, and the servo, while also simplifying power management. A rechargeable battery pack supplies the system, keeping the build portable and untethered during operation.

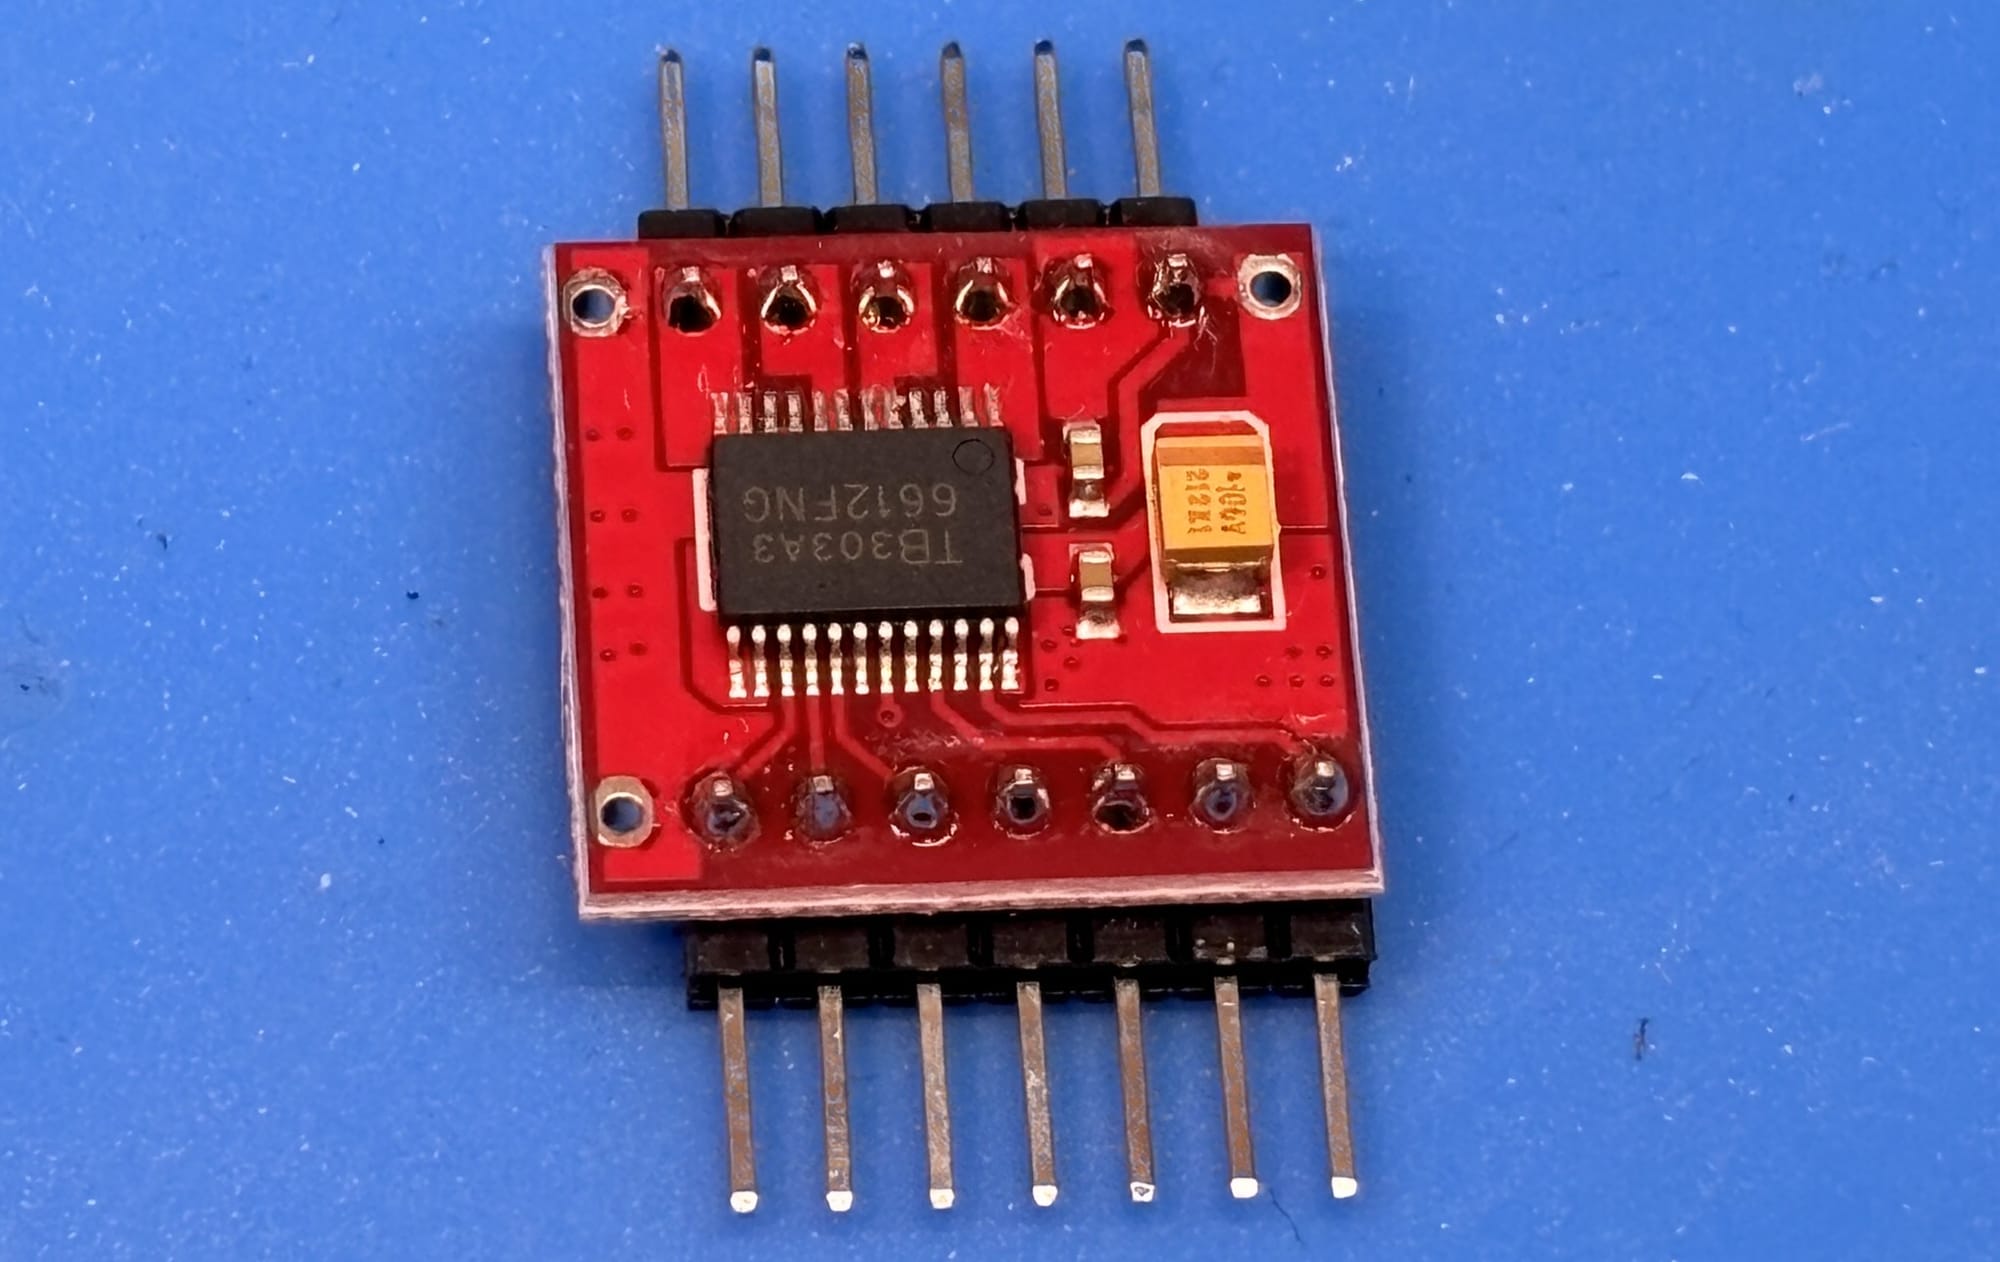
Movement is handled by two DC motors connected through a dual H-bridge. An H-bridge is a circuit made of four electronic switches, often MOSFETs, arranged in an “H” pattern. By toggling these switches in different combinations, the current running through a motor can be reversed, allowing it to spin in either direction. If the switches are turned on and off rapidly using pulse-width modulation (PWM), the motor’s speed can also be controlled. This is the same technique used in everything from computer fans to electric vehicles. In robotics, the H-bridge is a classic building block, appearing in countless kits and competitions where builders need to drive small motors reliably. In the Domino Robot, the integrated H-bridge removes the complexity of wiring the circuit from scratch, letting builders focus on how motor control shapes the robot’s behavior.
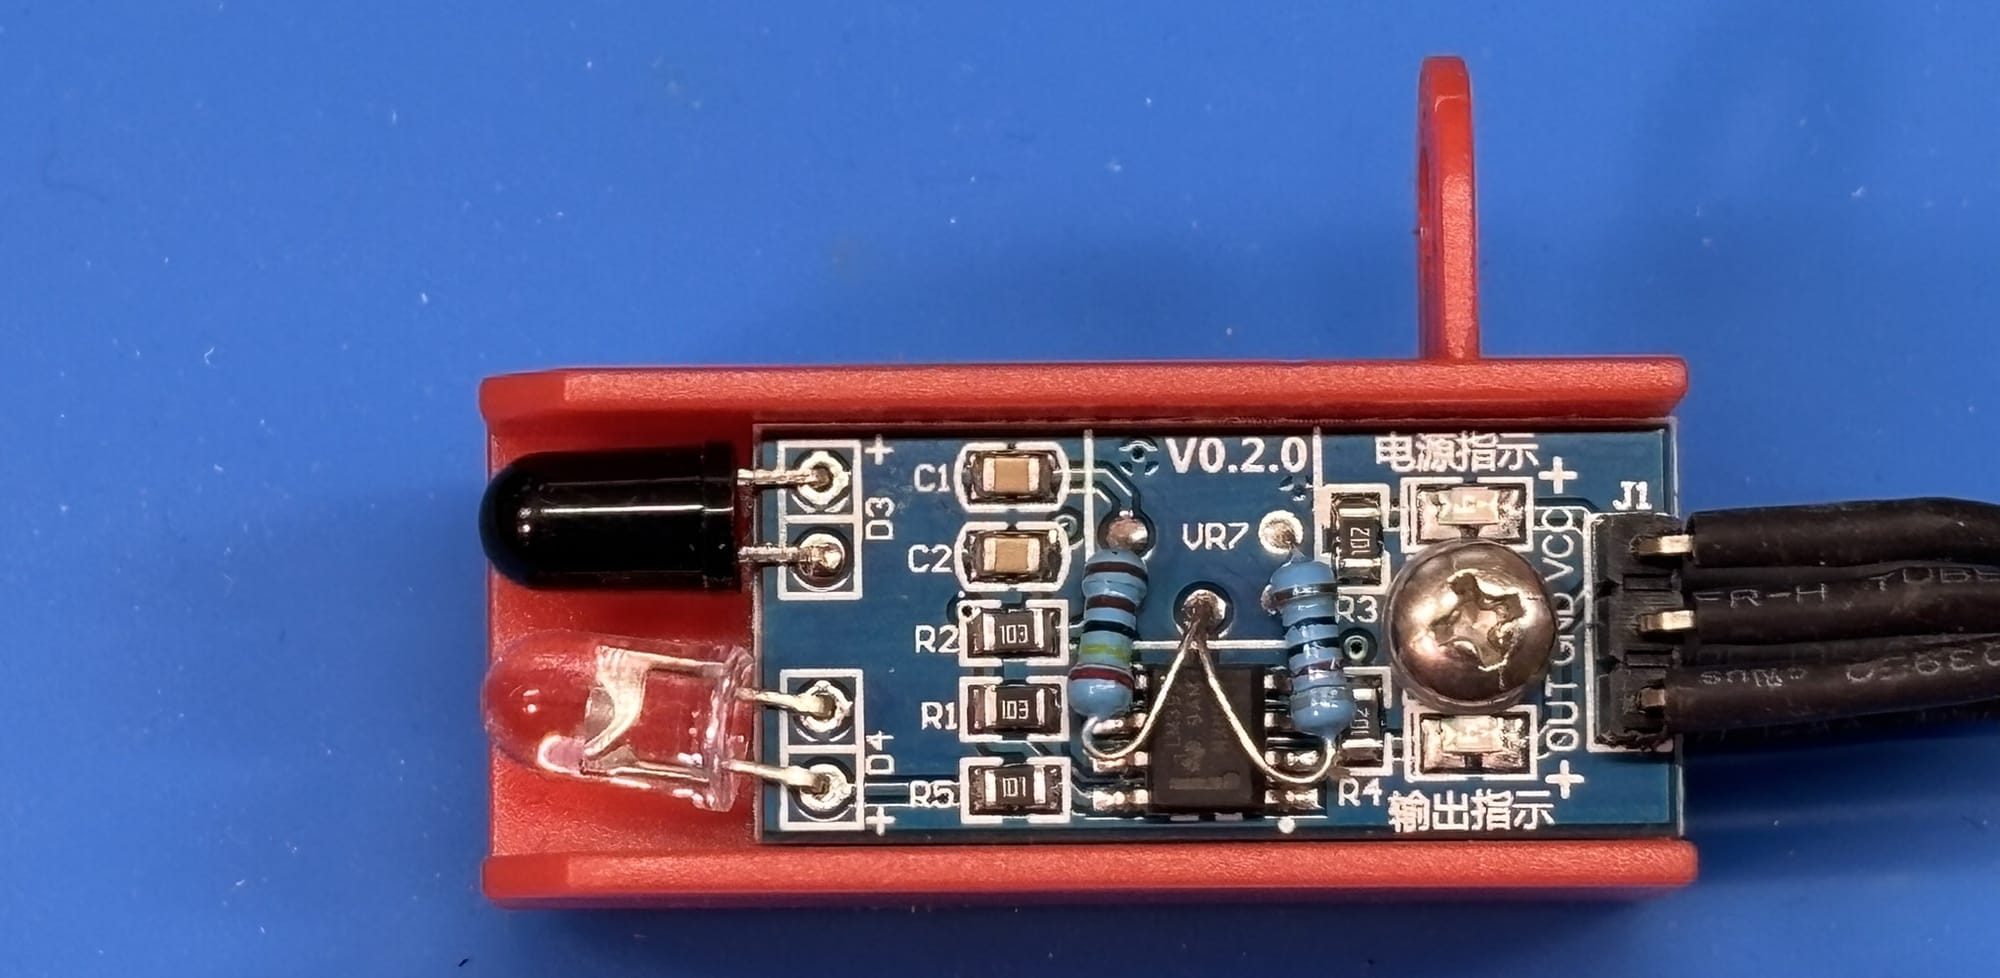
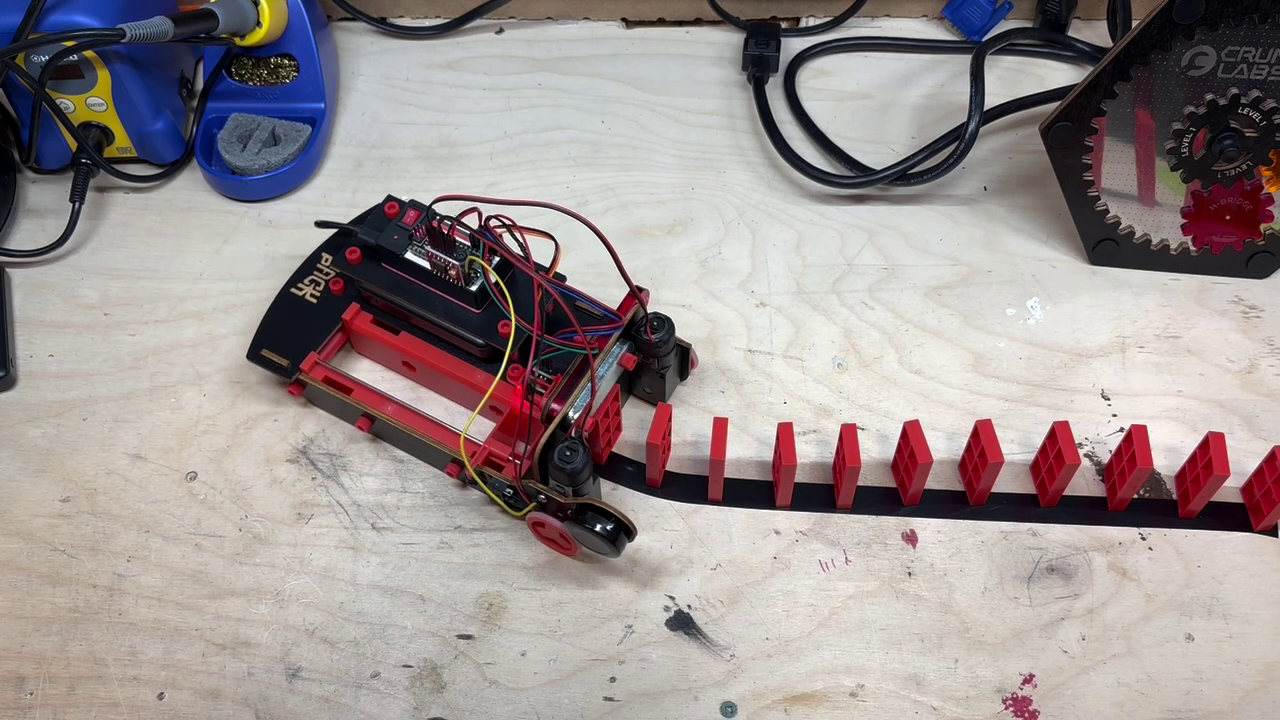
The robot relies on line sensors mounted along its centerline, pointing downward to the surface below. Each sensor uses infrared light to detect contrast between a strip of tape and the surrounding surface. Black tape reflects less light than a lighter background, so the sensors can determine whether the robot is directly over the line. By using two sensors side by side, the robot can tell when it begins to drift, as one sensor will lose sight of the tape before the other. The controller uses this feedback to adjust the motors and keep the robot following its path. Line sensors are a staple in educational robotics kits, from LEGO Mindstorms to Arduino-based projects, making them a familiar introduction to real-world automation.
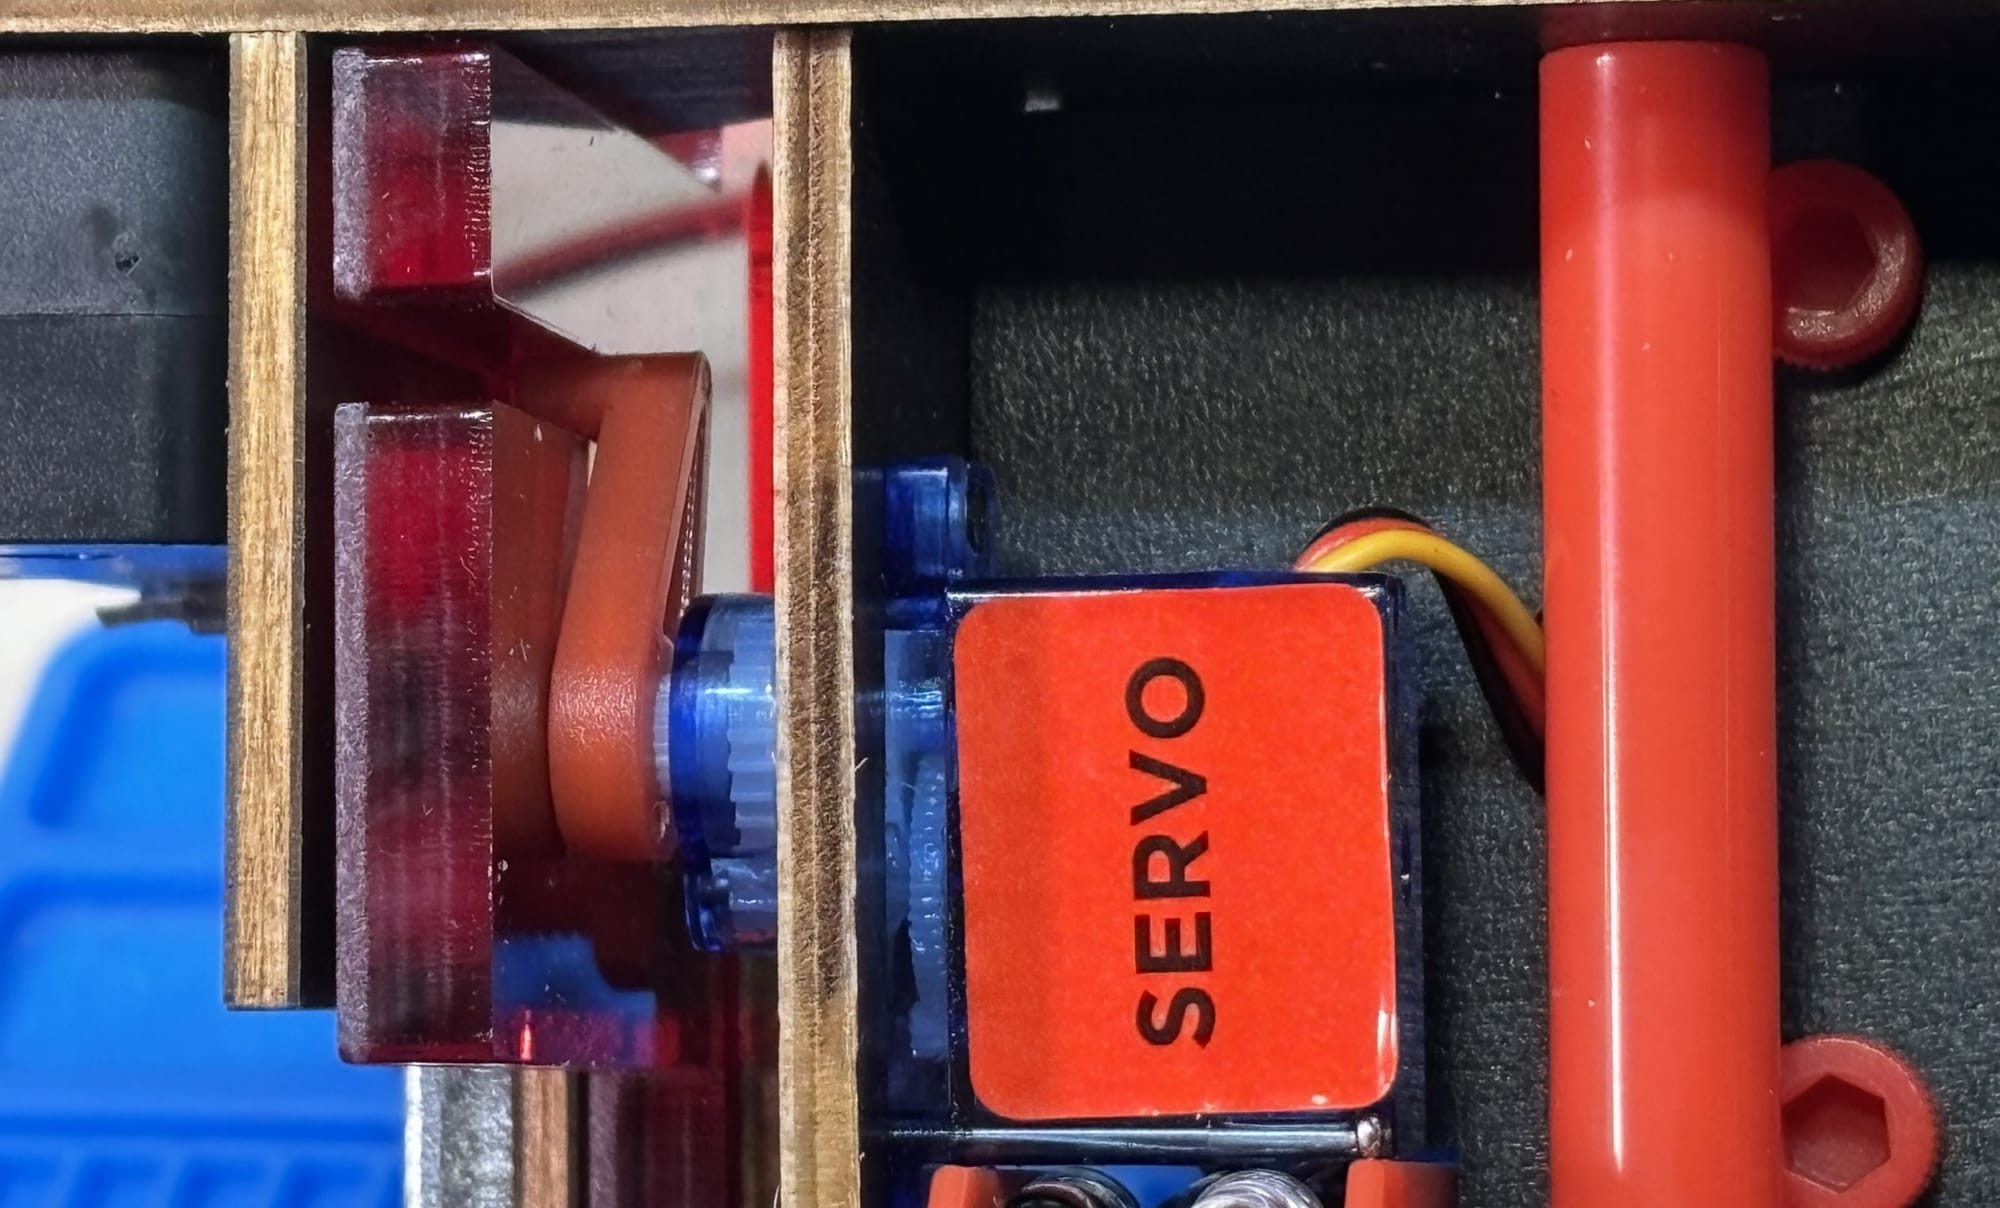
Domino dispensing is managed by a single servo motor connected to a scotch yoke mechanism. This linkage translates the servo’s rotation into a consistent back-and-forth sliding motion, opening and closing the gate that holds the dominoes in place. The design ensures that each cycle dispenses exactly one piece, keeping spacing regular even when the robot turns or changes speed.
The magazine itself uses a spring-loaded spool to press down on the stack of dominoes, keeping them aligned and feeding smoothly toward the dispensing gate. At the bottom of the stack, a small limit switch detects when the magazine is empty. When triggered, the switch signals the microcontroller to stop the motors, preventing the robot from running endlessly without dominoes. In practice, though, our switch rarely triggered, mostly because the pull force on the spool was too low to press the switch reliably.
Building the Robot
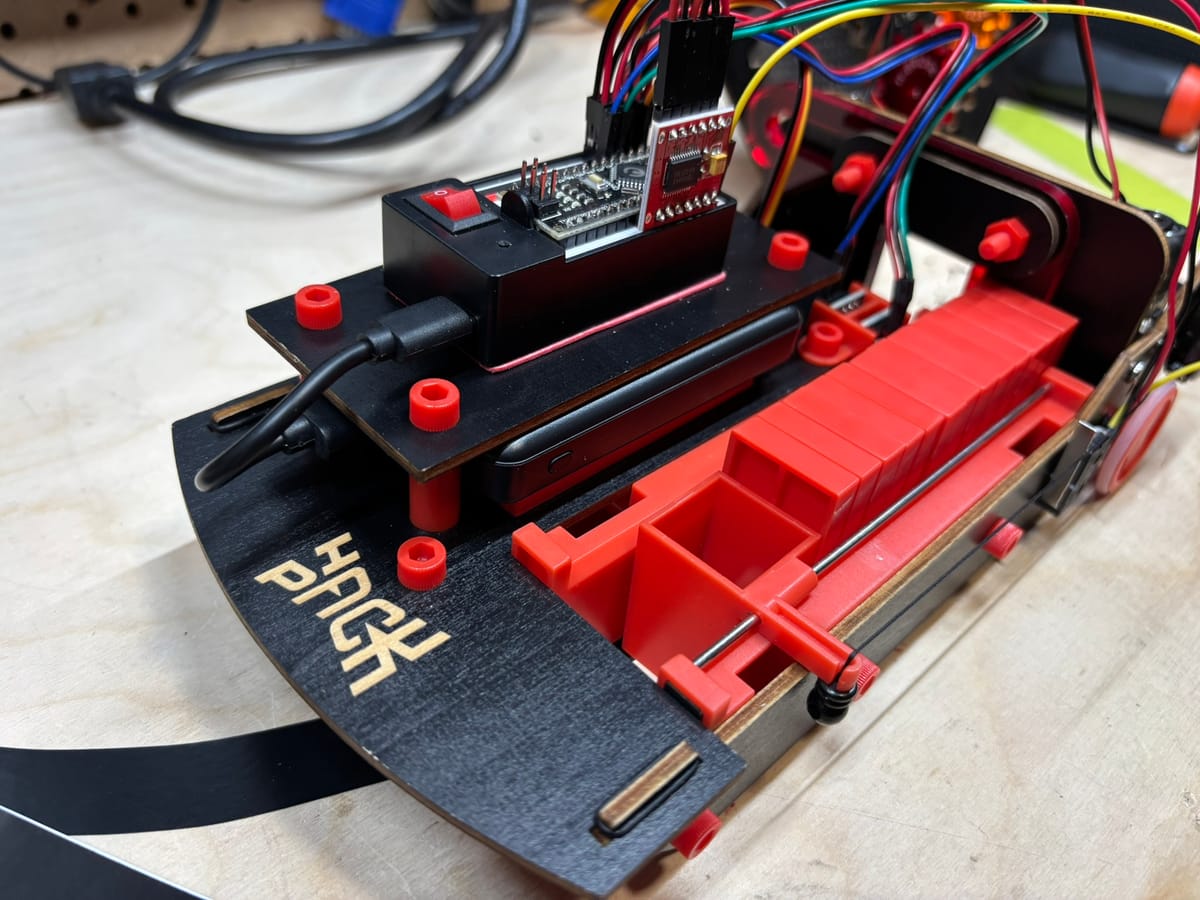
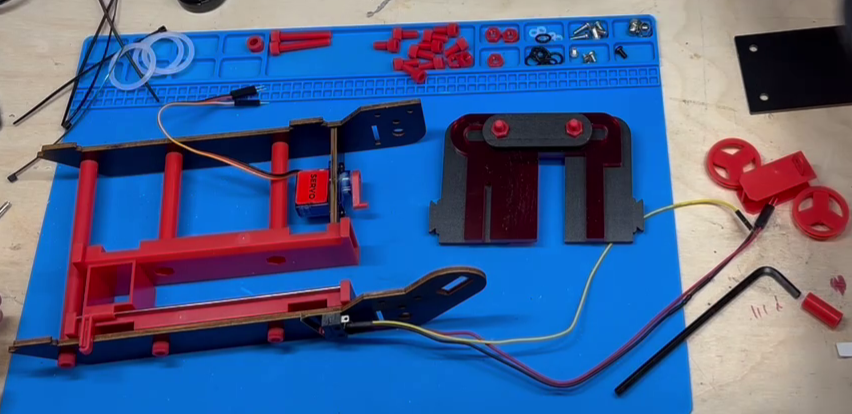
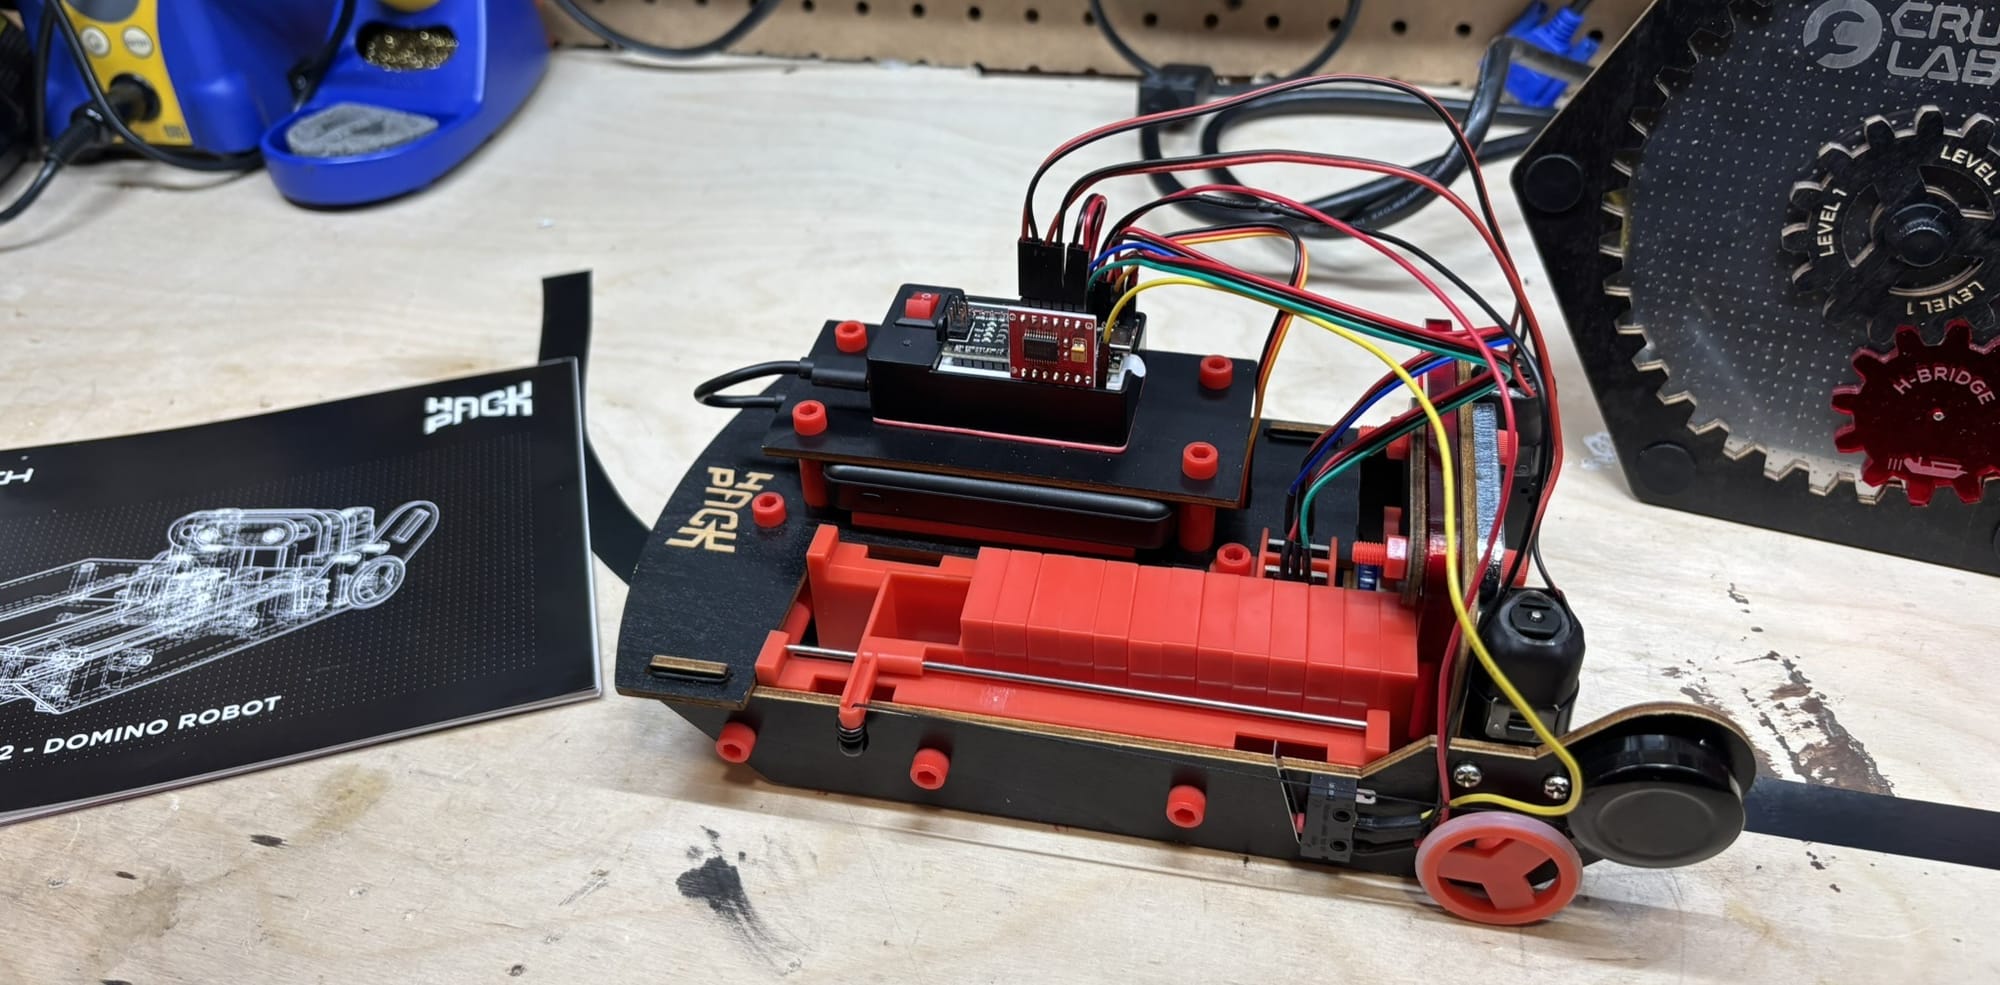
The build begins with the chassis, starting from the two side panels that form the frame. Into this base goes the domino magazine, designed to hold a vertical stack of tiles, along with the dispensing gate that controls their release. This stage also includes the installation of the first servo, which drives the scotch yoke mechanism, and the small limit switch that detects when the magazine is empty.
With the lower structure complete, attention shifts to the top of the robot. The dual line sensors are mounted along the centerline, facing downward to track the tape path. Housings are added for the battery pack and the Nano-compatible control board, both positioned for easy access once the robot is assembled. At this stage, the wiring begins, connecting the line sensors, servo, and limit switch to the controller.
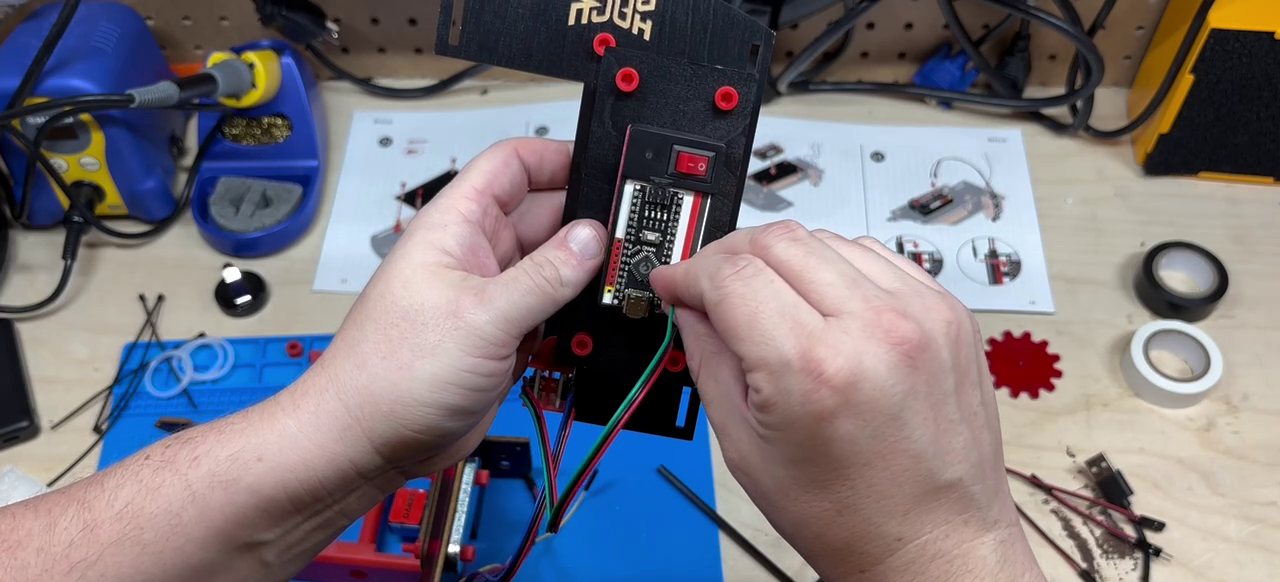
The final stage focuses on mobility. The dual H-bridge is inserted into the breadboard, followed by the installation of the two DC motors and wheels. Wiring for the drive system is completed here, bringing power and control together on the central circuit board. A spring-loaded spool is also added to the domino magazine, ensuring consistent pressure on the stack as pieces are dispensed.
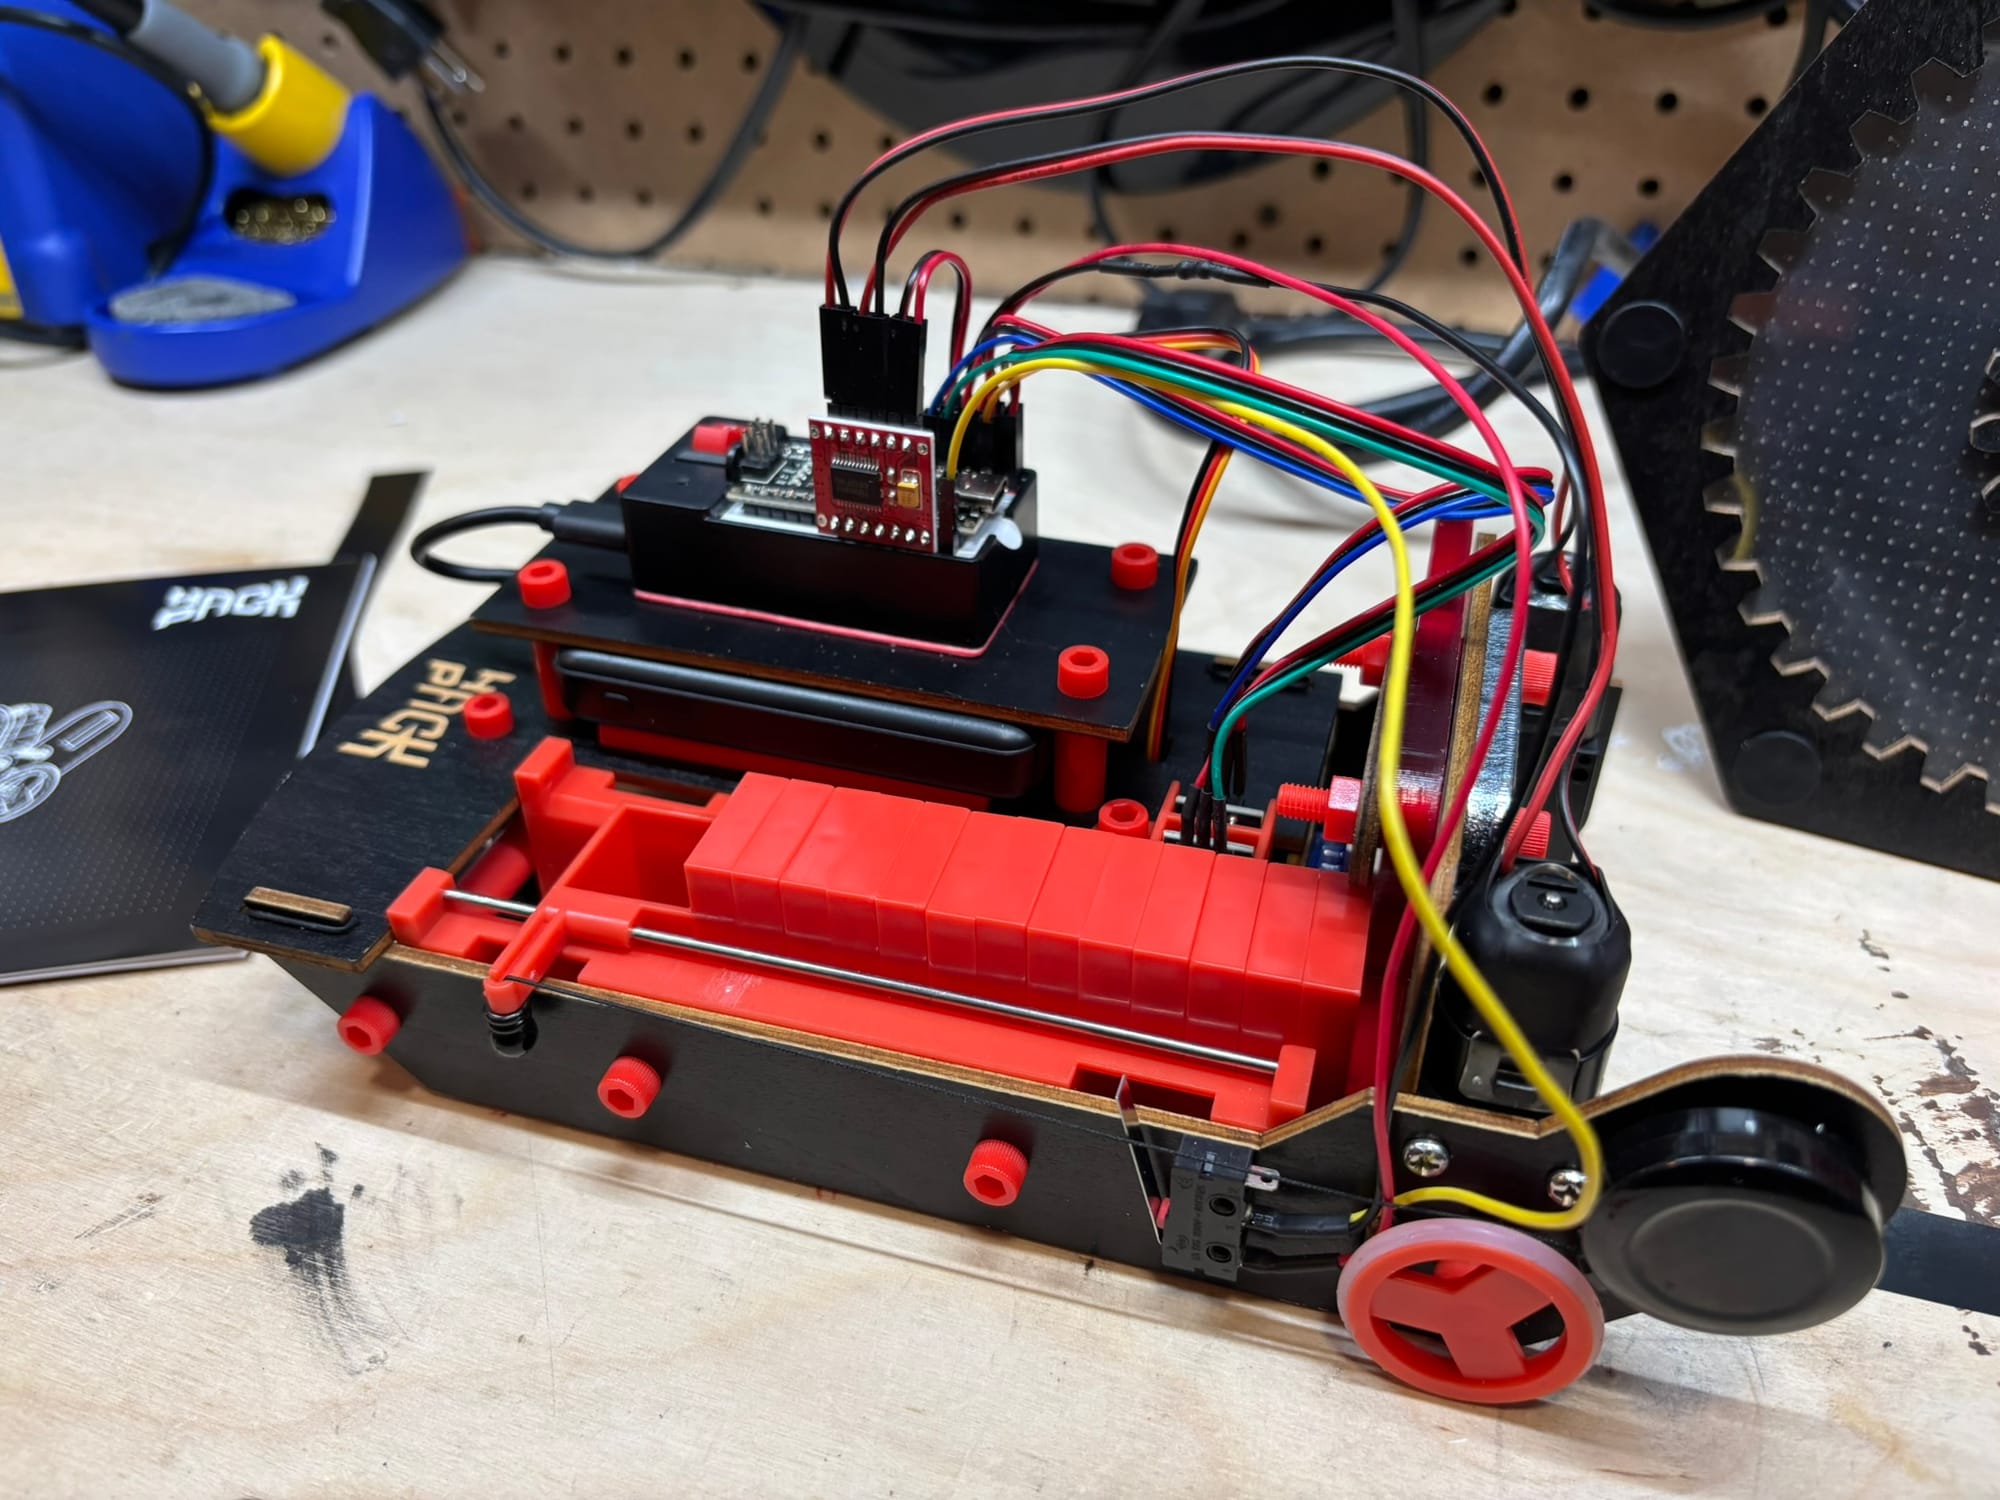
Structurally, the Domino Robot feels different from the earlier IR Turret project. While the turret relied heavily on wood for its frame, this build makes greater use of plastic components. Lightweight plastic panels form much of the chassis, and convenient plastic bolts hold the assembly together. The result is a sturdy, modular design that can be taken apart and reassembled without tools or glue.
One drawback of this design is the way dominoes are loaded. The magazine has no bottom to hold the stack in place, which means dominoes will fall out if the robot is lifted or tilted once filled. As a result, the robot must be loaded directly where it will operate, limiting flexibility during setup. It is understandable that the designers avoided a full base, which might increase costs and build complexity. However, a small lip along each side of the magazine could have solved the problem without affecting the mechanism.
Understanding the Code
The Domino Robot is the first Hack Pack project where the code feels like the real “brains” of the machine. In the IR Turret, the board simply reacted to button presses on a remote: tilt up, turn left, fire. Each action was a direct response to a command. By contrast, the Domino Robot is autonomous. Once placed on the tape, it has to make decisions on its own by constantly checking its sensors and running math to figure out the next move.
This logic shows up in two key places: how the robot follows the tape, and how it knows when to drop a domino. Both require the code to take raw input, process it, and use the result to control motors and servos in real time.
Driving the Robot
The code that makes the Domino Robot steer is simple but clever. It only works if the robot starts on the tape, because otherwise the sensors cannot agree on what “centered” means. Once it begins on the line, it checks the sensors over and over again, many times per second.
- If both sensors read about the same value, the robot assumes it is centered and keeps both wheels spinning at the same speed.
- If one sensor sees something very different, the robot calculates an error number. That error tells it which way it is drifting and by how much.
- The robot also remembers the error from the previous step. If the difference is getting larger, it knows it is drifting faster and needs to turn harder.
The amount of turning is called the control signal. It is made of two parts: the error itself (P, proportional) and how the error has changed since last time (D, derivative). Two “K” factors in the code let builders adjust how sensitive each part should be.
leftSensorValue = analogRead(LEFT_SENSOR_PIN);
rightSensorValue = analogRead(RIGHT_SENSOR_PIN);

error = leftSensorValue - rightSensorValue;
derivative = error - lastError;

controlSignal = (KP * error) + (KD * derivative);
lastError = error;

leftMotorSpeed = TOP_SPEED - controlSignal;
rightMotorSpeed = TOP_SPEED + controlSignal;

leftMotorSpeed = constrain(leftMotorSpeed, 0, TOP_SPEED);
rightMotorSpeed = constrain(rightMotorSpeed, 0, TOP_SPEED);
The motor speed is determined by the line sensor. If both sensor pick up the same color, the robot goes top speed in a straight line.
If the robot misses the tape completely, the sensors both see the same background and the error goes to zero. At that point the robot just drives straight ahead until it happens to cross the tape again. To make this less likely, the code automatically slows the robot down when turning. This gives the sensors more time to detect the line and keeps the motion smooth instead of jerky.
Dropping Dominoes
The robot also needs to know when to drop a domino. The first idea might be to use a timer: drop one every few seconds. That seems logical, but it quickly causes problems. When the robot slows down in a turn, the dominoes end up far too close together. When it speeds up on a straight, they spread too far apart.
To fix this, the code measures distance instead of time. Every time the motors spin, the code adds their speeds together into a counter. The farther the robot drives, the bigger that number gets.
- When the counter passes a set target (called
DISPENSE_DISTANCE), the robot knows it has traveled far enough. - At that moment, the servo swings open and lets one domino fall. The counter resets back to zero.
- After the robot travels a little more—about 70% of the target—the servo swings back. This reloads the gate with the next domino, ready for the next drop.
This system naturally adjusts to the robot’s speed. On straights, the wheels spin faster, so the counter fills up quickly and dominoes land closer together. In turns, the robot slows down, so dominoes are spaced farther apart. The result is a chain that looks neat and even, regardless of how the robot moves.
motor1.drive(leftMotorSpeed);
motor2.drive(rightMotorSpeed);
combinedmotorspeed = leftMotorSpeed + rightMotorSpeed;
distanceSinceLastDrop += combinedmotorspeed;

...

if (!stopButtonPressed) {
  if ((distanceSinceLastDrop >= DISPENSE_DISTANCE)
      && !dominoDropped) {

    servoMotor.write(SERVO_RIGHT);
    distanceSinceLastDrop = 0;
    dominoDropped = true;

  } else if ((distanceSinceLastDrop >= 0.7 * DISPENSE_DISTANCE)
             && dominoDropped) {

    servoMotor.write(SERVO_LEFT);
    dominoDropped = false;
  }
}
Drop the domino if we reach a certain distance. Otherwise, wait until we complete 70% of the journey before reloading the next domino to drop.
Finally, a small limit switch at the bottom of the magazine tells the robot when it has run out of dominoes. If triggered, the robot still drops the last one, drives to the next drop point, and then stops both motors. It waits in place until someone presses the reset button to start again.
Beyond the Build
CrunchLabs encourages builders to think of the Domino Robot as a starting point rather than a finished product. The manual itself even suggests reusing the infrared receiver from the IR Turret and moving it onto the Domino Robot. With this small change, builders can take control of when the robot moves or drops dominoes, rather than leaving everything to its autonomous code. From there, the community has pushed further, experimenting with alternate IR codes, improved decoding libraries, and even setups where a single remote can switch between controlling the turret and the robot.
Another direction has been obstacle avoidance. By attaching small distance sensors, builders have taught the robot to pause or reroute when it encounters an object in its path. It’s a natural extension of the line-following system: the robot is already making constant decisions based on what its sensors see, so adding another type of sensor fits right in. This transforms the robot from a simple line-follower into something that can navigate a more dynamic environment.
CrunchLabs has also shared 3D-printable files for additional dominoes, making it easier to extend a run without buying extra kits. It’s a small but practical way to expand the build, and a clear invitation for the community to create and share their own printable upgrades. Many of these ideas are actively discussed and shared on the CrunchLabs Discord, which has become the main hub for expansion projects.
Final Thoughts
The Domino Robot may not feel as sturdy as the IR Turret, but it represents an important rite of passage in the Hack Pack lineup. This is the first project that moves from direct control into autonomous behavior, asking the builder to trust the robot to make decisions on its own. That shift is significant: it introduces the kind of math and logic that drive real robots, but in a way that remains approachable and manageable for beginners.
By combining sensors, motors, and code into a self-guided machine, the Domino Robot marks a stepping stone toward more advanced projects. It shows that robotics is not just about parts fitting together, but about systems that sense, decide, and act — and that is a valuable lesson for any builder ready to go beyond simple reaction-based machines.